What Diablo Immortals Latest Event Bring?
 The Winds of Fortune event and essential quality-of-life enhancements are introduced by the most recent content update. These circumstances provide particular chances that promote active engagement, so forming a basic foundation for retaining players. Looking at how these events are put together can help one see how gaming developers use reward systems to create a sense of urgency and community involvement while also balancing the game's economic advancement.
The Mechanics of Winds of Fortune
The Winds of Fortune event is meant to speed up character development by doubling the collection of vital resources. Players acquire the power to activate a twenty-four-hour buff that gives duplicate amounts of gold, experience, legendary goods, and normal gems during the event window, which runs from July 15 to July 22, 2026. This ephemeral spike in resource creation significantly alters the gameplay experience since players are encouraged to make the most of their time in Sanctuary to maximize these rewards before the buff runs out. During Winds of Fortune, the 4-player party Normal Gems bonus drop will be doubled and unaffected by the daily cap, and only the first twelve Common Gems of the day will be tradable. While Winds of Fortune is live, activate your 24-hour buff to receive this boost. Once activated, the buff duration is in real time and will end 24 hours after it’s been initiated. If you have not activated the buff within 24 hours of the event's end, it will be enabled automatically. Any rewards not claimed before the end of the event will be auto-claimed on the next login. This doubling influence applies to many types of activities, including dungeons, bounties, and exploration of secret lairs. This large inclusion guarantees that every kind of player may gain from the event, whether they like group play or solo grinding. The developers make a strong case for gamers to participate in multiplayer games by removing the regular gems from the daily limit and doubling their drop rate for groups. Since it reinforces the community fabric by means of shared goals and mutual advantages, this social component is vital for a massively multiplayer online game's survival.Strategic Resource Management
Although the event provides clear benefits, it is vital to acknowledge the restrictions included into the system to guarantee long-term game stability. The exclusion of Battle Pass prizes from the doubling effect and the presence of particular limits on duplicate item profits show a deliberate compromise between honouring the player and safeguarding the game's economy. These constraints keep a deflationary situation whereby players may bypass the intended path too rapidly from happening. The automatic activation system for the buff helps the game flow smoothly and improves the player experience. The system manages it if a player doesn't cause the effect, therefore lowering possible annoyance. It is a player friendly design approach is the auto claim mechanism for unused rewards. By lowering the friction connected with complicated event rules, these systems let consumers concentrate on the main goal of vanquishing demonic forces. These design decisions draw attention to the shift from basic incentives to complex systems requiring strategic player interaction. The primary purpose of the Winds of Fortune event is to give a complete boost to the accumulation of loot and progression metrics. Participants in the event get twice as much gold, experience, combat pass points, ordinary diamonds, and legendary things. This duplication impact affects a broad spectrum of events, including the completion of Horadric Bestiary entries, the exploration of challenge rifts, the execution of bounties, and the challenge of fishing. Moreover, the incentive covers more demanding activities including dungeon runs, completing purge the depths missions, defending accursed towers, and exploring hidden lairs. Regular farming in the wilderness and the completion of general codex activities activate these doubled drop rates, therefore rewarding all kinds of participation during the constrained event period.Technical Infrastructure and Maintenance
The implementation of these upgrades calls for thorough backend management. The planned maintenance intervals spanning several time zones mirror the logistical difficulty of running a worldwide server environment. It is vital to understand that the developers have installed certain limitations to keep the economy of the game from being shaken by these high drop rates. To begin, the rewards of the Battle Pass continue to be excluded from this doubling impact. This is a crucial design decision since it guarantees that the season's core progression path stays dependable and constant. Unaffected are the weekly limits on regular jewels and Battle Pass points. This implies that although players acquire these caps quicker, they are unable to continuously farm these things above the intended weekly limits. By limiting these levels, the game stops high-level players from building an unbridgeable difference against more recreational players. Moreover, experience benefits are still dependent on the current multipliers connected with player level in relation to server paragon level. This guarantees that the occasion offers a boost without upsetting the progression curve that maintains the integrity of the competitive environment. The developers guarantee that the change to the new event state is as steady as feasible by staggering the downtime from July 14 for Oceania, Europe, and Asia to July 15 for the Americas. Casual users often disregard this technical accuracy, yet it is necessary for the flawless operation of competitive modes such as the Cross Region Bout of Realms. These maintenance windows represent a proactive strategy to handle player comments and raise the general functional integrity of the platform, especially in light of the recent changes to the Warlock class and the new PvP incentive collection systems.Technical Refinement of Class Mechanics
 For gamers who enjoy aggressive, melee-focused gameplay, the Barbarian class has long been a favourite. Using movement speed to engage or flee adversaries successfully is an essential feature of this archetype. Developers tackled a particular problem concerning the Legendary Essence called Steel Omen in a recent patch. This essence previously resulted in Whirlwind's ability delivering much higher movement speed perks than meant. The developers made sure Barbarian mobility stayed inside the set norms for the class by fixing this interaction. This kind of intervention is vital since permitting unplanned speed surges could result in an unfair edge in player versus player combat and speed farming situations.
The Necromancer class underwent technical adjustments aimed at increasing summon consistency as well. The Cryptreaper essence, which alters the Command Golem, was found to be the cause of the golem appearing outside the playable map limits in several areas. Such flaws can be bad since they successfully eliminate a main source of damage from the battleground and leave the player exposed. Moreover, the Gravemaster essence for Command Skeletons drew notice when rumors indicated the charge ability was being stopped too soon. Developers have guaranteed that Necromancers may count on their undead soldiers to act as predicted throughout fierce fights by stabilizing these connections. Furthermore, the refinement of the Dead Druthers essence definition shows a dedication to openness that would enable players to make educated judgments regarding their equipment loadouts free from equivocation.
For gamers who enjoy aggressive, melee-focused gameplay, the Barbarian class has long been a favourite. Using movement speed to engage or flee adversaries successfully is an essential feature of this archetype. Developers tackled a particular problem concerning the Legendary Essence called Steel Omen in a recent patch. This essence previously resulted in Whirlwind's ability delivering much higher movement speed perks than meant. The developers made sure Barbarian mobility stayed inside the set norms for the class by fixing this interaction. This kind of intervention is vital since permitting unplanned speed surges could result in an unfair edge in player versus player combat and speed farming situations.
The Necromancer class underwent technical adjustments aimed at increasing summon consistency as well. The Cryptreaper essence, which alters the Command Golem, was found to be the cause of the golem appearing outside the playable map limits in several areas. Such flaws can be bad since they successfully eliminate a main source of damage from the battleground and leave the player exposed. Moreover, the Gravemaster essence for Command Skeletons drew notice when rumors indicated the charge ability was being stopped too soon. Developers have guaranteed that Necromancers may count on their undead soldiers to act as predicted throughout fierce fights by stabilizing these connections. Furthermore, the refinement of the Dead Druthers essence definition shows a dedication to openness that would enable players to make educated judgments regarding their equipment loadouts free from equivocation.
Quality of Life Improvements
The game has also concentrated on user interface and experience enhancements outside of straight class changes. The latest modifications to the Warlock Devour UI mirror a more general design approach stressing accessibility and efficiency. Developers that spend time improving the interface lower the cognitive burden on the user, therefore letting them concentrate more on strategy than on fighting awkward menus or ambiguous instructions. Although they are the foundation of a great gaming experience, these changes are usually missed by the average player base. They guarantee that complicated systems, such as controlling resource use or ability triggers, continue to be straightforward even under the strain of intense battle. Technical changes like these are thematically covered by the Winds of Fortune event. Diablo Immortal events are meant to keep the gameplay loop interesting by offering fleeting difficulties and prizes. But how well these events turn out depends mostly on the stability of the character classes underneath. Naturally, players will lean toward the most effective ways to clear content if an event provides greater rewards. The integrity of the competition is compromised if some courses have flaws that provide unmerited benefits. Therefore, resolving class problems along with event upgrades is a deliberate action to maintain the spirit of fair competition.Warlock UI Improvements and Skill Functionality
The Warlock class got a lot of attention for its user interface and how its skills interacted with each other. The Warlock gameplay loop relies on managing the Soulgorger, and adding a specific nameplate to monitor its health, cooldown, and active effects greatly reduces the player's cognitive burden. By keeping vital information easily available, this UI improvement enables gamers to make wiser tactical choices during fierce battles. Moreover, elucidating the text about the stacking limits of Devour effects clears up possible uncertainty for players wanting to improve their loadouts. Further adjustments to abilities like Brimstone Gateway and Warp Strike point to a concentration on PC accessibility. The developers have solved long-standing problems that hampered fluid movement and battle effectiveness by clearing travel destinations upon portal use and repairing problems when entrance rifts neglected to manifest. These improvements stress the need of straightforward design in complicated class structures.
Enhancing Soulgorger Management
The management of the Soulgorger is among the most important changes included in the most recent update. A Warlock player needs to keep an eye on their pet or summon for both attacking power and defensive posture. The addition of a separate nameplate just for the Soulgorger, located close to the player's health bar, signifies a conscious move to offer more straightforward information during intense fights. The game lessens the user's cognitive load by letting players monitor the creature's health, respawn cooldowns, and active Devour effects in real time. Players can now rely on a dedicated user interface component instead of always searching the turmoil of the battlefield to find their summons. The adoption of screen edge tracking for the Soulgorger solves a frequent annoyance in top-down action games. Players often lose track of their primary source of support when a summon moves off the visible portion of the screen. The new tracking tool guarantees that the player stays aware of the Soulgorger's location even when it moves outside the field of vision. This modification enhances strategic mobility rather than simply serving as a visual aid, since the player may now dependably kite foes or position themselves to maintain the Soulgorger within an ideal range to maximize its utility.Mechanical Clarity and Ability Balancing
Visual feedback is equally important as technical clarity. The patch adds explanatory language to make the duration of Devour buffs clearer, as they formerly lacked transparency. Knowing precisely how long a buff last helps a player to improve their attacking patterns in a game controlled by exact damage windows and skill rotations. Equally vital is the explanation of how Devour effects interact with Primary Attacks. The developers have matched the Warlock with the established rules for other character classes by specifically noting that changing the Soulgorger's attack type does not cause these effects to stack. This provides a more consistent mechanical basis, hence averting misunderstanding for players who could anticipate eccentric interactions. Beyond the Soulgorger, the improvements to other Warlock specific tools show a will to rectify unexpected interactions on the PC platform. The Brimstone Gateway update, which forces a clear of the destination when using the portal, solves the issue of characters inadvertently walking in the wrong direction. The changes to Pit Burnt Paulds and Warp Strike likewise fix navigation and visual mistakes that formerly slowed down fighting. Although these technical tweaks seem small individually, together they greatly raise the reliability of the Warlock's gear. The game seems more responsive and rewarding when a talent operates precisely as the player means.Expanding the Scope of War Games
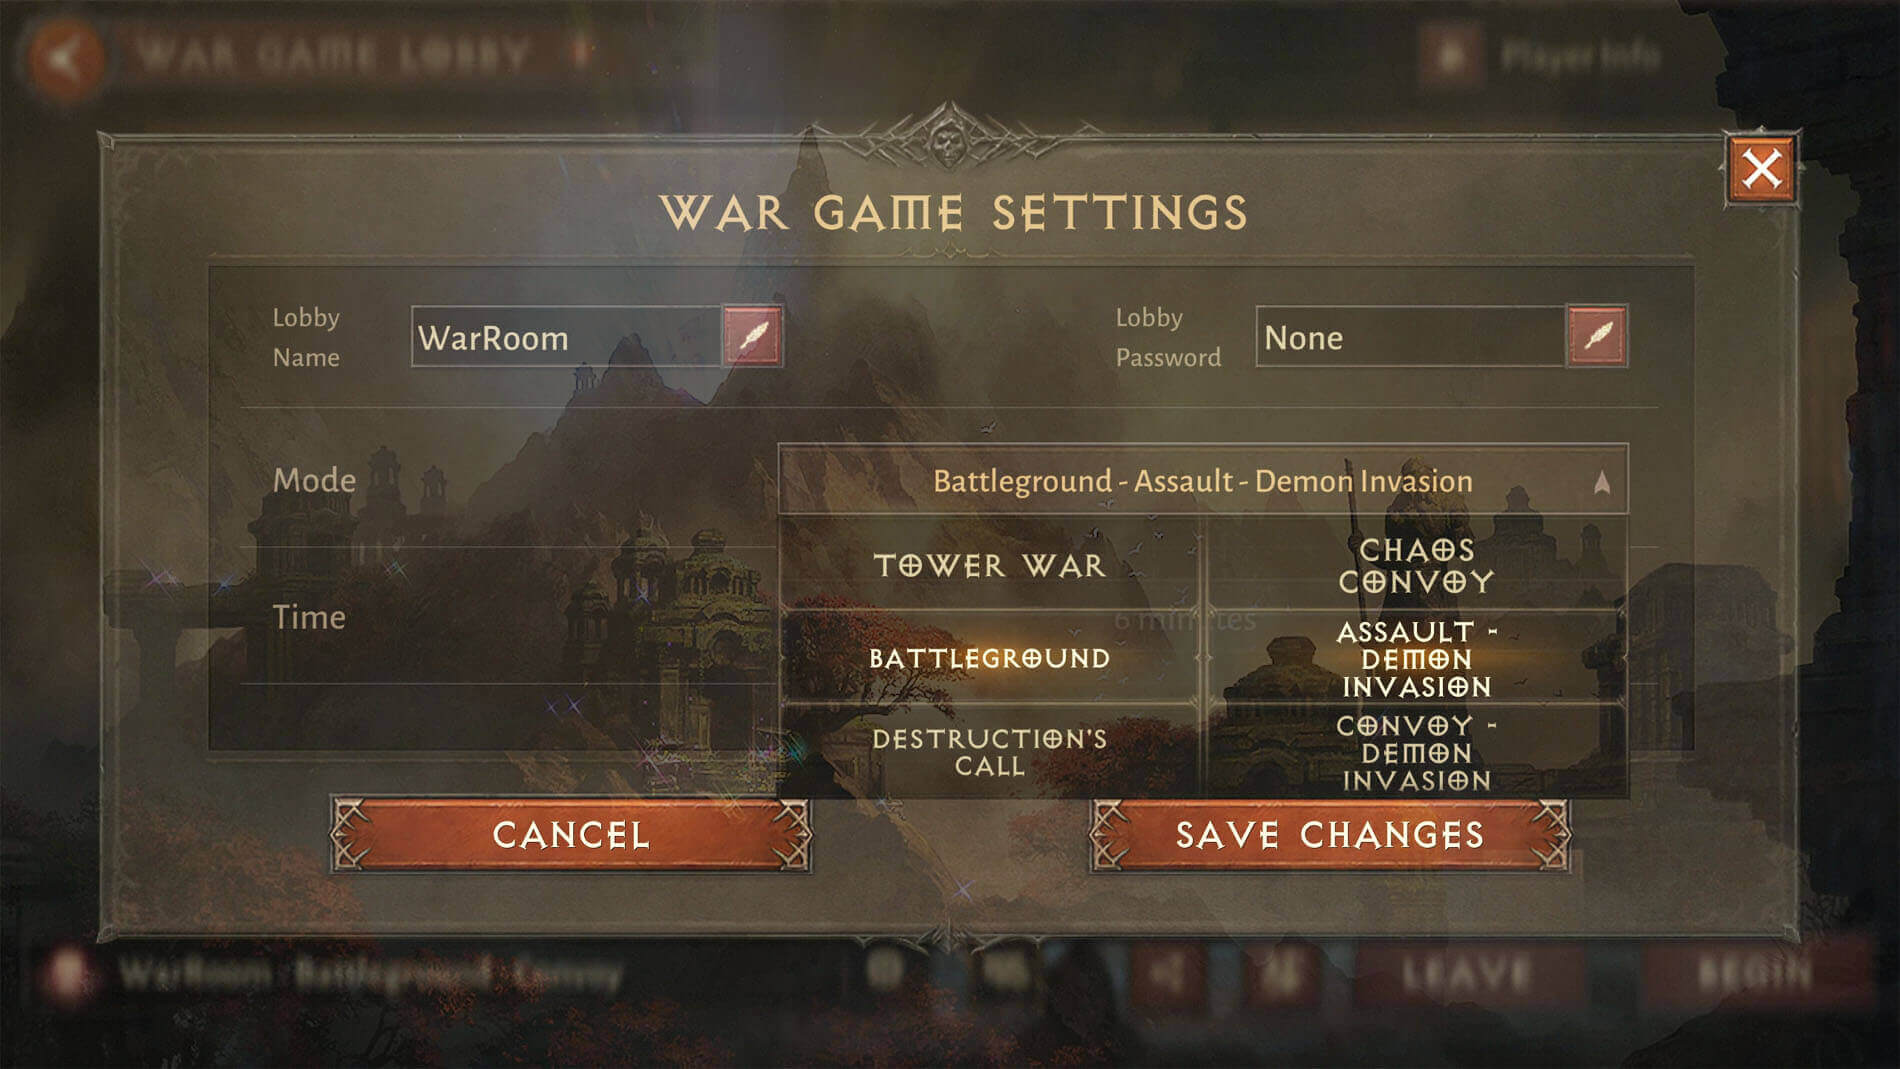 The increase in War Game modes is among the most obvious features of the recent upgrade. A key feature of the competitive scene in Diablo Immortal, War Games let players hone strategy and evaluate character builds in a regulated setting. The developers have given gamers a greater variety of situations to learn by including fresh choices like Chaos Convoy, Assault Demon Invasion, and Convoy Demon Invasion. These modes are not only aesthetic additions; they demand several strategic approaches and team lineups that compel players to change their playstyles.
When competitive choices are constrained, gamers frequently get stuck in endless loops that might result in weariness. The game maintains the tactical experience varied by adding variety via these particular Battleground modes. This variation guarantees that the game feels fulfilling and psychologically engaging instead of repetitive, therefore making it vital for high school students or any casual player who strikes a balance between gaming and academic or extracurricular obligations. Including these modes shows a will to maintain a lively competitive environment, guarantee that experienced players still discover difficulties, and allow new players to investigate many aspects of the game.
The increase in War Game modes is among the most obvious features of the recent upgrade. A key feature of the competitive scene in Diablo Immortal, War Games let players hone strategy and evaluate character builds in a regulated setting. The developers have given gamers a greater variety of situations to learn by including fresh choices like Chaos Convoy, Assault Demon Invasion, and Convoy Demon Invasion. These modes are not only aesthetic additions; they demand several strategic approaches and team lineups that compel players to change their playstyles.
When competitive choices are constrained, gamers frequently get stuck in endless loops that might result in weariness. The game maintains the tactical experience varied by adding variety via these particular Battleground modes. This variation guarantees that the game feels fulfilling and psychologically engaging instead of repetitive, therefore making it vital for high school students or any casual player who strikes a balance between gaming and academic or extracurricular obligations. Including these modes shows a will to maintain a lively competitive environment, guarantee that experienced players still discover difficulties, and allow new players to investigate many aspects of the game.
Streamlining Reward Systems for Efficiency
In addition to introducing fresh modes, the update tackles a significant quality-of-life problem concerning reward collection. Many sophisticated multiplayer games leave players feeling overwhelmed by the sheer volume of clicks needed to move across menus. Diablo Immortal previously forced players to go back to the matchmaking screen to physically collect their rewards following every player versus player fight. This method was not only difficult but also error-prone because players often forgot to pick up their rewards or simply decided to disregard the additional steps because they were tired. The change to Automatic PvP Reward Collection greatly improves convenience. The developers have eliminated the friction that formerly existed in the user path by offering incentives right away at the end of a match and adding a backup system whereby objects are delivered through in-game mail should inventory space be limited. This shift represents a wider trend in game creation whereby designers give gameplay flow top priority over superfluous administrative chores. The whole experience grows more natural when the interface is made to assist the player instead of requiring additional work. This change not only stops the unintentional loss of valuable things but also lets players leap back into the game or handle their real-world responsibilities without feeling caught in a cycle of menu management.TExplore Lut Gholein, Master the Warlock
 Reflecting the gloomy and always shifting character of the Diablo world, the scene of Sanctuary keeps changing. Blizzard has unveiled a game-changing update with the release of Patch 5. 0, known as The Bloodied Jewel, which honours three decades of the franchise while stretching the limits of mobile action role-playing games. This update is a daring step ahead in gameplay systems and character growth as well as a nostalgic homecoming to famous locations. The developers have effectively revived the experience for both seasoned slayers and returning warfront warriors by combining a new class, increasing the game's geographical scope, and refining key advancement mechanisms.
The Rise of the Warlock
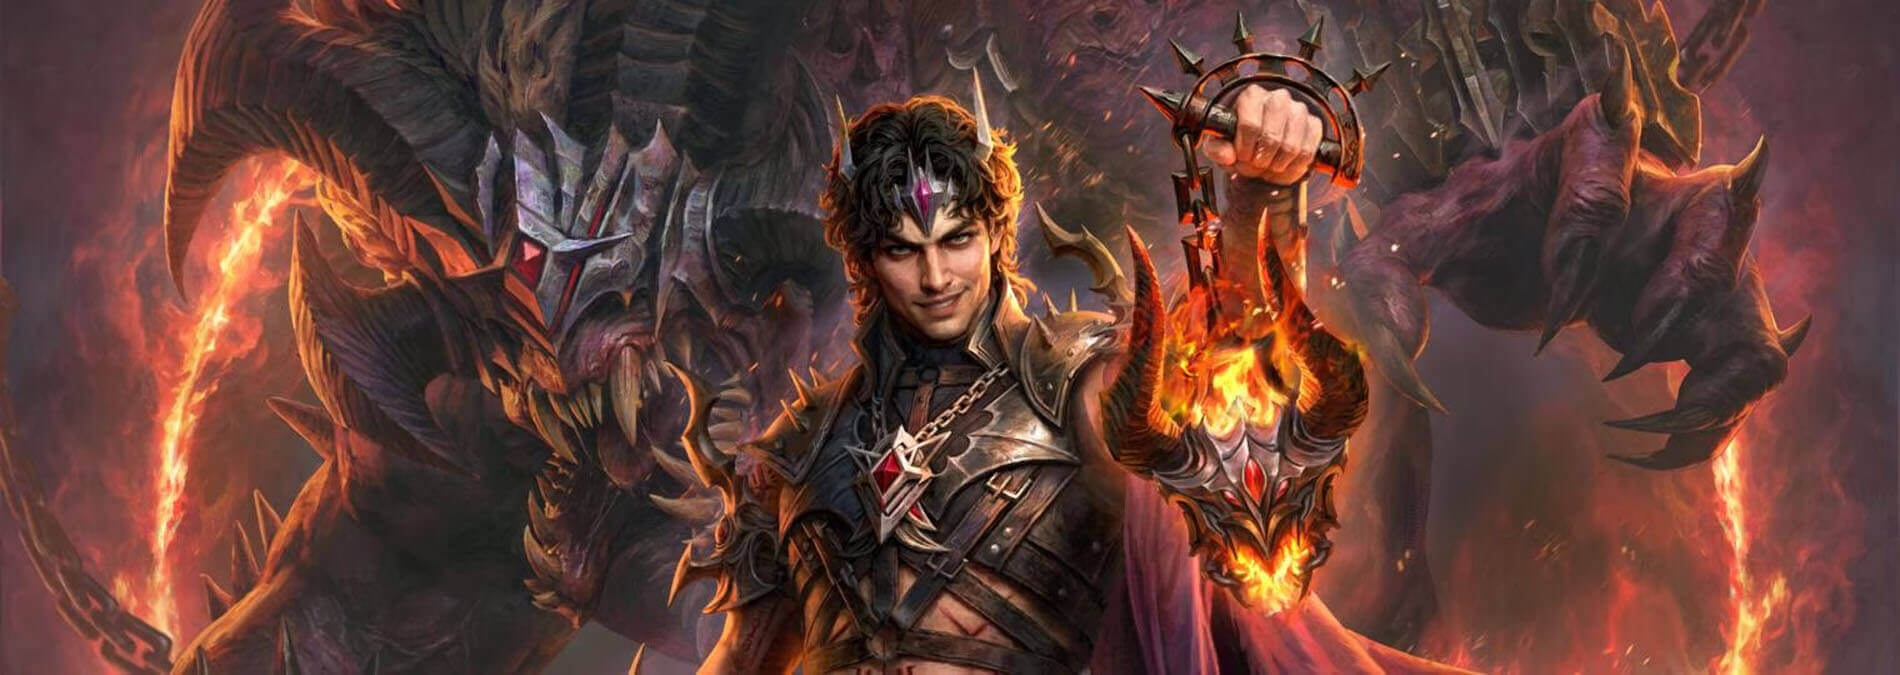
The arrival of the Warlock, the tenth playable class to join the battle, is the most important addition to Diablo Immortal in this release. Although the game has traditionally included spellcasters who draw on the elements or arcane powers, the Warlock is in a far darker realm. Rooted in the forbidden traditions of the ancient Vizjerei mage clan, these practitioners engage in demonology that was once outlawed following the devastating Mage Clan Wars. The class gains a layer of depth from this historical background as players take on the character of an outcast who has recovered hazardous, secret information to fight the growing tide of evil.
The Warlock's gameplay features set it apart from all other currently offered classes. The Warlock uses a risk-and-reward system that calls for exact health management, in contrast to conventional spellcasters who rely only on distance. Players have to weigh their aggression with the ever-present possibility of their own death as they give life force to fuel their spells. The core of this kit is the Soulgorger, a permanent demonic friend who acts as a multifaceted ally. This creature is more than simply a pretty pet; it is a tactical asset able of healing its owner, tanking damage, and shocking masses. This interaction between the player and their summoned unit forms a distinctive combat style in which the Warlock acts as both a strategic leader and a vulnerable channel for infernal power.A Return to Lut Gholein
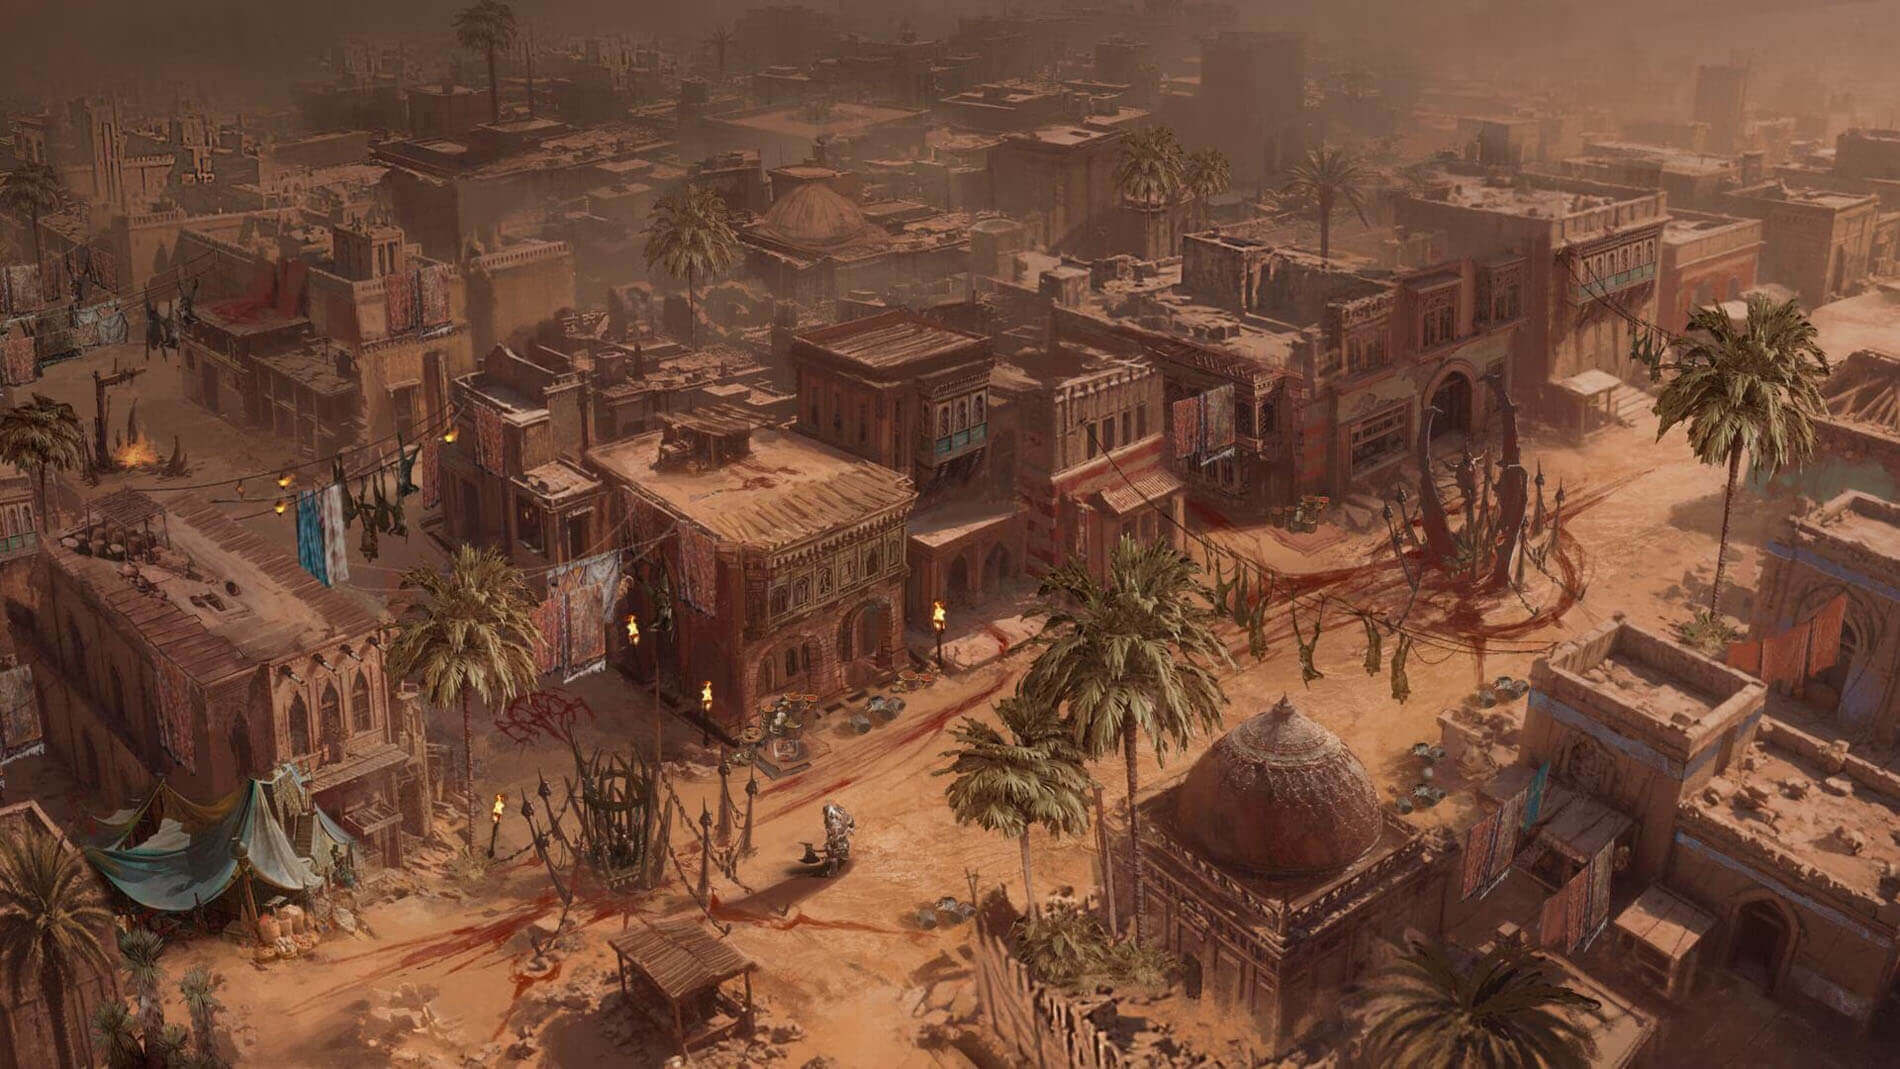 Patch 5. 0 also sends players back to Lut Gholein, the golden city. Long-time fans of the Diablo series will find this place very significant since it functioned as the main centre for excursions in earlier volumes. The addition of this area in the latest update is not just a visual delight but also a structural extension of the main narrative. There is a striking difference between the gruesome darkness of the demon-ridden dungeons hidden beneath the sands and the stark beauty of the desert landscape.
Beyond the visual appeal, the update brings fresh Helliquary bosses requiring coordinated teamwork. These meetings strain the capabilities of current equipment sets and demand that participants learn the tools provided in recent upgrades. The developers have created a narrative link that connects these high-level threats to the enigma of the Bloodied Jewel, so making every grind meaningful. The update of item progression systems also guarantees that players have consistent objectives to work toward, so stopping the feeling of stagnation that sometimes plagues long-running online games.
Patch 5. 0 also brings a sentimental return to Lut Gholein, a city cherished by players who lived the history of the franchise in Diablo II. The story centres on The Bloodied Jewel, a questline that sends players into the battles of the Jewel of the Desert under Andariel's shadow. Players interact in a narrative that honours the franchise roots while driving the present story forward by exploring the destroyed neighbourhoods and docks. The concentration on discovering old Vizjerei secrets and rejoining familiar characters bridges the divide between several generations of followers. The fierce fighting events experienced across the area benefit from this narrative depth since it provides significant background and grounds the player actions in a setting that seems both perilous and rich with history.
Patch 5. 0 also sends players back to Lut Gholein, the golden city. Long-time fans of the Diablo series will find this place very significant since it functioned as the main centre for excursions in earlier volumes. The addition of this area in the latest update is not just a visual delight but also a structural extension of the main narrative. There is a striking difference between the gruesome darkness of the demon-ridden dungeons hidden beneath the sands and the stark beauty of the desert landscape.
Beyond the visual appeal, the update brings fresh Helliquary bosses requiring coordinated teamwork. These meetings strain the capabilities of current equipment sets and demand that participants learn the tools provided in recent upgrades. The developers have created a narrative link that connects these high-level threats to the enigma of the Bloodied Jewel, so making every grind meaningful. The update of item progression systems also guarantees that players have consistent objectives to work toward, so stopping the feeling of stagnation that sometimes plagues long-running online games.
Patch 5. 0 also brings a sentimental return to Lut Gholein, a city cherished by players who lived the history of the franchise in Diablo II. The story centres on The Bloodied Jewel, a questline that sends players into the battles of the Jewel of the Desert under Andariel's shadow. Players interact in a narrative that honours the franchise roots while driving the present story forward by exploring the destroyed neighbourhoods and docks. The concentration on discovering old Vizjerei secrets and rejoining familiar characters bridges the divide between several generations of followers. The fierce fighting events experienced across the area benefit from this narrative depth since it provides significant background and grounds the player actions in a setting that seems both perilous and rich with history.
Quality of Life and Community Impact
 A big update's effectiveness relies equally on technical improvement and fresh material. Blizzard has used this update to add several quality-of-life changes that tackle frequent community input. Among these are improved matchmaking for the new Helliquary raids, simplified inventory management, and changes to the upgrading mechanism of legendary goods. These apparently little adjustments greatly lower the friction of daily play, therefore freeing players to concentrate more on the strategic elements of their build instead of administrative chores. Together with the sheer size of the Warlock class and the return to classic regions, these structural changes make this upgrade among the most thorough bundles produced for the game.
The Evolution of Combat- Powerful Demonic Abilities

The Core Mechanics of the Soulgorger
The Warlock experience is built around the Soulgorger, a permanent demonic companion that acts as the class's foundation. This beast is far more than just a house pet. It is a tactical tool that can absorb damage and initiate fierce counterattacks. The Soulgorger progresses by the unusual Devour method, which lets it feast on other dead demons on the battlefield. Its power increases as it eats these smaller creatures, giving the player better defensive and offensive attributes. The player can use skills such as Pummeling Eruption and Ferocious Leap to guide the Soulgorger into the middle of battle; Voracious Sacrifice adds a layer of survivalist complexity by letting the demon trade its own health to shield the Warlock. This master-pet relationship creates a symbiotic fighting circle that defines the Warlock playing experience.Versatility in Combat and Arsenal
The Warlock has a varied kit that enables several ways of approaching battle. The Primary Attacks highlight this adaptability by providing both sustained accuracy and explosive area damage. Lunatic Rush is great for thinning out huge crowds because it calls for Fallen Lunatics that charge and explode, hence producing a turbulent battlefield. On the other hand, the Hellfire Bolt offers a constant flow of ranged damage that enables kiting and mobility. Beyond these fundamentals, the Warlock uses powers like Lash of Pain and Hellswarm to inflict status effects and exercise crowd control. The Warlock stays very successful against thick groupings of creatures because of its capacity to infect adversaries with plague that then spreads upon their death. Moreover, the Demonic Portal skill lets the player summon particular, strong creatures like the Bloodlord or the Rasplet Hulk, therefore providing customized utility for various mission objectives or boss fights.Mobility and Tactical Positioning
The capacity to move fast and maintain pressure on the foe is usually essential for success as a Warlock. The class has great mobility tools that combine thematic components with practical utility. The player can cross the field on a Hellflyer using Burning Ascent, leaving a path of damage that penalizes opponents for being out of place. Likewise, the Brimstone Gateway gives a strategic trip choice that would help the player and their friends. These movement skills are essential for setting up combos and making sure the Soulgorger is always positioned to intercept incoming attacks, not just for fleeing danger. Warlocks may control the pace of every fight by fusing these movement skills with the crowd control effects of spells like Infernal Eruption.The Philosophy of Sacrifice
The most unique feature of the Warlock is its strong focus on the life force system. Advanced players have to become proficient in skills including Siphon Life, Blood Offering, and Demonic Pact. These skills make the user continually weigh their own life against the strength of their magic. The Warlock generates damage levels that few other classes can match by transforming health into raw destructive energy, but this comes at the expense of fragility. For individuals who like precision gaming, this high risk, high reward design approach makes the class very fulfilling. Correctly overseeing these life pools is what distinguishes a Warlock from a beginner from a master of the dark arts.Legendary Customization in Diablo Immortal
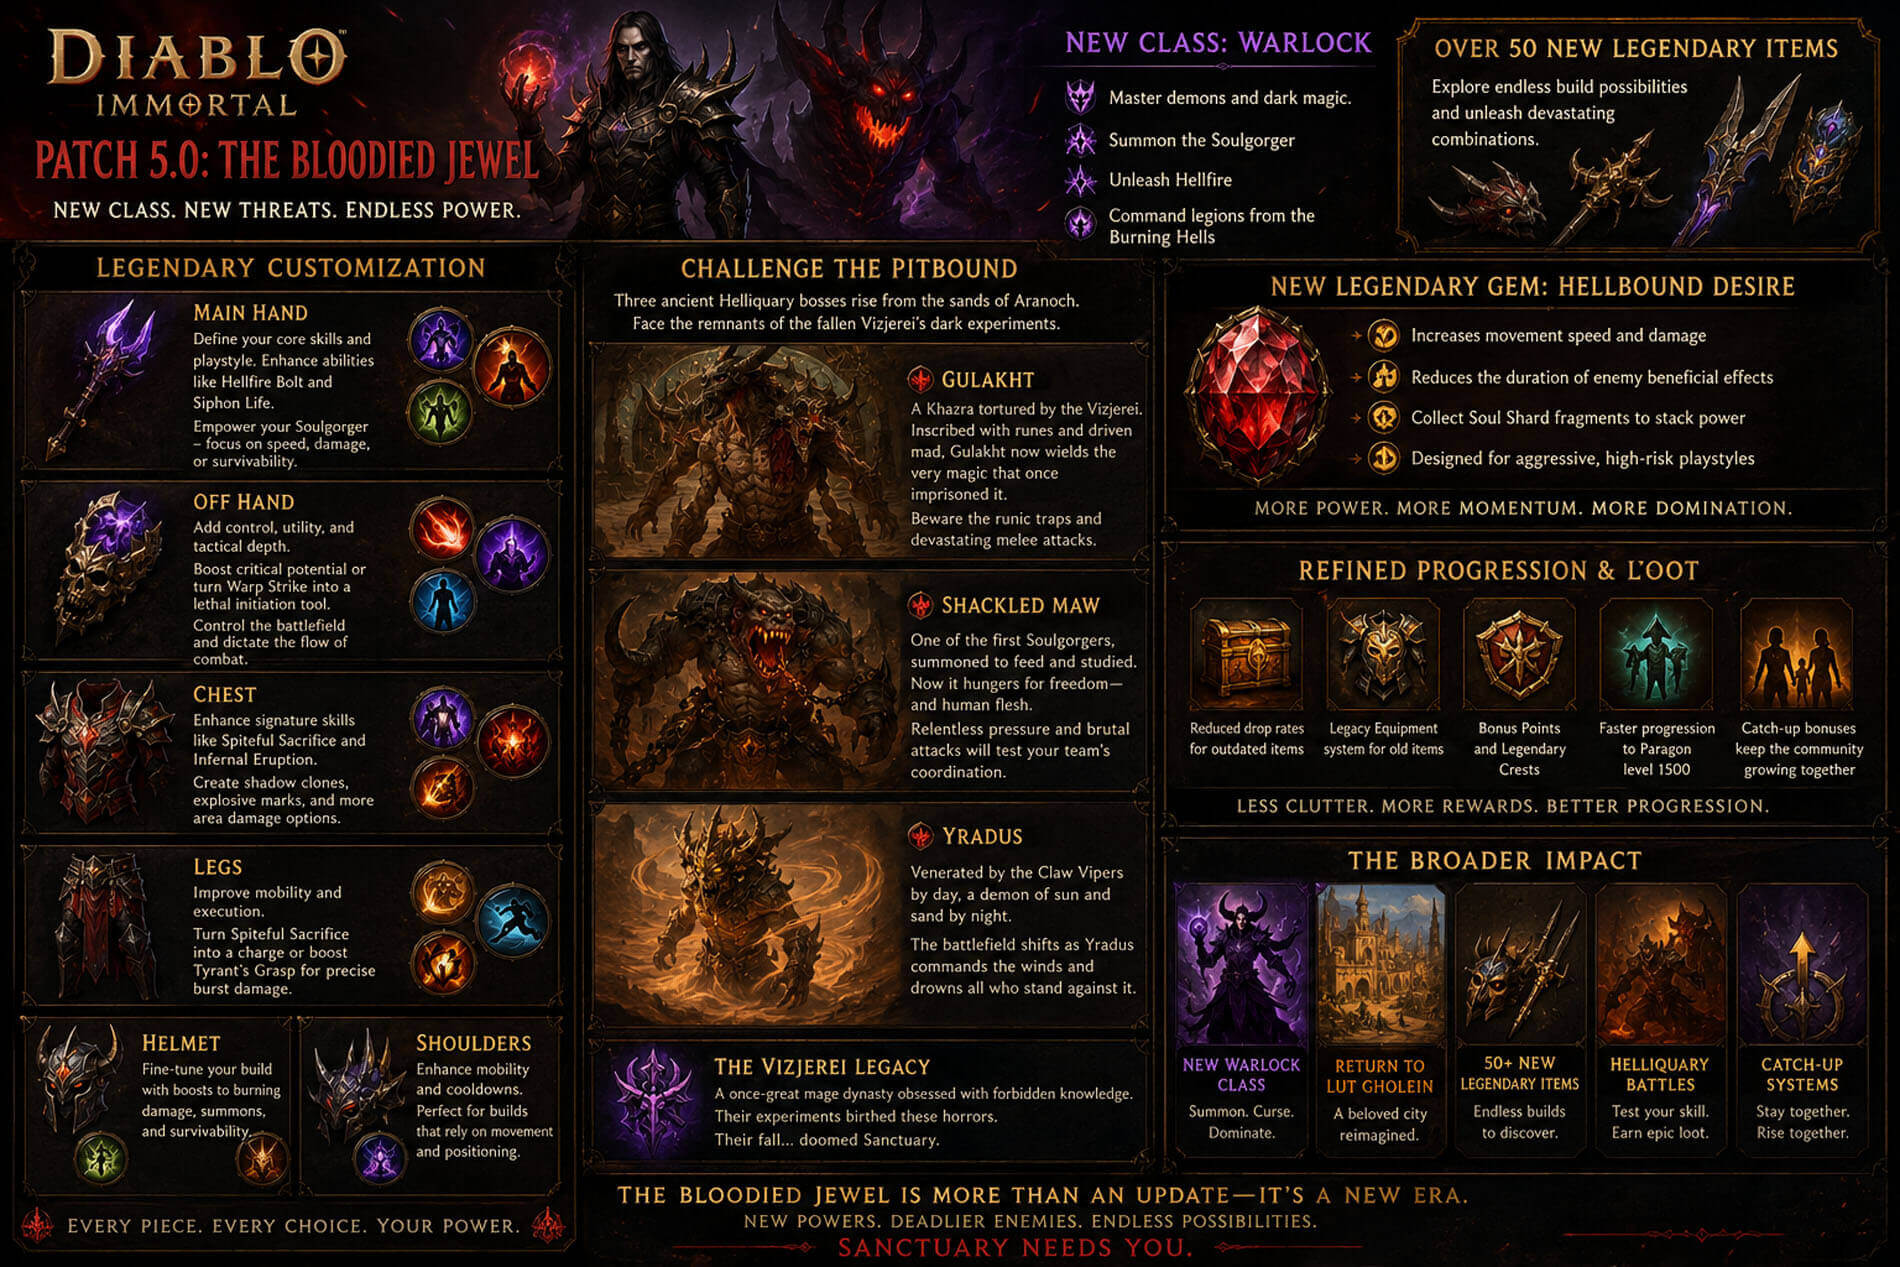 The customisation starts with Main Hand and Off Hand gear, which determine the basic rhythm of battle. Often altering fundamental skills like Hellfire Bolt or Siphon Life, Main Hand items help to define the Warlock's identity. These weapons let players define their preferred engagement approach by offering improvements ranging from higher mobility to better survivability. Moreover, a noteworthy feature is the capacity to enhance the Soulgorger via these goods, allowing gamers to select between a quicker assaulting minion or a more robust creature fit to survive lethal damage. Meanwhile, Off Hand gear adds a layer of tactical complexity by emphasising control. The Off Hand choices reflect the player's ability to manipulate the battlefield, whether they choose to enhance critical hit potential or turn Warp Strike into a powerful initiation weapon. Success in both solo dungeon runs and competitive player versus player warfare depends critically on this trade-off between offensive power and utility.
Strategic Armor and Defensive Utility
Beyond armament, the Chest and Leg armor pieces are absolutely essential in raising general battle effectiveness. The Chest Armor centers on enhancing signature skills like Spiteful Sacrifice and Infernal Eruption. These armor sets allow the Warlock to thrive in situations needing continuous area damage by producing fresh mechanics such as explosive enemy marks or shadow clones. Leg Armor pieces also provide aggressive enhancements that enhance mobility and execution precision. Players can focus on burst damage techniques depending on ongoing movement by boosting Tyrant's Grasp or transforming Spiteful Sacrifice into a charge-based ability. This layering of armor options lets gamers create combinations that boost the power of their selected skills, therefore building a unified build that feels both strong and purposeful.Refining Gameplay through Specialized Gear
Adding Helmet and Shoulder equipment finishes the Warlock's customization options by providing fine-tuning possibilities for mobility and posture. Particularly useful are objects that change the Brimstone Gateway since they give the Warlock the flexibility required to move around challenging boss arenas. Furthermore, equipment improving burning damage or summon survivability guarantees that the player stays viable in the late game. These things are the glue that holds a build together. They give the Warlock the sustain and defensive buffers he needs to stay alive when he is under a lot of pressure. Since these things interact directly with other pieces of equipment, they support a holistic view of gear acquisition whereby every slot advances a cohesive fighting style.The Challenge of the Pitbound
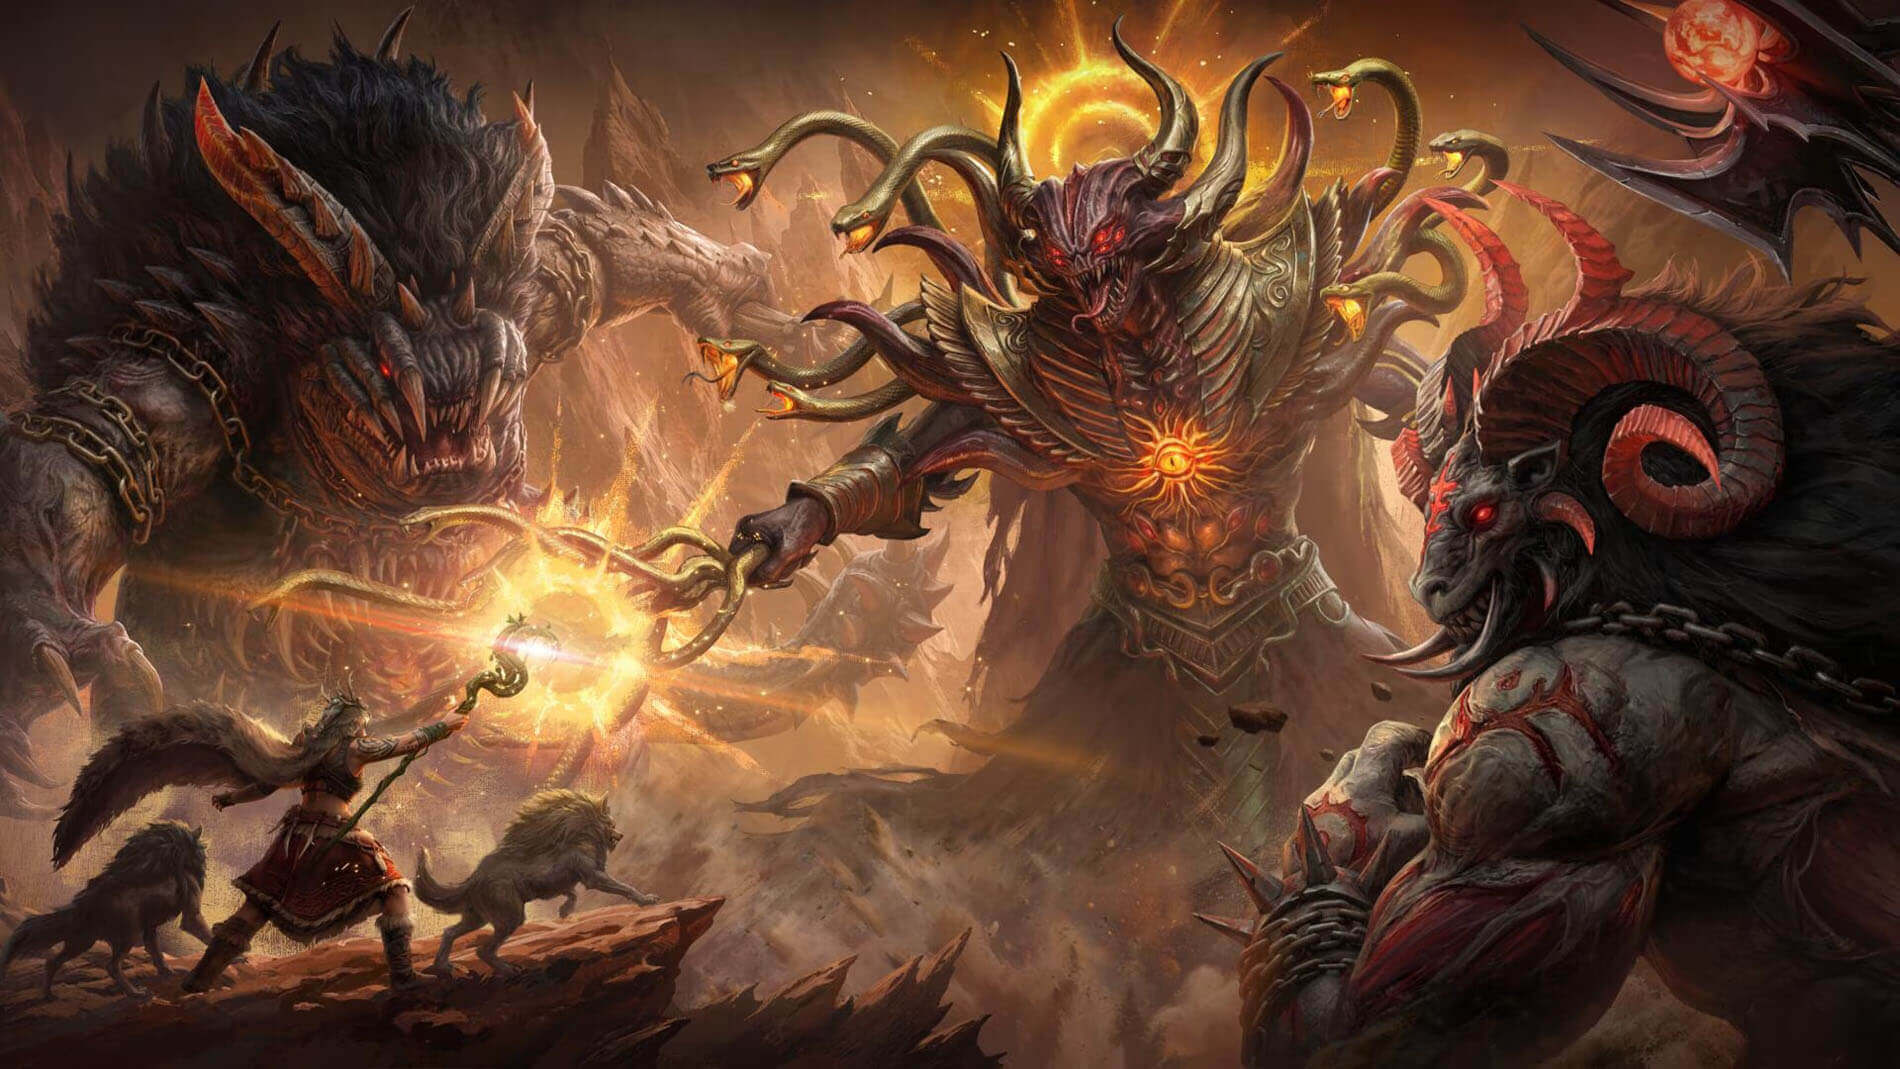
The addition of sophisticated endgame challenges keeps altering Sanctuary's terrain as Diablo Immortal develops. The release of the Pitbound in Patch 5. 0, named The Bloodied Jewel, signals a major turning point in this development. Hidden beneath the expansive and ever-moving dunes of the Aranoch Desert, these three powerful Helliquary bosses stand as the remnants of the once great and now fallen Vizjerei mage dynasty. Their appearance reminds us of the results of illicit experimenting and the dismal history of demonology. These battles test players' skill and teamwork by combining rich history with complex fighting systems, hence enhancing the game as a gold standard in mobile action role-playing games.The Vizjerei Legacy
One has to first examine the history of the Vizjerei to grasp the danger presented by the Pitbound. Renowned for their intelligence and ambition, the Vizjerei were among the strongest wizard families in the history of the world. Still, their fixation with knowing demons turned them down a road of corruption and catastrophe. The experiments carried out by these mages typically included the summoning and binding of creature’s way outside their jurisdiction. Though the civilization finally fell, the horrors they unleashed remained locked away in subterranean vaults. Years of seclusion in the Aranoch Desert have only served to exacerbate these injustices, turning abandoned studies into vengeful creatures awaiting the breaking of their jail's seal.The Mechanics of Gulakht
Driven to the edge of insanity by protracted exposure to magical torture, Gulakht is the first of the three bosses, a Khazra beast. Gulakht is a great illustration of the environmental storytelling embedded in these contacts. The creature did not give in to its fate; instead, it controlled the runes that were meant to hold it inside a chamber decorated with protective wards. Gulakht transformed its prison into an extension of its power by ingesting these mystical symbols into its own flesh. This boss battle needs gamers to deal with a twofold danger: They have to deal with the creature's fierce melee assaults while also avoiding the magical traps buried in the surroundings. The group's capacity for space management and reaction to the changing arena patterns will greatly determine success versus Gulakht.The Aggression of Shackled Maw
The Shackled Maw stands for the raw, unrestrained hunger of a Soulgorger, in contrast to the deliberate magic of Gulakht. This entity symbolizes the peril of conceit as it was among the earliest devils effectively conjured and later deserted by the Vizjerei. Through relentless pressure, the Shackled Maw seeks to stretch players to their boundaries. It does not give party members long chances to rest; therefore, they must coordinate their defense and offense with great accuracy. This battle acts as a mechanical test for teams, stressing the need of tank control and healer placement. It emphasizes the value of teamwork in a group as individuals who neglect to synchronize their actions will swiftly become overwhelmed by the beast's unrelenting attack.The Dual Nature of Yradus
Yradus, the last member of the trio, brings an environmental volatility component. Revered by the Claw Vipers as a divine guardian, the creature conceals a dark demonic nature that only comes forth after sunset. As Yradus harnesses wind, sand, and solar energy to upset the player, this change upsets the fundamental physics of the battlefield. This struggle is especially significant since it compels adventurers to modify their approach depending on the time of day and the shifting environment. Due to its instability, Yradus is probably the most complicated of the three as players can't depend on a fixed rotation. They have to stay alert and willing to change their approach as the surroundings itself grows hostile, though.Strategic Power and the Hellbound Desire Gem
The Hellbound Desire Legendary Gem's introduction is a highlight of the most recent upgrade. This product is a great illustration of how the creators want to reward aggressive gaming styles. The gem inspires gamers to assume a more proactive role in battle by providing a multifarious boost including faster movement speed and more damage. The introduction of Soul Shard fragment stacking and the capacity to lower the duration of hostile positive effects adds a depth level that benefits individuals who prioritize consistent damage production. This jewel represents a significant change in how players who love high risk and high reward gaming could build their characters. It is meant to be more than simply a statistical boost since it drives the player to interact with the environment in a more deliberate way, therefore guaranteeing that every meeting is meaningful and effective.Refining Progression and Loot Mechanics
The structural modifications done to the Legendary Essence and Set Item pools are likely the most significant improvements in Patch 5. 0. Many long-running games' inventory chaos and irritating loot experience result from the accumulation of obsolete or infrequently used objects. Blizzard has dealt with this by lowering the frequency of outdated items in the drop pool, therefore guiding player efforts on gear appropriate for present gameplay criteria. The move to categorize older items as Legacy Equipment, along with giving loyal players bonus points and legendary crests, shows a well-thought-out way of balancing player investment. The developers have effectively lowered the need for too much farming by simplifying the advancement route. While simultaneously guaranteeing that seasoned players can spend more time enjoying the game than handling pointless equipment, this makes the ascent toward the new Paragon server level of 1500 seem much more realistic for fresher players.The Broader Impact of Patch 5. 0
For the franchise, the update is a big step forward since it combines nostalgia with contemporary creativity. Adding the Warlock class gives players a complex fighting mechanism stressing summoning and strategic positioning. Returning to the legendary site of Lut Gholein also fills the distance between the traditional Diablo experience and the present version of the game. Together with over fifty new legendary items and demanding Helliquary battles, these additions produce a thick experience that honors talent and curiosity. The catch-up systems, which provide major experience incentives for individuals under the new Paragon level, help to keep the player base together and prevent it from being split by power discrepancies. This fosters a better ecology where the society may develop together notwithstanding personal variations in playing time.Is the Warlock Worth Playing?
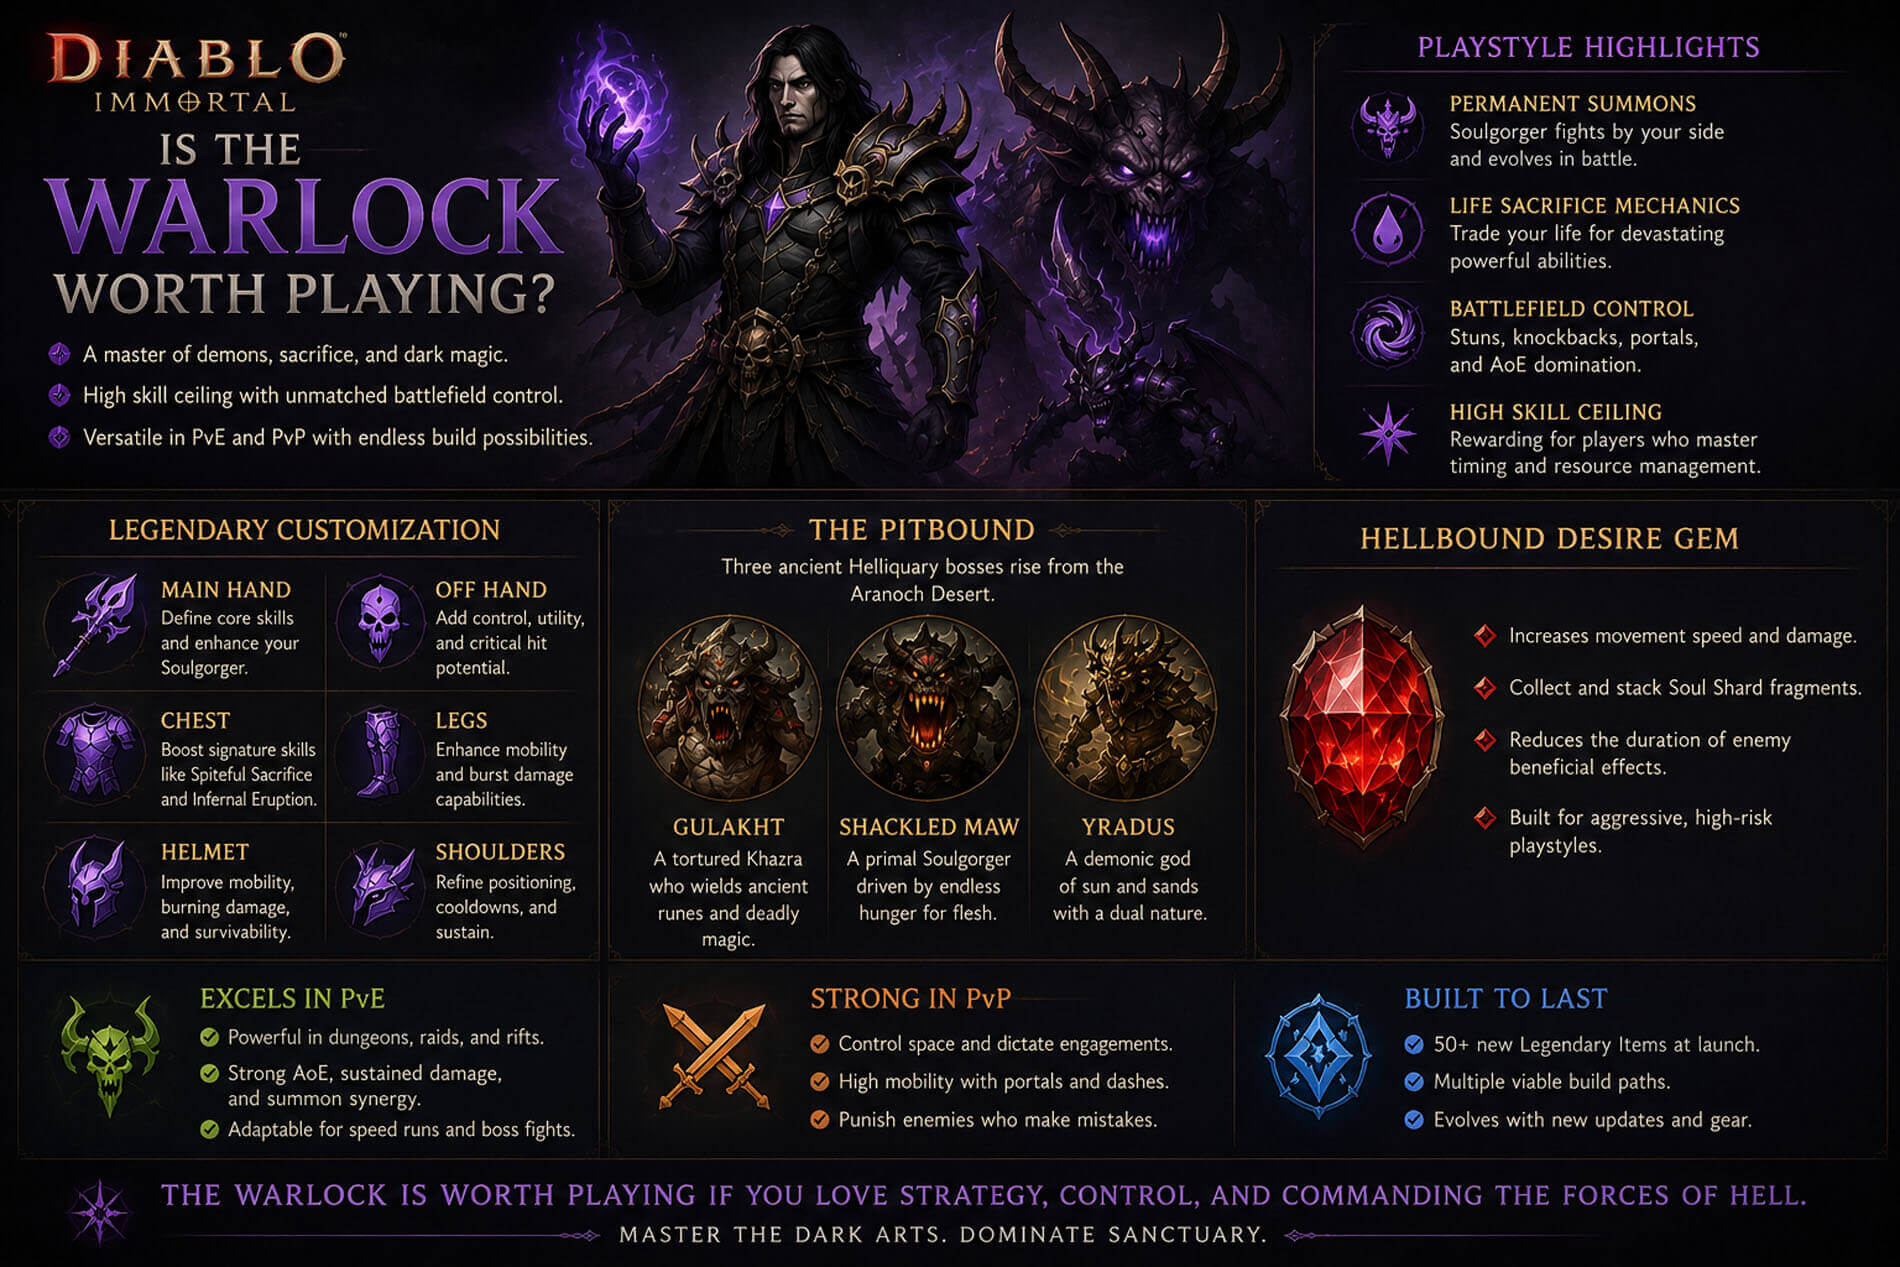 The arrival of the Warlock class in Diablo Immortal marks a major change in the games meta. It brings a new playstyle with complicated mechanics that goes beyond the usual hack and slash. Conventional classes in the game often depend on simple damage production or mobility, but the Warlock combines layered crowd control, life sacrifice techniques, and permanent summons into a coherent fighting system. This class is for players that value strategic complexity as it rewards methodical preparation and effective resource management more than mindless button mashing. The Warlock is a high skill ceiling character that pushes players to explore the complexities of their toolkit in great detail in order to achieve real success in both solo and group situations as the game develops.
Battlefield Control and Mechanics
The Warlock's unparalleled capacity to control the course of the combat is among its main advantages. The Soulgorger is a vital partner that operates as a strong frontline tank maintaining enemy engagement. This lets the player stay in a protected location and plan attacks from afar. The Warlock can gather huge groups of foes before killing them with burst damage thanks to the interaction between summon pressure and area of effect spells like Devouring Darkness and Infernal Eruption. Managing large density groups requires this tactical approach, which makes the class quite effective in content cleanup. Beyond basic damage, the Warlock provides an interesting risk-reward mechanism. Many of the most powerful abilities in the class repertoire need the player to give up a percentage of their personal health to work. This mechanical decision compels a fragile balance between survival and aggression. To make sure they don't go too far in times of great power, players have to learn to monitor their health pools all the time. Less experienced players might find themselves becoming a liability if they do not account for their own self-inflicted damage, while those who master this management will discover that the Warlock is capable of outputting damage numbers that equal or surpass other classes.PvE Performance and PvP Potential
The Warlock stands out in practically every big game mode when assessing PvE performance. The class operates with constant efficiency whether one is handling Elder Rifts, demanding Helliquary Raids, or participating in open world farming. Particularly useful in lengthy boss bouts where ongoing pressure is required, the Soulgorger's metamorphosis during battle offers a consistent source of sustained damage. The class also provides enough adaptability to stay relevant in speed runs, where movement and high impact area damage are at a premium. The Warlock offers a different yet just as appealing profile in the world of PvP. The class's capacity to dominate space using stuns, knockbacks, and portals determines success in the arena or battlegrounds. High mobility from skills like Brimstone Gateway enables strategic repositioning or swift escapes should the circumstances grow dire. Although the class has a high skill floor, the reward for learning its crowd control skills is the capacity to push enemies into situations where they are unable to properly react to the Warlock's summoned minions. The amazing degree of build diversity of the Warlock guarantees its longevity. With a wide range of Legendary Items at launch, players are free to play in any way they choose. One may concentrate on a summoner-centric build, a high-risk sacrifice setup, or even a support-oriented portal build. This variety keeps the class exciting and enables players to change their playstyle as the game introduces new equipment and balance adjustments. Offering these alternatives has helped the developers to guarantee that the Warlock appeals to a broad spectrum of player types, from those who want the tactical control of a summoner to those who like the thrill of high-risk glass cannonEverything You Need to Know About Shades of the Nephalem
Renowned for its addictive loot-gathering gameplay and dark fantasy environment, Diablo III regularly refreshes its experience with seasonal material. Season 39, also known as "Shades of the Nephalem", brings back a popular theme that was first introduced in Season 22. This version vows to add an interesting new mechanic to the familiar battle against the powers of the Burning Hells: the capacity of one's own shadow. Beginning on June 26th, the season challenges players to once more answer the call to help Sanctuary, utilizing this particular thematic element to boost their fighting ability and overcome fresh challenges. For veteran and new players looking for fresh ways to enjoy the action RPG, the return of the "Shades of the Nephalem" theme together with an enlarged Kanai's Cube and reinstated cosmetic prizes places Season 39 as a fascinating event.
The Shades of the Nephalem Theme
The creative "Shades of the Nephalem" motif, which centres on the idea of spectral friends, is at the heart of Season 39. According to the lore, the shadows themselves have developed some level of will and may be used by the Nephalem. The "Shadows of the Past" technique reflects this in gameplay. Activating any Shrine or Pylon will cause a shadow clone of the player's selected class to appear. This clone isn't simply a visual trick; it will deploy one of three predetermined, pre-selected builds to provide a powerful and often unexpected increase in fighting. The strength of the clone scales with the player's character, thereby guaranteeing it stays a useful resource all across their travels. Moreover, these spectral companions remain for a whole minute, or till the player character drops, offering a significant, albeit transient, edge in handling tough battles and quickening farming pace. Including several build types for every class introduces a strategic depth and element of surprise that inspires gamers to modify their approaches depending on the shadow clone they get. In addition to giving fighting a distinctive graphic flair, this mechanic offers a palpable power surge that might be essential in defeating difficult elites and Rift Guardians.Kanai's Cube and Strategic Flexibility
Beyond the shadow clones, Season 39 introduces a major change to Kanai's Cube, a key part of Diablo III's endgame progression. Kanai's Cube will include a fourth, extra slot for the whole of this season. Players have never had as much building flexibility as this enlarged slot provides. Crucially, this fourth slot can hold any of the item types found in the first three slots (Weapon, Armor, and Jewellery), but with the important condition that it cannot stack with an item of the same type already in those first three slots. For instance, this implies a player might equip a Legendary power from a weapon in the fourth slot even if they already have a weapon equipped in the main weapon slot of their character. This gives players a great way to improve their builds by trying out Legendary powers that work well together but were once hard to use or could not be used at all. Directly answering to player input, this improvement to Kanai's Cube seeks to enable more inventive and tuned character builds, hence providing a more interesting and customized gameplay experience.Cosmetic Rewards and Progression Milestones
 Season 39 provides a set of unique cosmetic goodies to encourage player advancement, just like every other season. The "End of Journey" rewards, which players obtain by finishing Season Journey chapters, comprise a new pet, Corvus Cadaverous, and a portrait frame, Laurels of Knowledge, therefore stressing both the horrific reality of the continuous battle and intellectual ability. Also returning this season are cosmetic prizes first offered during Season 15. Among them is the unique Conqueror Set, which gives players Chest and Glove slots and gives devoted gamers a clear visual identity. Moreover, a collection of portrait frames themed around the Eternal Conflict will be available, enabling gamers to visually show their allegiance to the continuing battle against the demonic forces. For people who love the finer, sometimes fluffier, points of Sanctuary, the cosmetic pet Belphegor is also here to give their journeys a touch of personality. These benefits not only act as visual recognition of work but also support the general feeling of success and belonging inside the Diablo III community.
Season Journey Rewards and Stash Tabs
The Season Journey itself is a tiered set of objectives that leads players through the material of the season, rewarding them with a range of goods and incentives as they advance. One especially appealing incentive for hard workers is the gaining of more stash tabs, which are necessary for handling Diablo III's expanding inventory of treasures. Players that have already passed the Conqueror level in past seasons may already have some of these highly sought after additional tabs. However, Season 39 offers a definite way to open one more for people who have not yet hit the five-stash-tab mark. This necessitates reaching the Conqueror tier and completing a particular collection of demanding objectives. These include speedily finishing a Torment XIII Nephalem Rift inside five minutes, levelling three Legendary Gems to level 55, and effectively finishing two of the season's Conquests. Additional difficulties include conquering Malthael and Greed on Torment XIII difficulty under specific criteria, reaching Greater Rift level 60 alone, and using Kanai's Cube for item augmentation and reforging. These goals not only provide the player a tangible in-game advantage but also motivate exploration of several difficulty levels and gameplay concepts.Seasonal Conquests
Conquests are unique successes inside the Season Journey that challenge players to test the boundaries of their builds and their knowledge of game rules. Several fan-favourite Conquests from Season 39 come back, each providing a unique difficulty. The "Sprinter" and "Speed Racer" Conquests test players' ability to finish Diablo III's entire campaign from Act I to Act V at level 70 in less than an hour, which requires a lot of speed and good planning. Conversely, "Avarice" and "Avaritia" concentrate on wealth accumulation, demanding players to accomplish a streak of 50 million gold beyond The Vault or its Inner Sanctum. "Boss Mode" and "Worlds Apart" task players with defeating every boss in Diablo III at max level on Torment X within twenty minutes, thus creating a race against time. "The Thrill" and "Superhuman" need finishing a solo Greater Rift level 45 free of any equipped Set items, therefore rewarding creative gear choices for individuals who like theory crafting and non-traditional builds. At last, "Masters of the Universe" and "Masters of Sets" test players' command of class-specific Set Dungeons by needing eight distinct Set Dungeons completed at mastery level. From speed-runners to build experts, these different Conquests guarantee there is a difficulty to fit every playstyle.Haedrig's Gift
 Participating in Diablo III Seasons, Haedrig's Gift is arguably among the most important rewards as it gives players strong class sets that may greatly accelerate their gearing process and allow them to handle greater challenges. These sets are given for finishing Chapters 2, 3, and 4 of the Season Journey. Every Gift has a piece of a certain class set. Players should remember that Haedrig's Gift enables only one class set every season, irrespective of Hardcore or Softcore gameplay. When choosing which character to open these gifts on, strategic planning is therefore important as all three gifts must be opened on the same character to build a complete six-piece set. The class sets provided in Season 39 are: Wrath of the Wastes for Barbarians, Roland's Legacy for Crusaders, Unhallowed Essence for Demon Hunters, Raiment of a Thousand Storms for Monks, Bones of Rathma for Necromancers, Helltooth Harness for Witch Doctors, and Tal Rasha's Elements for Wizards. These sets give participants a solid basis for development, therefore enabling them fast access to endgame material and more successful play.
"Shades of the Nephalem", Season 39, provides a captivating bundle of prizes meant to keep players occupied all through their adventure. There are plenty of chances for players to put their abilities to the test, from the practical advantage of more stash room, gained by completing difficult tasks inside the Season Journey, to the strategic complexity offered by a varied range of Conquests. Haedrig's Gift's introduction of strong class sets further sweetens the deal by allowing players to swiftly build strong characters and explore the most difficult material the game has to offer. By deftly negotiating the Season Journey, honing the Conquests, and judiciously deploying Haedrig's Gift, Nephalem may arise from Season 39 stronger and more ready to confront the always lurking darkness.
Participating in Diablo III Seasons, Haedrig's Gift is arguably among the most important rewards as it gives players strong class sets that may greatly accelerate their gearing process and allow them to handle greater challenges. These sets are given for finishing Chapters 2, 3, and 4 of the Season Journey. Every Gift has a piece of a certain class set. Players should remember that Haedrig's Gift enables only one class set every season, irrespective of Hardcore or Softcore gameplay. When choosing which character to open these gifts on, strategic planning is therefore important as all three gifts must be opened on the same character to build a complete six-piece set. The class sets provided in Season 39 are: Wrath of the Wastes for Barbarians, Roland's Legacy for Crusaders, Unhallowed Essence for Demon Hunters, Raiment of a Thousand Storms for Monks, Bones of Rathma for Necromancers, Helltooth Harness for Witch Doctors, and Tal Rasha's Elements for Wizards. These sets give participants a solid basis for development, therefore enabling them fast access to endgame material and more successful play.
"Shades of the Nephalem", Season 39, provides a captivating bundle of prizes meant to keep players occupied all through their adventure. There are plenty of chances for players to put their abilities to the test, from the practical advantage of more stash room, gained by completing difficult tasks inside the Season Journey, to the strategic complexity offered by a varied range of Conquests. Haedrig's Gift's introduction of strong class sets further sweetens the deal by allowing players to swiftly build strong characters and explore the most difficult material the game has to offer. By deftly negotiating the Season Journey, honing the Conquests, and judiciously deploying Haedrig's Gift, Nephalem may arise from Season 39 stronger and more ready to confront the always lurking darkness.
New Endgame Activities, Rewards, and Mythic Upgrades
 Blizzard Entertainment has officially launched the Public Test Realm for Diablo IV's upcoming patch 3. 1, offering players an unprecedented early glimpse into Season 14 and some of the most significant gameplay adjustments since the launch of the Vessel of Hatred expansion. Running from June 2nd to June 9th, this PTR is a vital time for the development team to get player feedback and improve material prior to its formal release. Season 14 guarantees a wealth of fresh adventures, headed by a unique seasonal activity known as Pandemonium Ruptures, a thorough update of Mythic Uniques, the eagerly awaited debut of Solo Self Found mode, and a variety of new endgame rewards. Taken together, these changes seek to revitalize Sanctuary, giving both seasoned and new players strong incentives to return to the shadows.
Pandemonium Ruptures Bring Chaos to Sanctuary
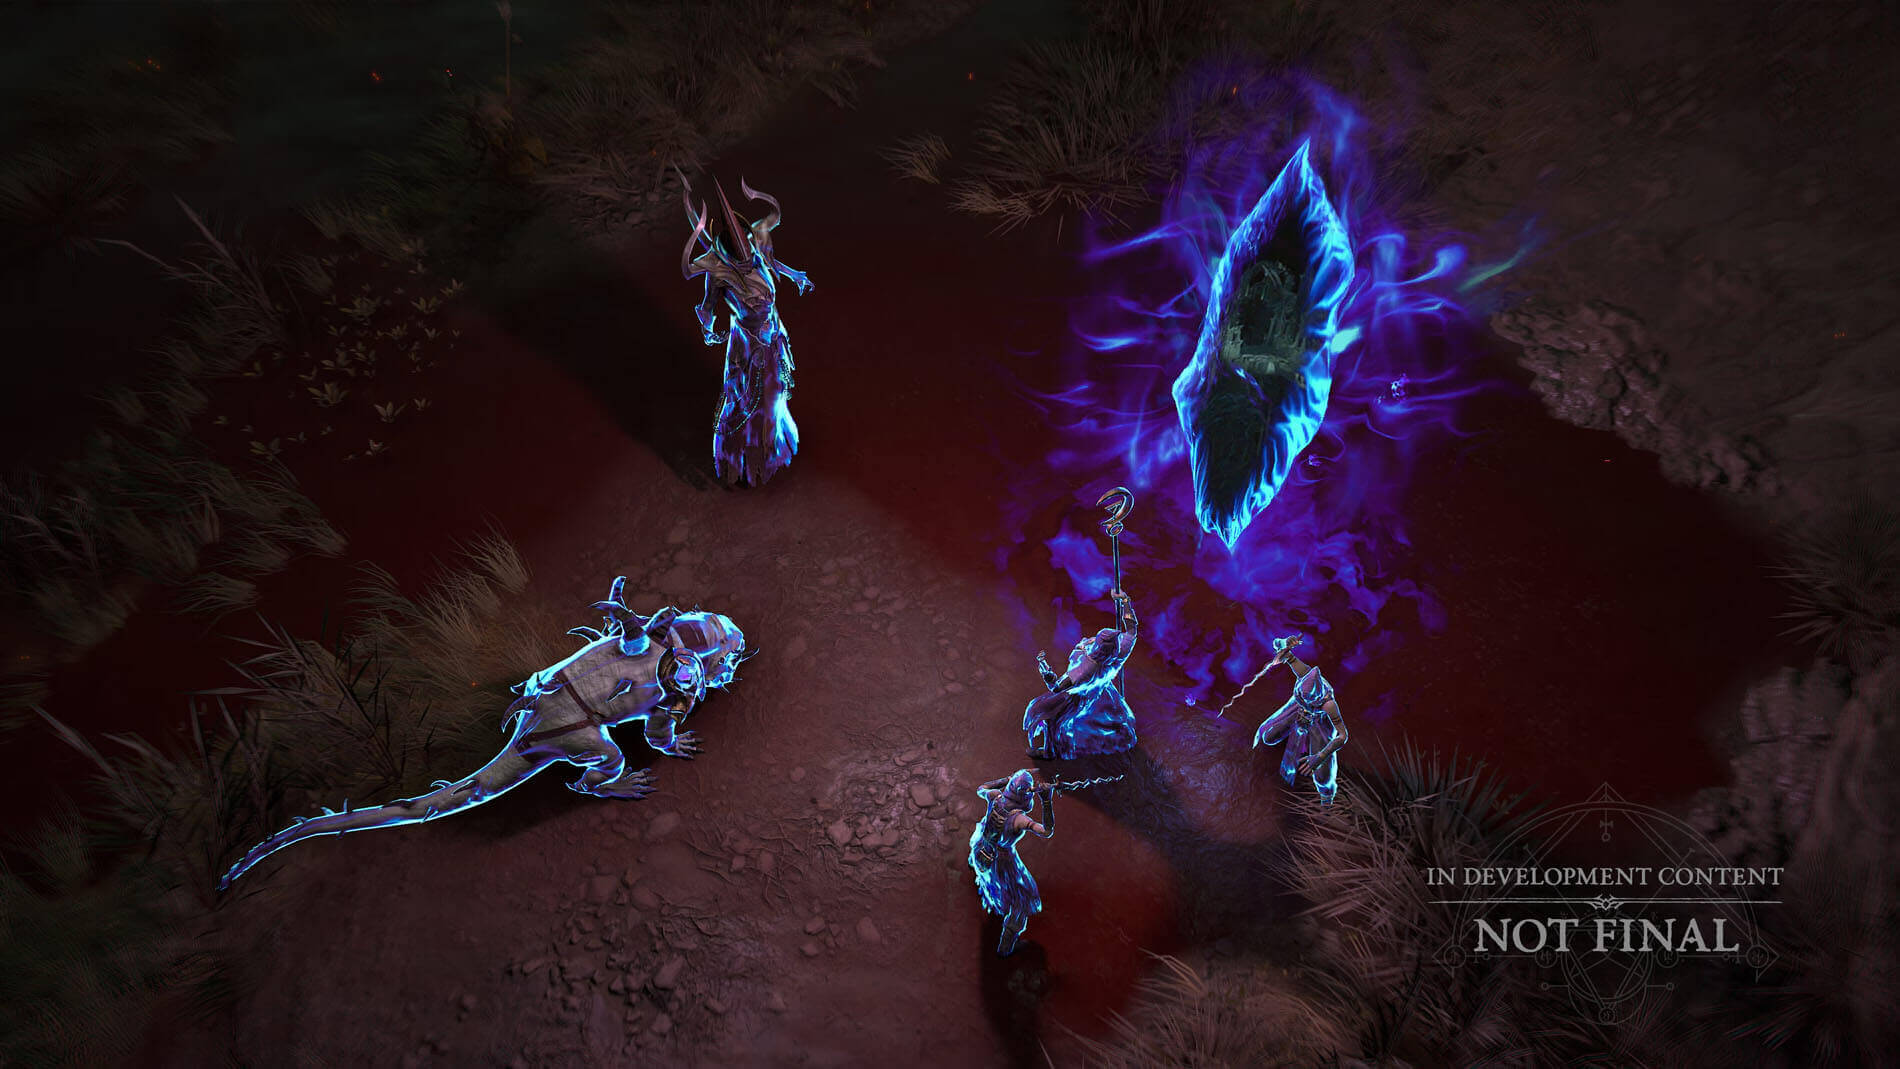
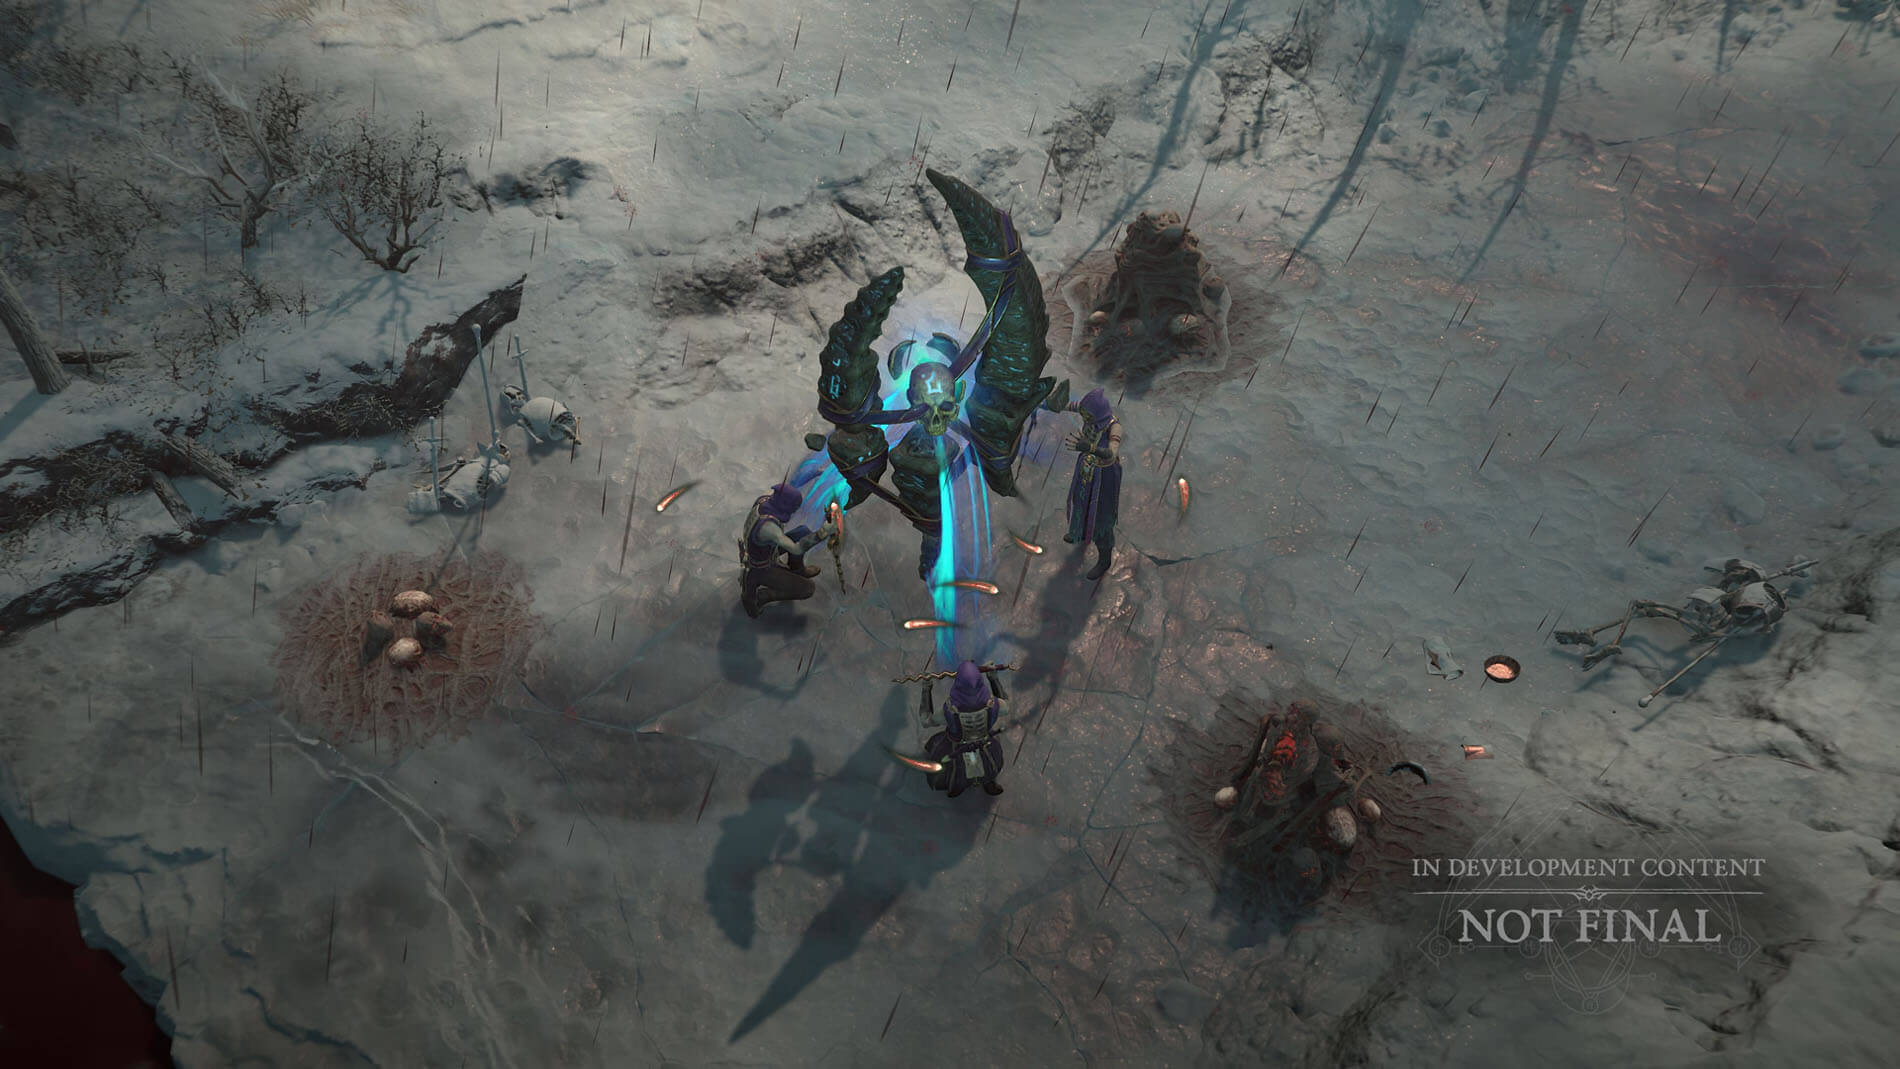 The Pandemonium Ruptures are clearly the focal point of Season 14, a fresh seasonal event meant to increase the pandemonium and difficulty inside Sanctuary. These fissures symbolize tears in the fabric of reality, breaking the boundaries between Sanctuary and the Pandemonium, releasing powerful foes and the expectation of extraordinary rewards. Players will participate in unique events focused on Death's Head Idols that produce growing ritual areas. The gameplay loops inside these ruptures are strategically oriented: First, players have to beat the guardians that surround the idol, and then they can start the Rupture itself. Maintaining the activity of the Rupture for as long as feasible by mending Tears and destroying the advancing monsters becomes the main goal. The longer players can effectively keep the Rupture going, the more profitable the loot rewards become, so fostering a risk-reward dynamic that promotes talented play and continuous participation.
The Pandemonium Ruptures show up in three different levels of severity. Normal Ruptures are smaller, more regular meetings usually discovered dispersed throughout Sanctuary, frequently surfacing during Helltide events. Surging Ruptures offer a modest increase in difficulty and scope, potentially replacing regular Helltide activities with more fascinating tasks. The Colossal Ruptures are the most important of these as they are huge battles deliberately situated in the Fields of Desecration close to Zarbinzet. Because of their increased reward potential and increased likelihood of spawning Realmwalkers, these bigger events are expected to be the main farming target in Season 14.
The Pandemonium Ruptures are clearly the focal point of Season 14, a fresh seasonal event meant to increase the pandemonium and difficulty inside Sanctuary. These fissures symbolize tears in the fabric of reality, breaking the boundaries between Sanctuary and the Pandemonium, releasing powerful foes and the expectation of extraordinary rewards. Players will participate in unique events focused on Death's Head Idols that produce growing ritual areas. The gameplay loops inside these ruptures are strategically oriented: First, players have to beat the guardians that surround the idol, and then they can start the Rupture itself. Maintaining the activity of the Rupture for as long as feasible by mending Tears and destroying the advancing monsters becomes the main goal. The longer players can effectively keep the Rupture going, the more profitable the loot rewards become, so fostering a risk-reward dynamic that promotes talented play and continuous participation.
The Pandemonium Ruptures show up in three different levels of severity. Normal Ruptures are smaller, more regular meetings usually discovered dispersed throughout Sanctuary, frequently surfacing during Helltide events. Surging Ruptures offer a modest increase in difficulty and scope, potentially replacing regular Helltide activities with more fascinating tasks. The Colossal Ruptures are the most important of these as they are huge battles deliberately situated in the Fields of Desecration close to Zarbinzet. Because of their increased reward potential and increased likelihood of spawning Realmwalkers, these bigger events are expected to be the main farming target in Season 14.
Realmwalker 2. 0 Returns Stronger Than Ever
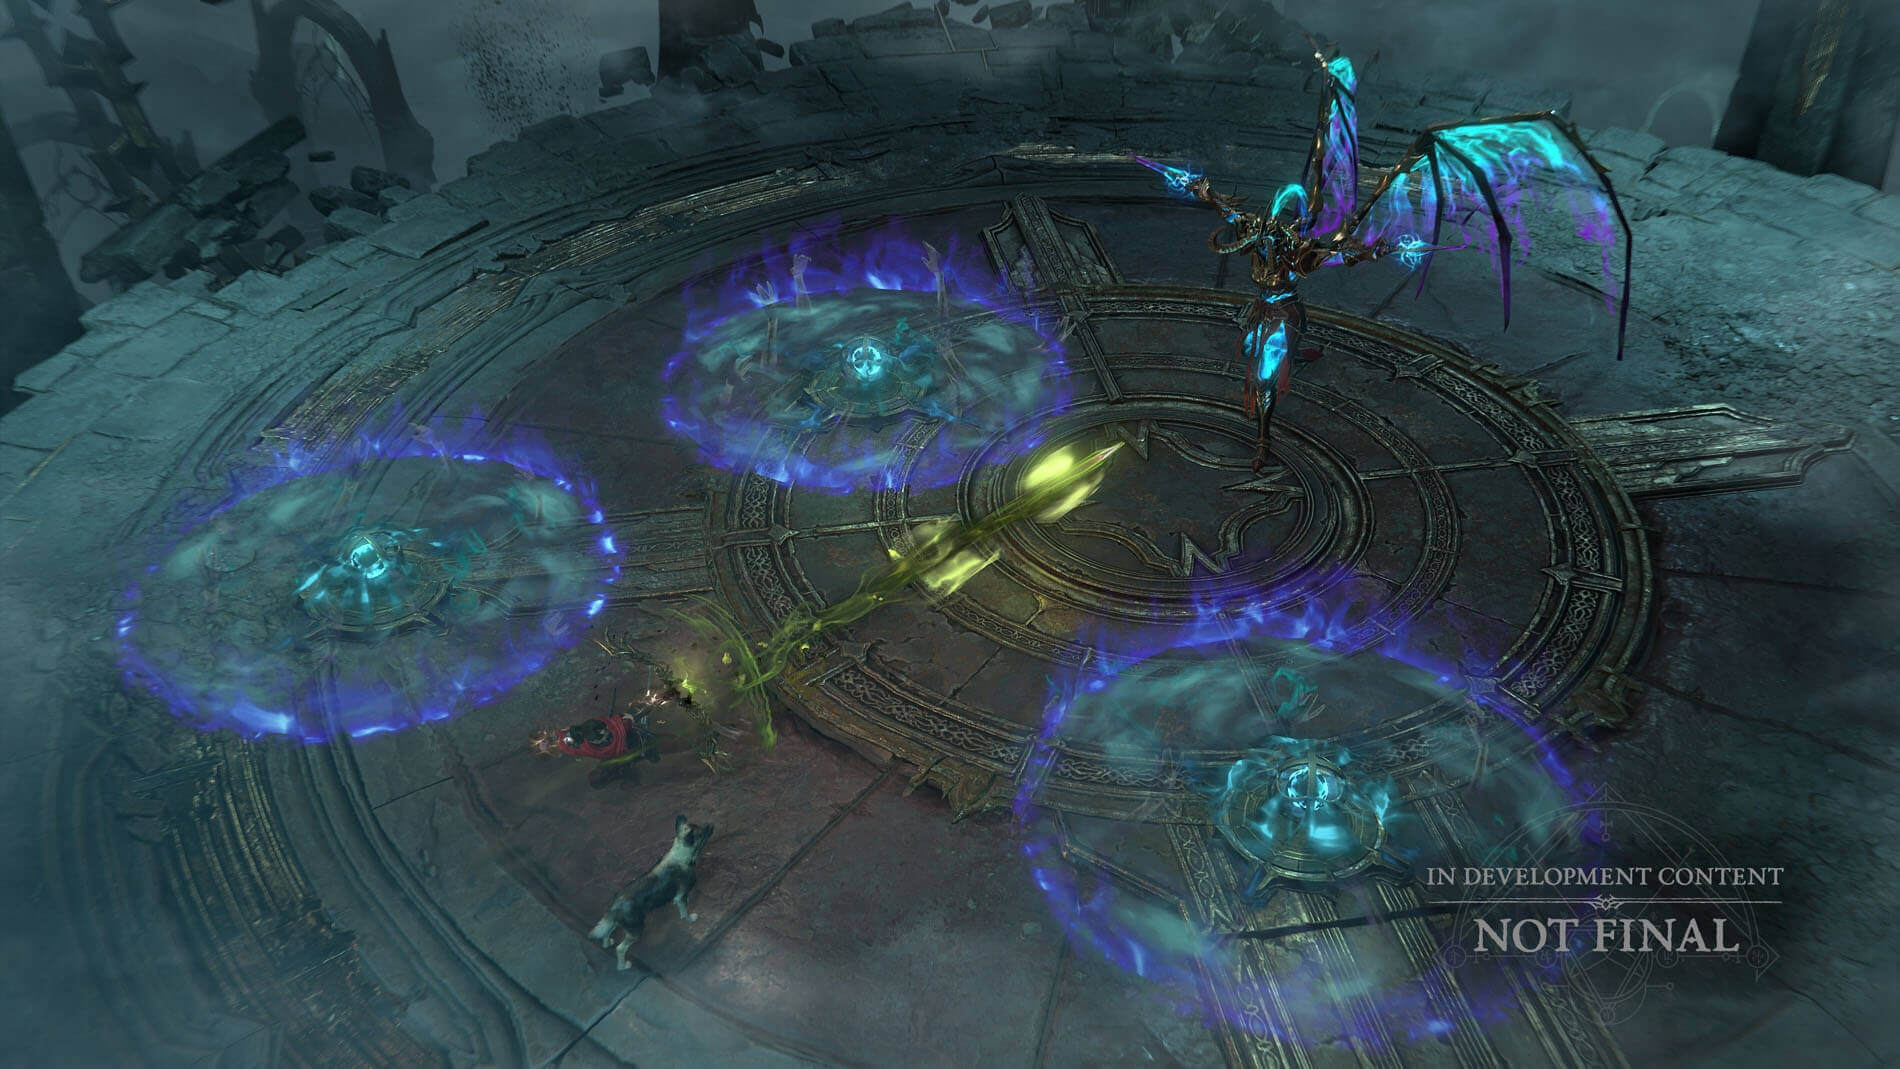
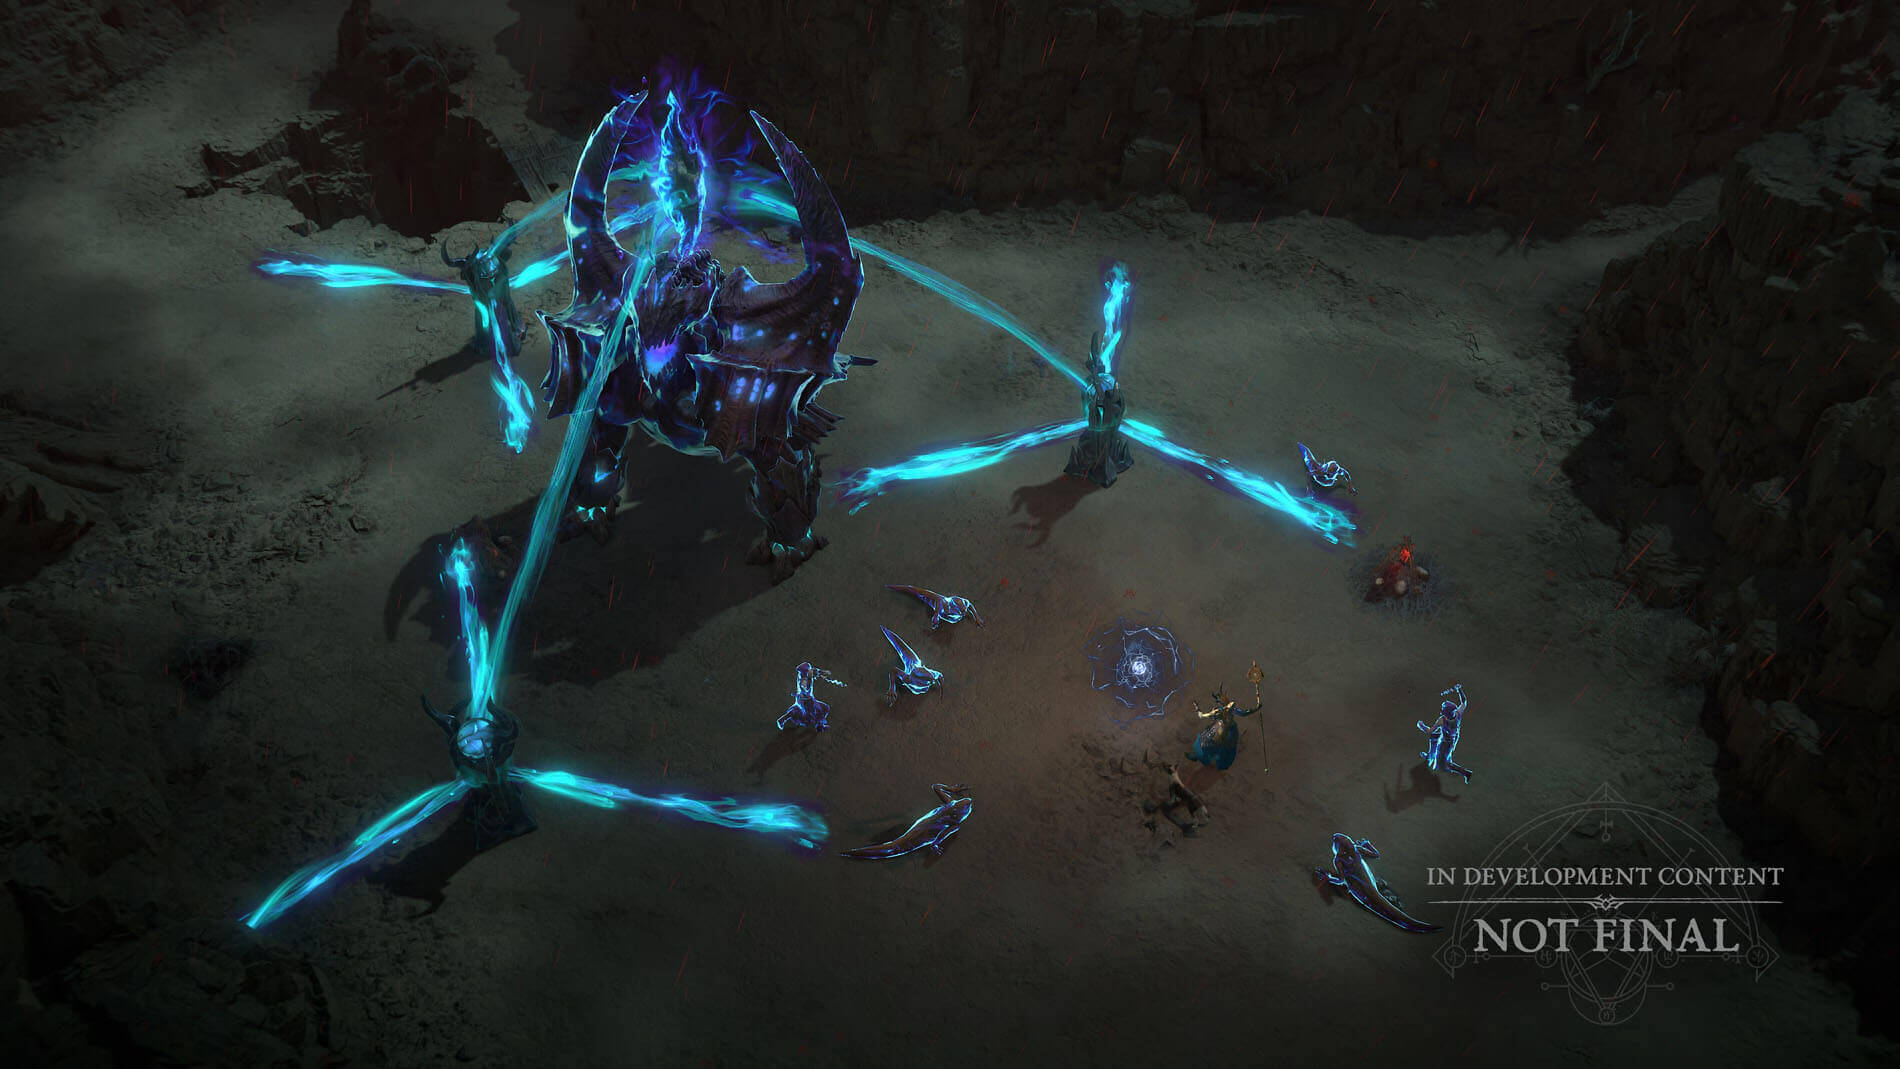 A vibrant endgame battle, Realmwalkers, are making a strong comeback in Season 14 with significant improvements to their integration. Players now have more direct ways to start these encounters, mostly via the Pandemonium Rupture system, rather than relying on totally random events. Normal Ruptures cannot summon Realmwalkers according to the new Realmwalker spawn restrictions. If the event is finished with Mastery, Surging Ruptures give you a possibility to call a Realmwalker. Crucially, Colossal Ruptures ensure a Realmwalker encounter upon completion. This improved system makes the last loop more consistent and targeted, allowing players to plan for particular incentives instead of depending just on the luck of the draw.
Successfully vanquishing a Realmwalker opens a portal to the Deathtoll Chamber, a completely fresh layer of bonus stuff. The Deathtoll Chamber is imagined as a small, single-room challenge dungeon packed tightly with rich rewards. There are two main ways to get into these chambers: by beating a Realmwalker or by setting off Rupture events inside Nightmare Dungeons. Players will finish specialized Rupture mechanics within that provide extra loot. The Deathtoll Chamber is most crucially the only place to get Betrayer's Husks, a new seasonal cash required to unlock prizes from the Season 14 Lair Boss. For those looking for efficient endgame farming, Deathtoll Chambers will almost certainly be an essential part of any successful strategy.
A vibrant endgame battle, Realmwalkers, are making a strong comeback in Season 14 with significant improvements to their integration. Players now have more direct ways to start these encounters, mostly via the Pandemonium Rupture system, rather than relying on totally random events. Normal Ruptures cannot summon Realmwalkers according to the new Realmwalker spawn restrictions. If the event is finished with Mastery, Surging Ruptures give you a possibility to call a Realmwalker. Crucially, Colossal Ruptures ensure a Realmwalker encounter upon completion. This improved system makes the last loop more consistent and targeted, allowing players to plan for particular incentives instead of depending just on the luck of the draw.
Successfully vanquishing a Realmwalker opens a portal to the Deathtoll Chamber, a completely fresh layer of bonus stuff. The Deathtoll Chamber is imagined as a small, single-room challenge dungeon packed tightly with rich rewards. There are two main ways to get into these chambers: by beating a Realmwalker or by setting off Rupture events inside Nightmare Dungeons. Players will finish specialized Rupture mechanics within that provide extra loot. The Deathtoll Chamber is most crucially the only place to get Betrayer's Husks, a new seasonal cash required to unlock prizes from the Season 14 Lair Boss. For those looking for efficient endgame farming, Deathtoll Chambers will almost certainly be an essential part of any successful strategy.
Meet The Risen: Diablo IV's New Monster Family
 Diablo IV's Season 14 marks a major change in its endgame material, bringing a set of new difficulties and concepts meant to stimulate player interest. Leading these transformations is the inclusion of "The Risen", a new monster family that significantly modifies fight mechanics. Along with this new adversary group, players may look forward to the introduction of a strong seasonal lair boss, the Corrupted Reaper, and a revolutionary redesign of the Mythic Unique itemization system. Moreover, the much-anticipated Tower and Leaderboard system formally emerges from beta, providing a structured competitive environment, while the cooperative War Plans system receives a vital quality-of-life update. Together, these components want to provide the Diablo IV community with both new gameplay experiences and more strategic complexity.
The Risen: A Strategic Shift in Combat
Season 14 brings The Risen, a new family of creatures noted for their distinct fighting style. A major opponent kind inside this group is the Gravehound, which unleashes strong orbs upon death. These orbs aren't stationary pickups; they actively move towards a powerful elite enemy called the Exarch. This mechanism gives players a vital tactical choice: either let the Exarch absorb the orbs and boost itself, or intercept the orbs to seize their inherent ability. This change elevates battles from a straightforward activity in enemy eradication to a more intentional and tactical interaction. Players must set priorities, assess orb intercept hazards and benefits, and adjust their strategy on the fly. This shift from merely speed-based clearing promotes a more deliberate approach to fighting, therefore adding complexity and re-playability to current encounters.The Corrupted Reaper: A New Endgame Bounty
 Arrival of the Corrupted Reaper, a strong new seasonal monster, further improves the endgame environment of Diablo IV. This monster may be found close to Zarbinzet and was accessible from Torment I and higher during Public Test Realm (PTR) testing; upon the official start of the season, it was unlocked through the seasonal storyline. The Corrupted Reaper is ready to be a much sought-after battle as a result of its significant benefits. Along with higher chances for vital Mythic upgrade materials and significant seasonal advancement prizes, it has the best drop rates for Mythic Unique items in the game. The appeal of these strong drops and progression advantages implies that the Corrupted Reaper may become among the most often battled encounters in Diablo IV's history, therefore providing a fascinating endgame goal for committed players.
Mythic Uniques 3. 0: Redefining Itemization
The whole remodelling of the Mythic Unique itemization scheme may be among the most significant alteration brought in Season 14. Mythic Uniques were once found in a very uncommon item tier, which made them quite hard to get. The new way of thinking turns Mythic into a quality modifier for items, which means that any Unique item could become Mythic. An amazing 30% increase is applied to a Unique item's current abilities as it is raised to Mythic quality. This core adjustment greatly improves build flexibility, enabling players to create strong combinations and explore a bigger range of item synergies. Several paths help one to get these improved objects: Pandemonium Fragments, a seasonal currency gained from seasonal reputation, caches, and Corrupted Reaper kills, may be utilized with the Horadric Cube to improve Uniques. Additionally awarded for seasonal development are class-specific Mythic Uniques. Additionally, Ancestral Unique items have a little possibility of naturally falling as Mythic. One major restriction is that players can only equip one constructed Mythic Unique; however, naturally dropped Mythics do not share this restriction, therefore maintaining game equilibrium while still homering extraordinary luck.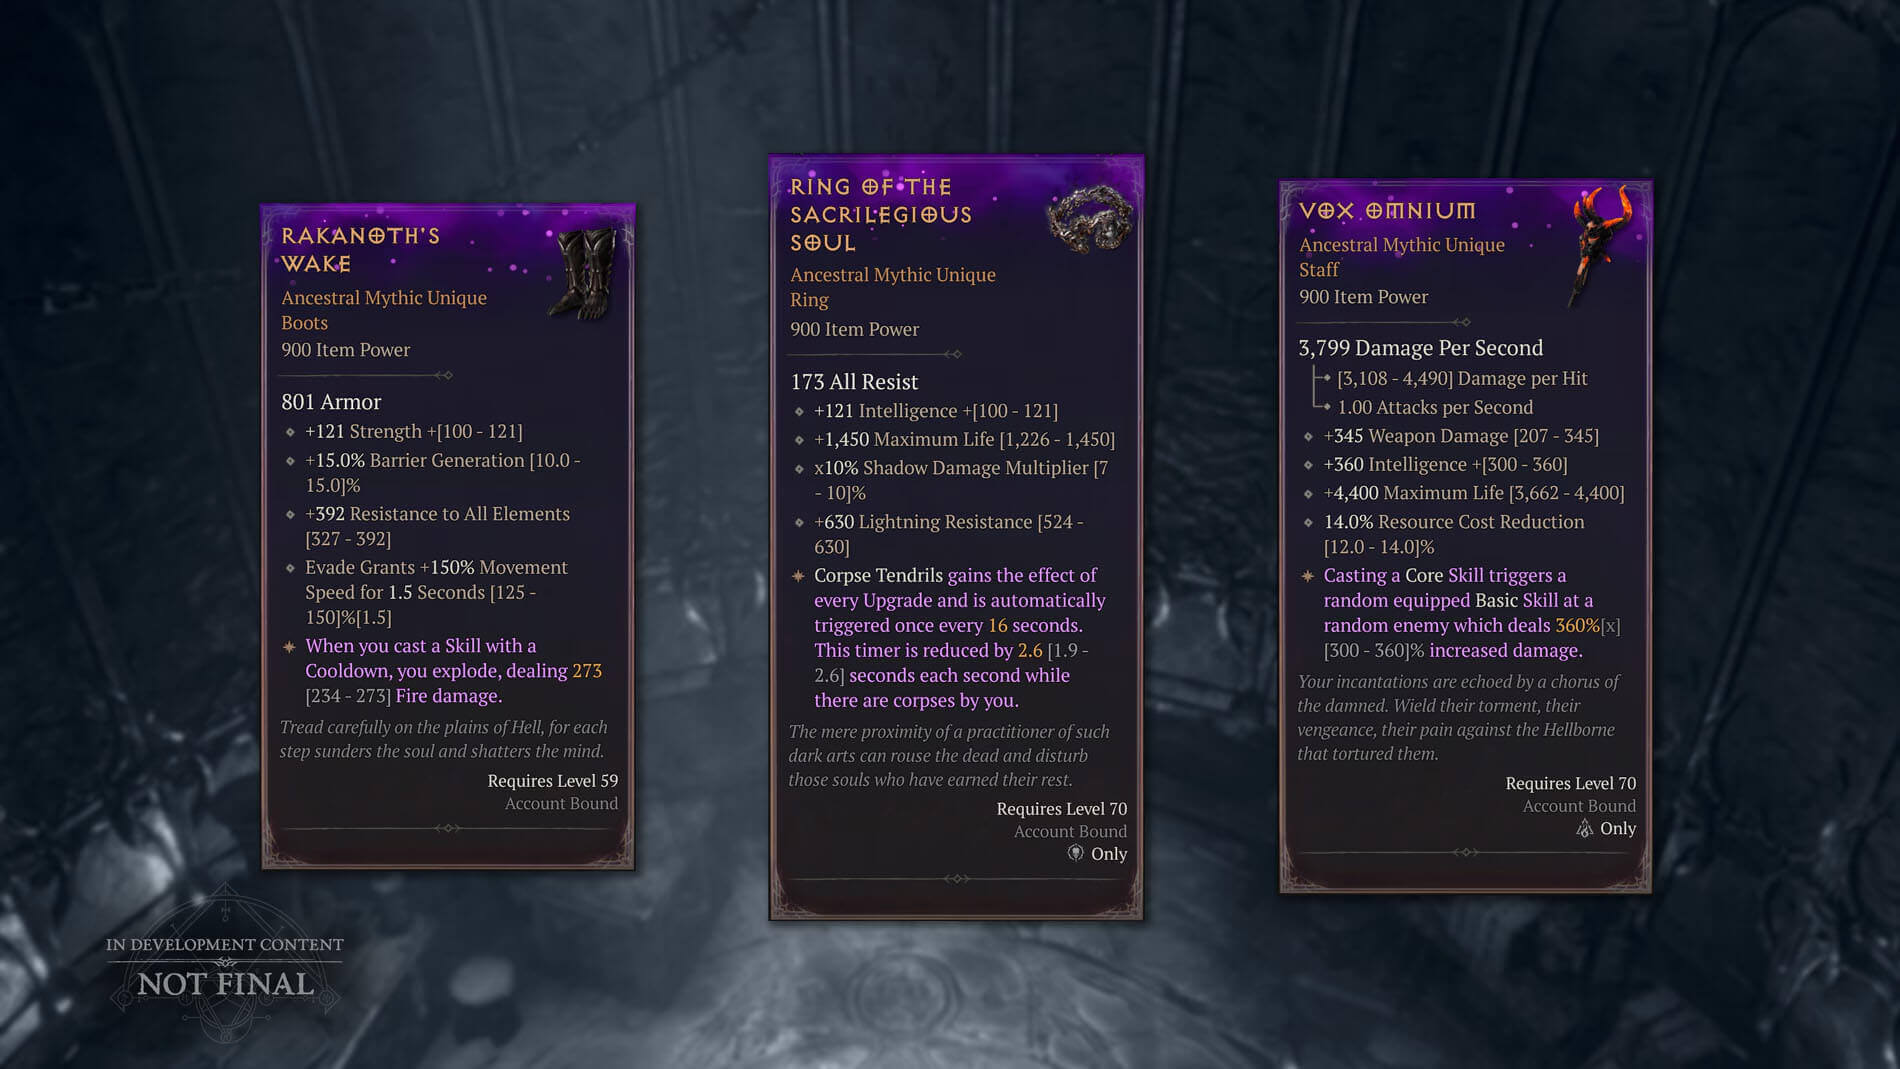
Tower and Leaderboards Emerge from Beta
The official debut of the Tower and Leaderboard system in Season 14 signals the end of its testing period. Special cosmetic incentives are being launched to mark this occasion. Weekly rewards at greater levels include halo cosmetics, prestige titles, gear caches, and higher odds for Unique item drops. The competitive reward tiers are set up to grow with participation, giving big rewards for hitting Tier 100, getting into the Top 1000, Top 500, Top 100, Top 10, and finally Rank 1. Players will also receive exclusive emblems at the end of the season signifying their highest achieved rank. This method is meant to give competitive gamers a distinct and significant goal for driving leaderboard ranks across the season.War Plans Go Party Friendly
 The modification of War Plans to make them party friendly is a less well-known but nevertheless very important enhancement coming with Season 14. In the past, synchronising progress goals with friends might have been a laborious undertaking. Players can synchronize their whole War Plan board with party members thanks to the new system. Once Marks of El'Druin are used and group approval is obtained, every member of the party will get the same plan layout. This improvement greatly simplifies collaborative development by eliminating many of the annoyances connected with divergent goals and promoting a more harmonious group experience.
Horadric Cube Gets More Crafting Power
Enhancements to the Horadric Cube, the debut of a dedicated Solo Self Found mode, and a series of quality-of-life upgrades lead these changes. Taken together, these changes show that Blizzard is dedicated to responding to community input and creating a more interesting and fulfilling experience for players, especially in the later stages of character development. Greater player agency in influencing their character's power and different routes for those looking for ultimate personal difficulty or exquisite optimization seem to be the overall aims.Revamped Horadric Cube for Enhanced Crafting
A major improvement to the Horadric Cube, a crucial component of item optimization in Diablo games, in Season 14 guarantees to turn it into an even more effective weapon for players trying to improve their equipment. The improvements aim at delivering more focused and deliberate techniques for rerolling item affixes, so lowering the randomness that might sometimes cause annoyance. Crucially for gamers aiming to build particular set-ups, "Focused Rerolls for Unique items" will give players more control over which affixes are sought for enhancement on unique equipment. Adding to this is "Chaotic Rerolls for Uniques", which provide a different path for unique item transformation while keeping an element of unpredictability. Moreover, "Unique Power Rerolls for select items" offers an extra degree of control whereby gamers may modify the fundamental powers of particular unique items. "Improved Chromatic Tuning Prism results" point to a more consistent and advantageous engagement with the current system. Together, these improvements enable players to lessen the grind connected with getting perfect equipment, hence promoting a more fulfilling endgame loop where work is more immediately rewarded. This improvement of the crafting system is a major step toward guaranteeing that players may reach their intended builds depending less on luck alone.The Arrival of Solo Self Found
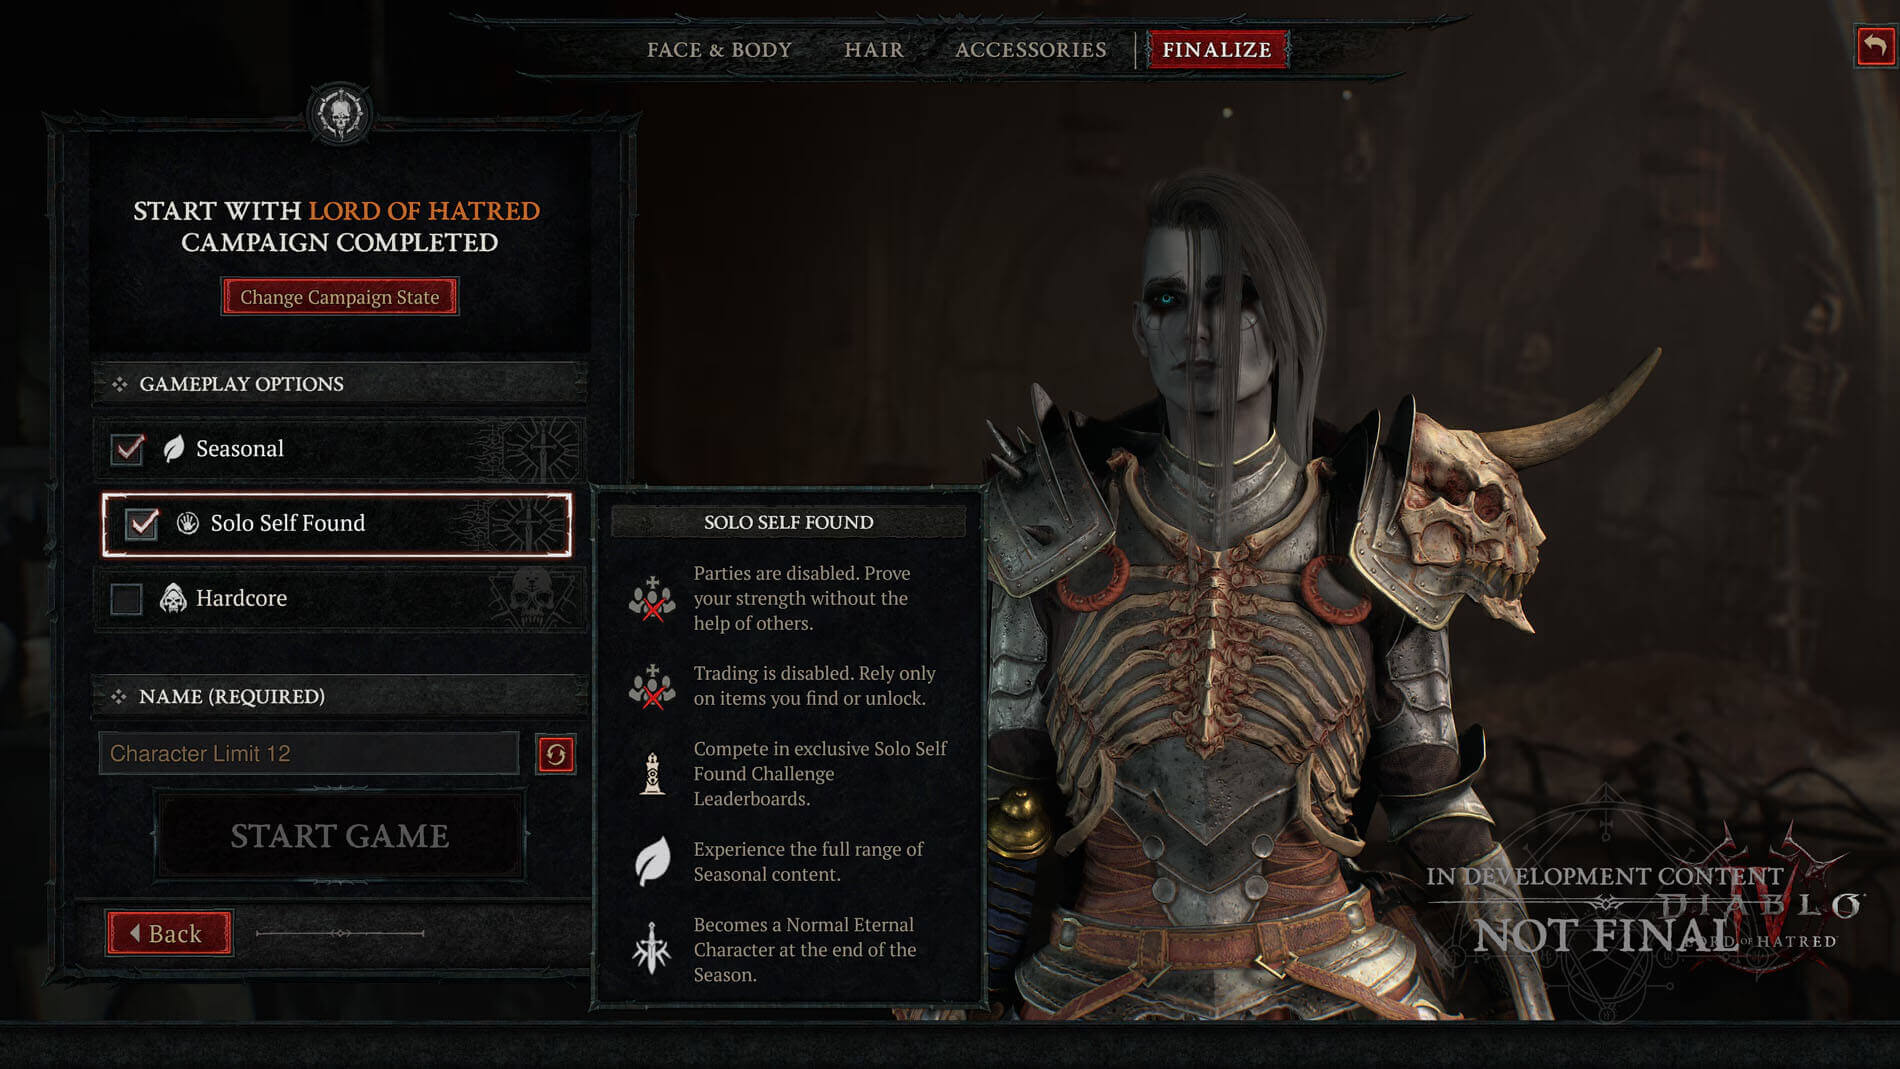 The long-requested "Solo Self Found" (SSF) mode is possibly the most significant new feature of Diablo IV in Season 14. This special game mode is for the purist player who wants to face the difficulties of Sanctuary only through their own work. Strict self-imposed restrictions apply to SSF characters: they cannot join parties, trade with other players, or profit from shared progression outside of other SSF characters on the same account. The mode's core is this isolation; it offers a "purer progression experience", as intended by its supporters. The attraction of SSF comes from the increased feeling of success from conquering every challenge without outside help. Dedicated leaderboards for SSF players would provide a new competitive aspect, acknowledging individual accomplishments in a really unadulterated manner. This mode pushes players to their limits and encourages a better knowledge of game mechanics and build synergy for a more difficult endgame. The launch of SSF represents a major turning point, recognizing and serving a key group of the Diablo community who appreciate self-reliance and individual success most highly.
General and Systems Updates
The limit on Obols at 25,000 is a significant change in the Season 14 PTR. This modification aims to simplify inventory management and promote more regular interactions with Obol merchants, therefore discouraging gamers from amassing large quantities without really utilizing them. Moreover, the PTR adds missing minimap icons for important objects inside Nightmare Dungeons and The Pit, a quality-of-life change that will clearly help gamers negotiate these difficult regions more successfully. Including formerly missing Boss Trophy items for Astaroth and Bartoc as well as their combined recipes in the Horadric Cube adds more depth to the cosmetic and collection features of the game, giving players new long-term objectives. Although relatively small on their own, these general improvements help to create a more enjoyable gameplay experience by responding to player comments on usability and collecting incentives.War Plan Evolution
A key element of recent Diablo IV seasons, the War Plan system, receives significant focus in the Season 14 PTR. Particularly from Torment VIII upward, the experience scaling for War Plan operations has been much improved, implying an attempt to make these endgame activities more rewarding for high-level players. The base activity XP of Infernal Hordes has also been raised, therefore encouraging more interaction with this material. A significant modification to the Helltide War Plan progress shifts the focus from merely opening chests to gathering a certain quantity of Cinders: 75 across Normal through Penitent difficulties and 300 in Torment 1+. This change seeks to provide Helltides an experience that is more active and goal-oriented. The addition of new War Plan quests and nodes, particularly for Long Helltide and Escalation Sigils, signals an increase in the strategic complexity of the War Plan, providing players with fresh paths for advancement and tactical planning inside the seasonal structures of the game.PTR Testing Infrastructure and Boosts
The PTR will be accessible in several international areas, such as North America, Europe, Korea, Japan, South America, and Australia, to enable thorough testing. This vast geographic scope guarantees a varied testing population. Mrak is the PTR Boost NPC that can be found in big cities next to the main Waypoints. This NPC is a key feature for easy testing. Mrak offers a full set of enhancements to speed up player development, enabling testers to rapidly reach and assess endgame material. These increases come in the form of grants of Gold, Obols, all materials, Masterworking, Temper Manuals, Lair Keys, Tributes, Infernal Compasses, and Nightmare Escalation Sigils. Equipment-focused boosts include all Runes, Max All Aspects, Random Legendaries, all Uniques, and Talisman Items. Paragon boosts give all Glyphs and Max All Glyphs. Progression boosts instantly complete the campaign and all Strongholds, unlock Whispers and the Artificer's Obelisk, set the character level to 70, unlock all Waypoints and reveal the map, and grant all Skill and Paragon points. Additionally, players can unlock all Torment Tiers, and unlock and max War Plans. There are also seasonal products like Pandemonium Fragments. Significantly, several of these boosts highlighted in blue have undergone changes since the previous PTR, indicating continuous improvement of the testing environment itself. Mrak's demand for Level 7 Helms and Level 15 Amulets promotes fundamental advancement before these particular equipment slots are available.Fourfold Revival Anniversary Update
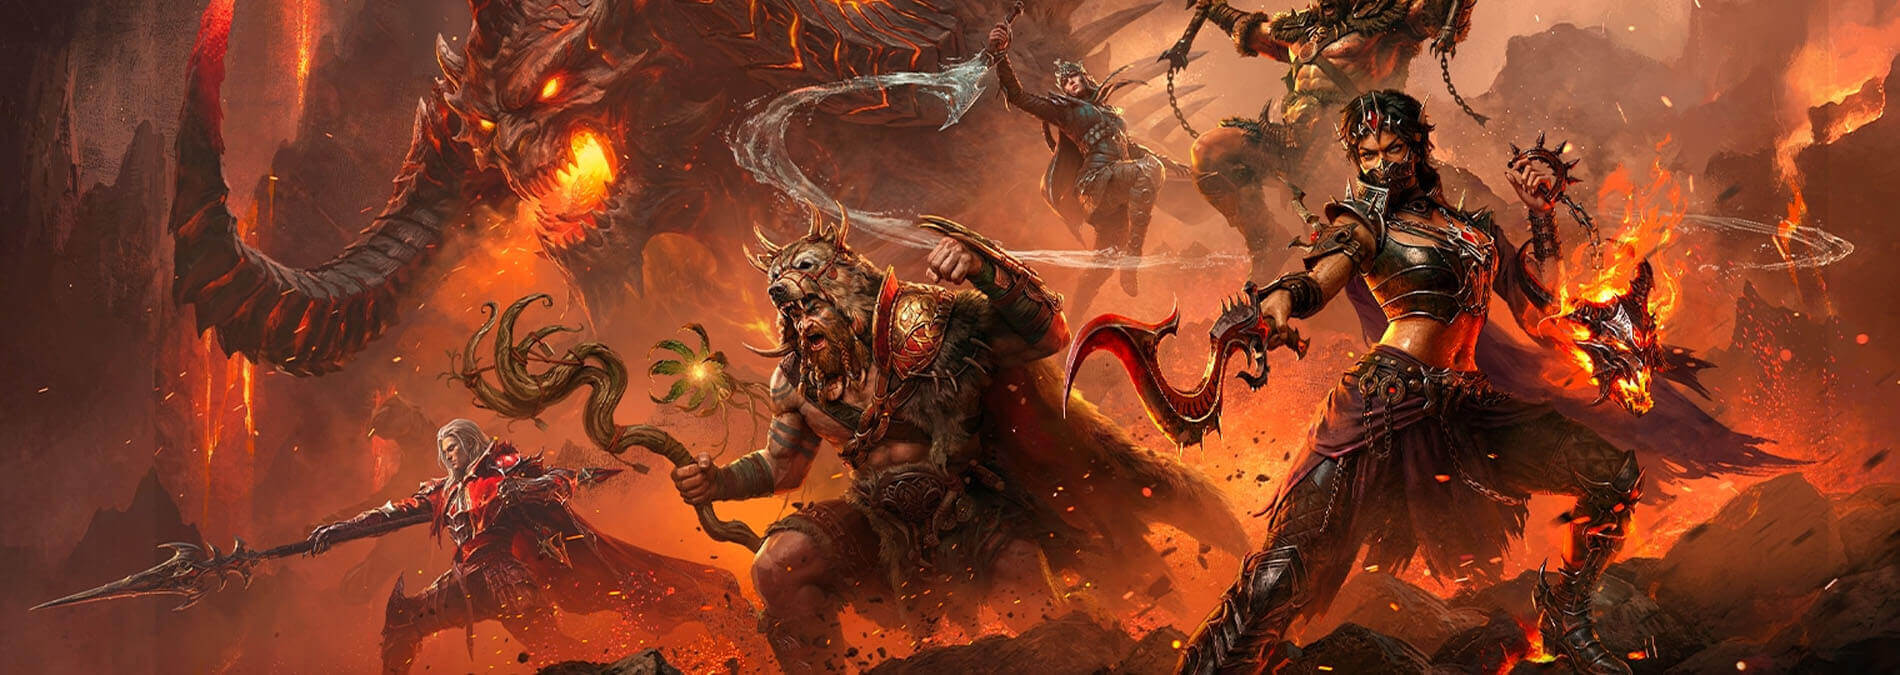
Another year has passed in the bleak and brutal realm of Sanctuary defined by the relentless hunt of demonic foes and the discovery of mighty legendary items. Recognizing this milestone, Blizzard Entertainment is celebrating Diablo Immortal's fourth birthday with a sizable content release. Called the Fourfold Revival, this celebration promises a month-long festival full of incentives, entertaining activities, competitive arenas, and vital quality-of-life improvements. Following a recent crossover with StarCraft, which introduced players to the hazards of Zerg invasions and the powerful Tal'Darim, the focus now turns completely to celebrating Diablo Immortal's journey through a deliberately chosen series of in-game activities meant to appeal to both seasoned adventurers and newcomers.
The Fourfold Revival: A Central Pillar of Celebration
Central to this anniversary update is the Fourfold Revival event itself, planned to take place between June 1st and June 17th. This all-encompassing celebration provides a single anniversary experience by bringing together many unique events. The ultimate objective is to reward players for their commitment, regardless of how long they have spent in Sanctuary. Logging in during this time will give every player a distinctive Warlock-themed Anniversary Avatar Frame, therefore offering a permanent memento of the game's fourth year. But this cosmetic delight is only the entryway to a plethora of chances. Players can actively participate in many activities meant to produce useful in-game assets all during the event. Among these are desired Legendary Crests, strong Set Items that may significantly change character builds, unique cosmetic gear, even a unique cosmetic look for their familiars.
Trial of True Evils: Confronting Sanctuary's Greatest Threats
Among the most awaited aspects of the anniversary celebration is the Trial of True Evils. This unique occasion pushes players to go up against four of Diablo Immortal's most recognizable and powerful bosses: Diablo, Iphael, Vitaath, and Saarodan. These meetings are not typical boss battles; they have been painstakingly recreated as anniversary challenges, with the difficulty dynamically adjusting to match each player's present power level. Whether they are just starting their adventure or are already experienced endgame players, this well-considered design guarantees that the trials remain an intriguing and engaging experience for all. The progressive unlock mechanism for these bosses inspires continuous interaction. Rather than having all encounters available from the outset, bosses will become accessible gradually over the event's duration. This phased strategy encourages players to come back frequently so they can perfect every single boss fight before facing the ultimate gauntlet, in which all four may be confronted in a relentless sequence. Successful completion of these rigorous challenges will earn players unique incentives, including the much sought-after Hellbinder Butchie Familiar Transmogrification, Legendary Crests, powerful Legendary Equipment, useful Set Items, and a range of vital upgrade materials. Particularly, the Hellbinder Butchie cosmetic is ready to be a sought-after item for devoted collectors.
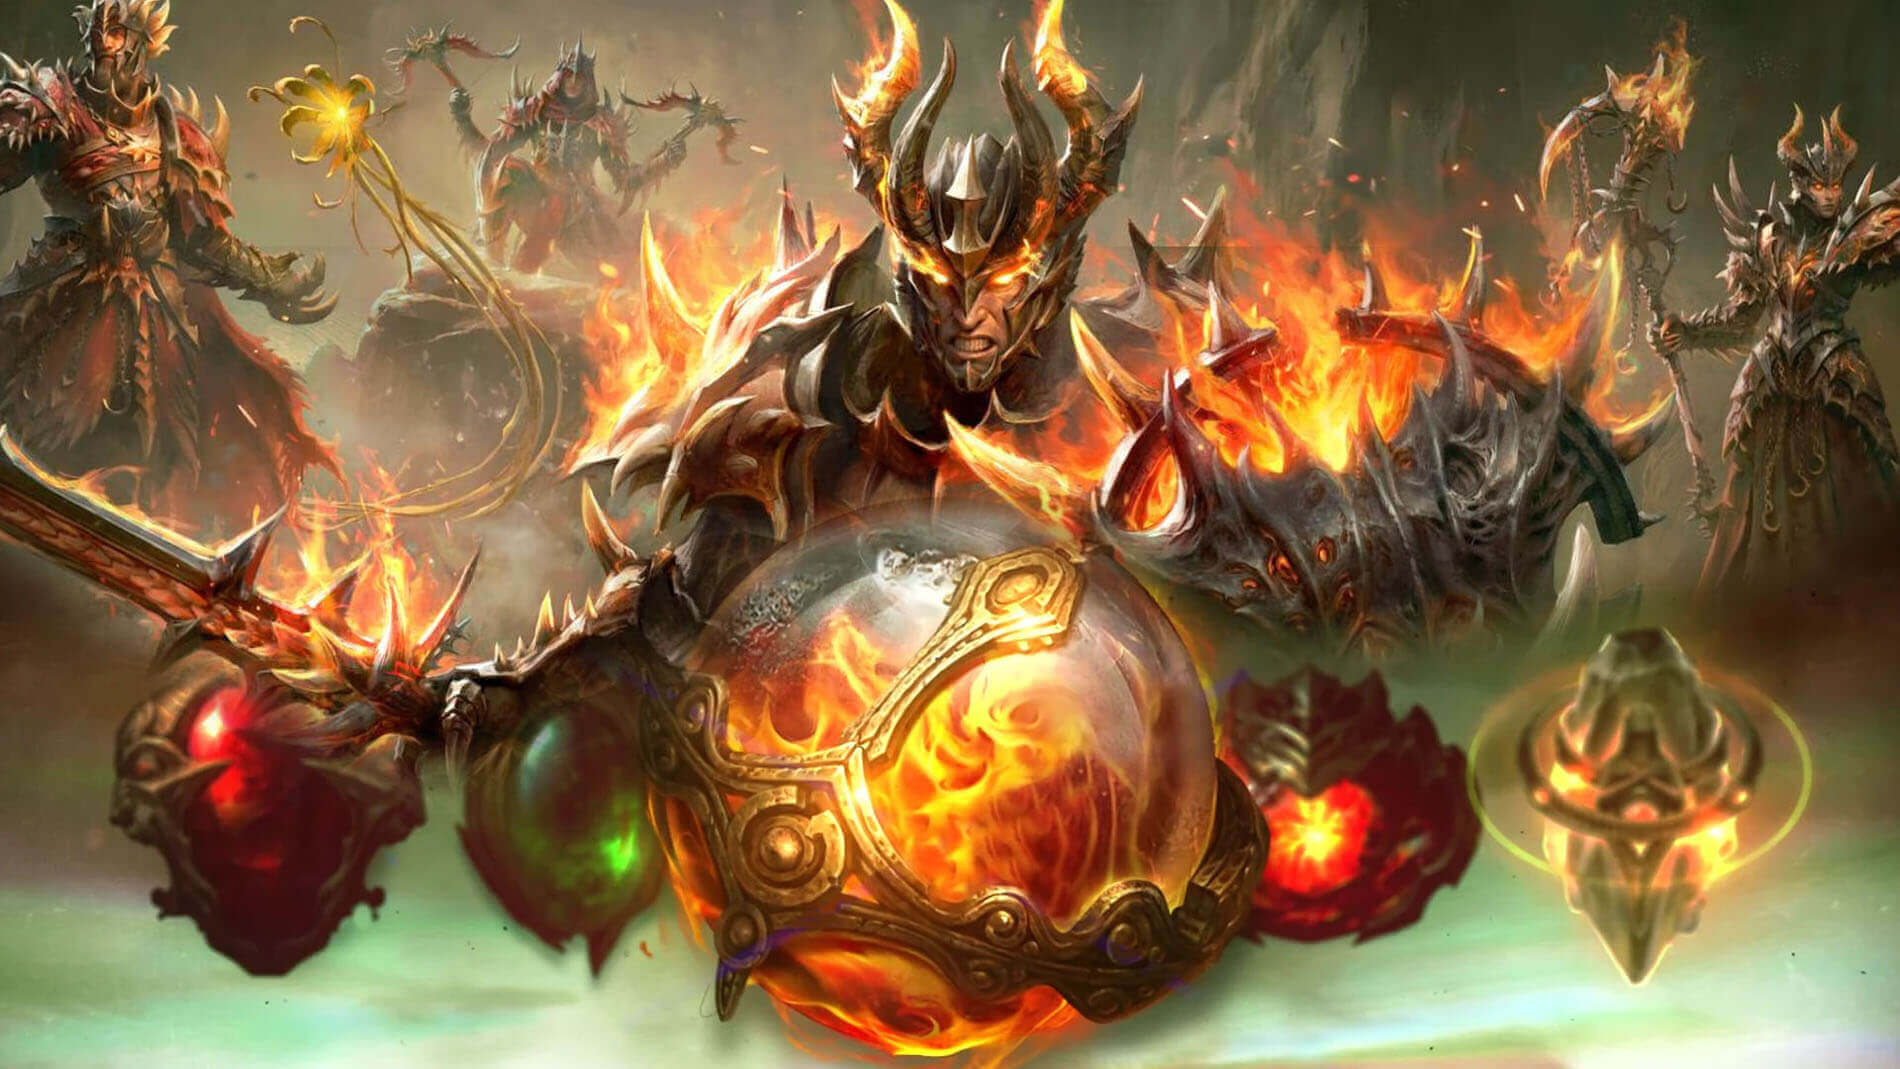
Legendary Gem Trial: Experiencing Endgame Potency
The Legendary Gem Trial is one especially player-centric feature added for this anniversary event. This function, which is accessible from June 1st to June 17th, lets players temporarily equip and experiment with a fully upgraded Rank 5 Legendary Gem for a whole hour. The timer of this system is clever as it only keeps track of the time players spend in the game. Logging off or having a disconnection will stop the countdown, hence giving players plenty of opportunity to properly test several legendary jewels without feeling under pressure. Several strategic goals inside the game's ecosystem are advanced by this project. Players have a great chance to evaluate the effects of premium jewels before investing actual money. Moreover, it helps players maximize their present character builds and provides new users a real taste of the strength attainable at the endgame. Additionally, this feature is meant to motivate experimentation across several character classes, perhaps exposing fresh and potent build synergies. Many people will have their first encounter with the revolutionary potential of a completely ranked Legendary Gem through this trial.
Chaos Convoy Season 2: A Renewed Arena of Conflict
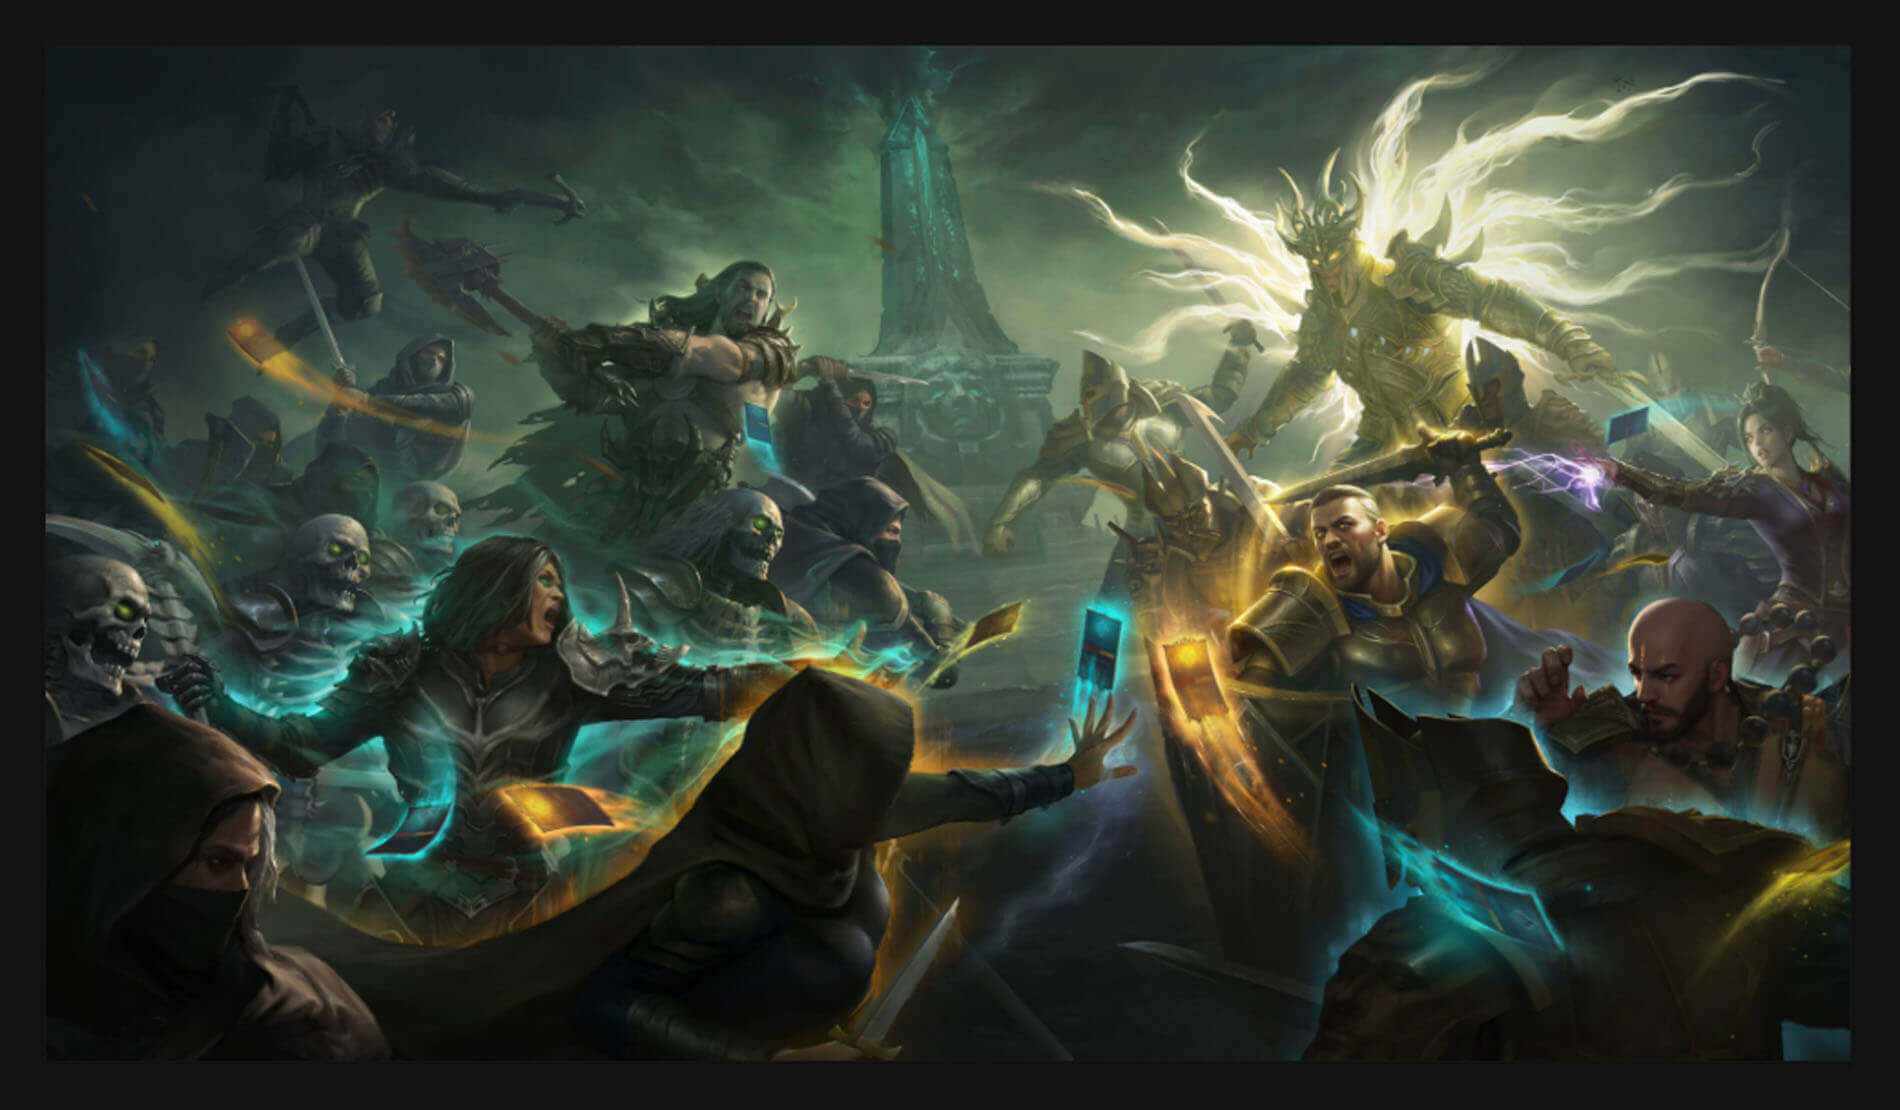
With the return of Chaos Convoy starting on May 27 and finishing on July 13, player vs player fans have yet more reason for celebration. This version of Chaos Convoy adds a new Battleground experience that stresses player advancement inside a single match. Participants will enhance their fighting skills by obtaining random buffs called Gifts of Corvus, which are deliberately dispersed across the arena. This dynamic mechanism guarantees that no two matches are ever exactly the same, therefore demanding flexibility and rapid decision-making from all engaged. The inclusion of these unusual features seeks to rekindle the competitive spirit inside Diablo Immortal's player community.
Chaos Convoy and Competitive Play
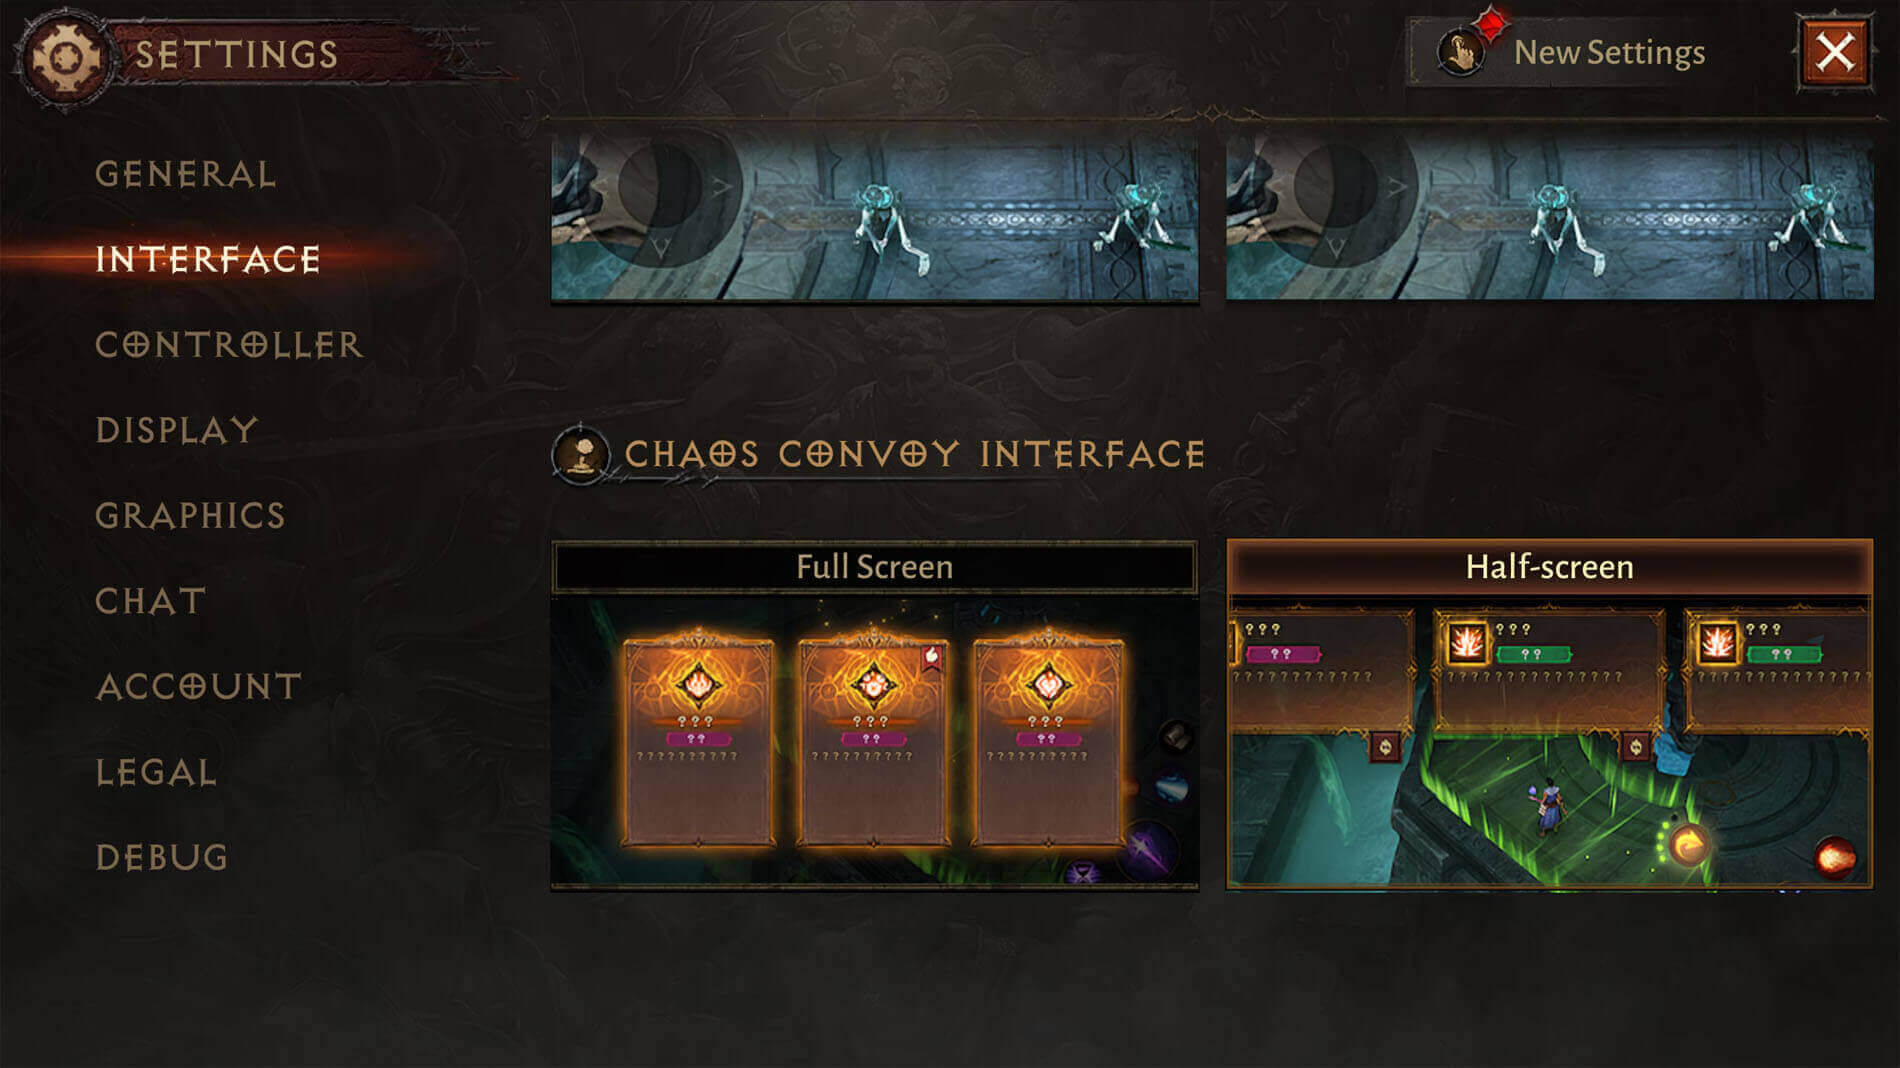
The Chaos Convoy is a major addition to the PvP environment of Diablo Immortal. This roguelike-style combat arena is different because it challenges players to adapt their strategies to their skill. Players are given a random assortment of Gifts before every game, and extra possibilities become available every minute. These gifts greatly affect fight effectiveness by offering a wide range of buffs, from reduced cooldowns and spectral weapon summons to higher damage over time and improved movement speed. No two Chaos Convoy matches are the same, with more than a hundred different Gifts, therefore requiring ongoing strategic adjustments and resulting in a very re-playable PvP experience. Moreover, players are entitled to double Battleground rewards throughout the Chaos Convoy's active period, therefore making it an especially fulfilling activity for individuals trying to advance the ranks and obtain useful equipment. Blizzard has also improved the player experience with better matchmaking systems, balance changes guided by player data, and an improved interface for card selection, including a half-screen mode for fluid gameplay.
The Chaos Convoy is complemented by the Bout of Realms Championships, which give competitive players a chance to show what they can do. In this competition style, teams of eight players from different servers compete against each other in an attempt to achieve regional dominance. The updated tournament schedule, running from late May to mid-June, focuses on regional competition instead of cross-regional conflicts. This strategic change seeks to create a more accessible and interesting competitive scene, therefore allowing more teams to compete frequently and develop a more visible presence in their local areas.
Winds of Fortune and Gear Optimization
For players who are mostly interested in character development, the Winds of Fortune event stands out as a high point of the anniversary update. This event runs from June 10 to June 17 and greatly increases rewards for a wide range of in-game activities. Players can anticipate double prizes for Gold, Experience, Regular Gems, Legendary Items, Battle Pass Points, Dungeon completions, Hidden Lair explorations, Challenge Rifts, and Bounties. This comprehensive incentive mechanism is initiated by a unique 24-hour buff that players can activate at their convenience throughout the event time, making it an excellent time for them to enhance their gear, advance their Paragon trees, and accumulate vital supplies.
Set Gear Reforging is a very interesting endgame mechanic that was added during the anniversary. This functionality offers a mechanism to turn common duplicate Set Items into more powerful versions, therefore tackling that problem. Players can forge a new, improved item with improved stat potential by combining three identical Set pieces from the same slot and set classification. The reforging process produces different results, with opportunities for 2 Attributes and 2 Affixes, 3 Attributes and 2 Affixes, or the much sought-after 3 Attributes and 3 Affixes. This system provides a clear path for players looking for the best gear optimization and gives duplicate gear real worth.
Cosmetic Enhancements and More
The Delayed Pain Battle Pass completes the anniversary party by bringing in a fresh cosmetic collection for gamers that value aesthetic customization. This dark and menacing armor set, which has jagged spikes, fiery visual effects, and an aggressive demonic design, offers a unique appearance for individuals who gather it throughout Seasons 53 to 55.
The Eastgate Vestry Warm-Up Event and Rotating Challenges
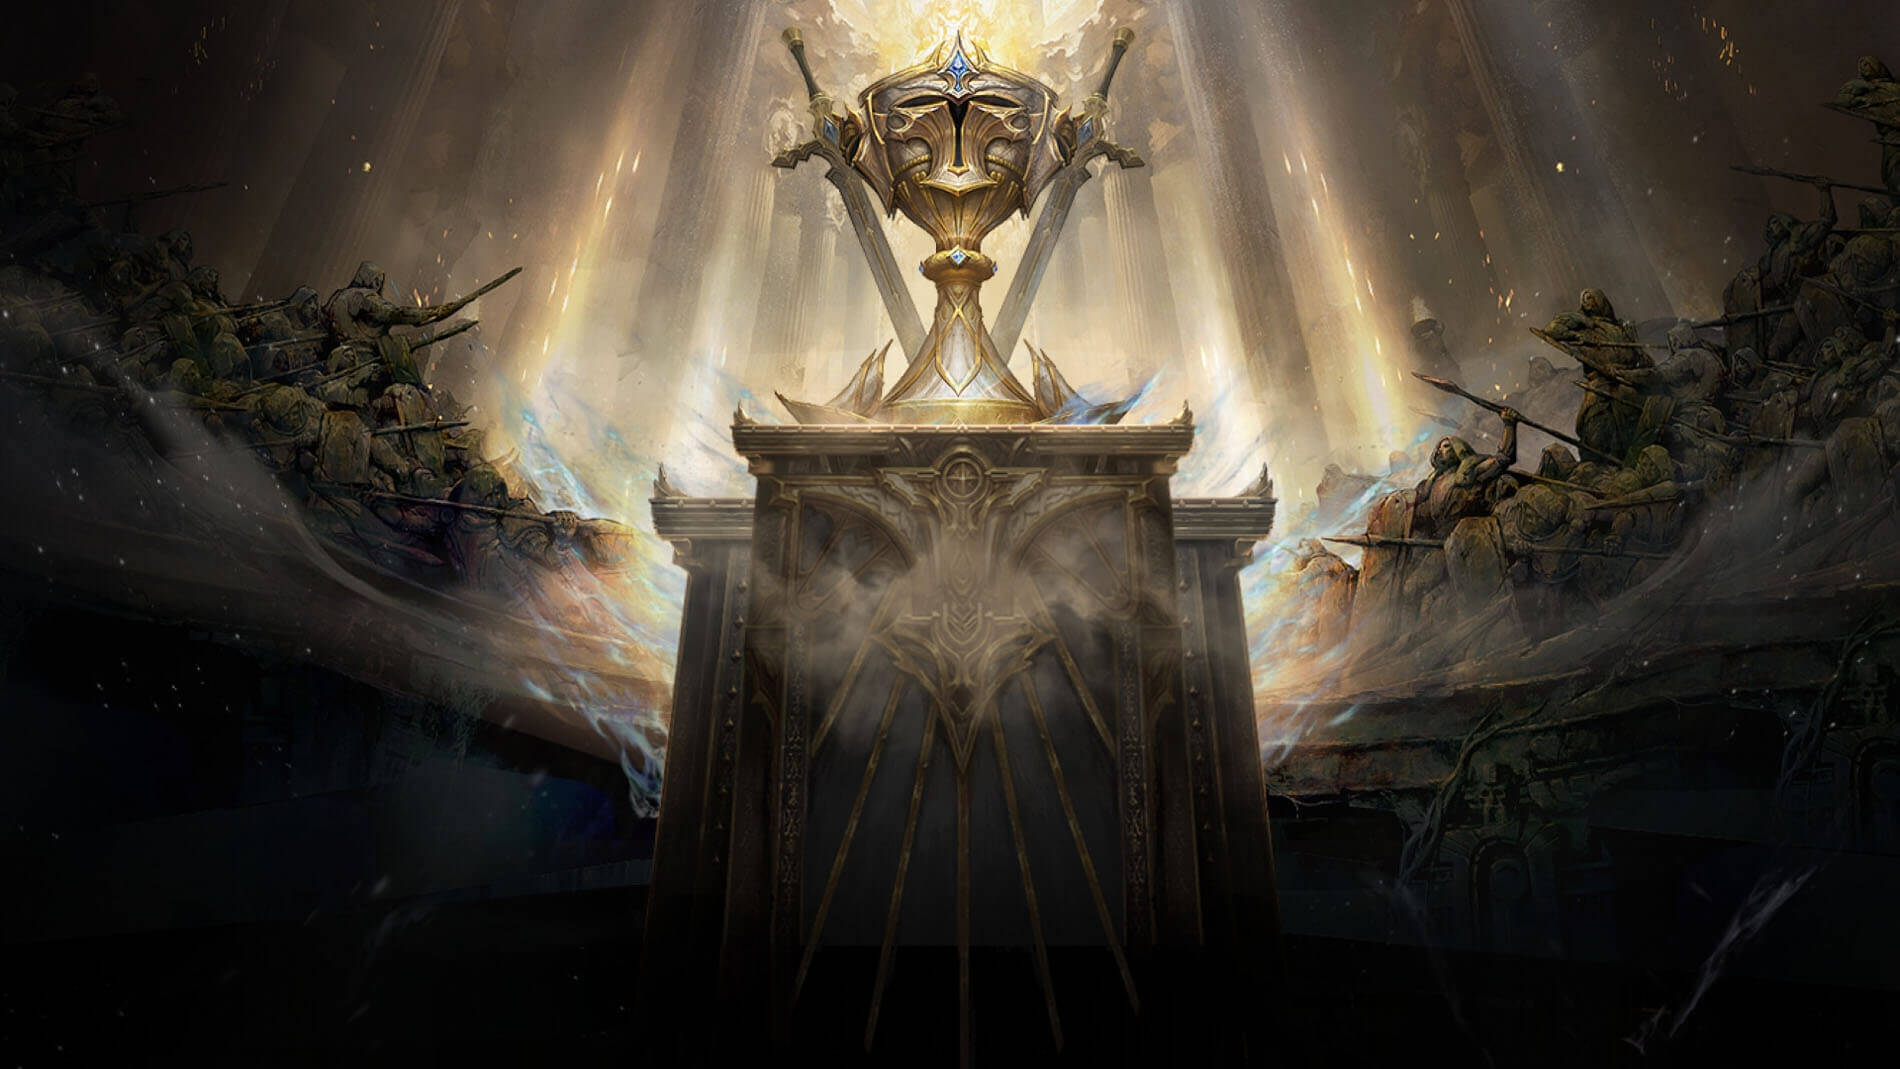
The Eastgate Vestry Warm-Up Event, a collection of spinning game modes meant to keep players interested all through June, is a centrepiece of the anniversary celebration. This event presents unusual difficulties testing various facets of player ability and strategic thinking. Players can take part in Survivor's Bane from June 10 to June 17, a game mode that stresses stamina and resource management in a survival-focused challenge. Following this, from June 17th to June 24th, the Trial of the Hordes will assess players' fighting ability against progressively harder waves of adversaries, therefore necessitating strategic usage of skills and deliberate prioritizing of targets. The event ends with the Wild Brawl, which takes place from June 24th to July 1st. It moves quickly and has a lot of player-versus-player action with an element of surprise, which makes for exciting battles. Finishing these different tasks gives useful advancement incentives that serve as a springboard for players getting ready for future content releases and the more difficult challenges that await.
Class Balance Adjustments for Enhanced Gameplay
Beyond the events, the anniversary update introduces focused changes to multiple character classes aimed at improving gameplay balance and boosting underutilized builds. The Blood Knight class experiences a significant alteration with the lowering of the tracking range for its boosted Abomination Primary Attack. This modification aims to provide more possibilities for counterplay, hence avoiding the impression that the ability is excessively dominant in some settings. The Demon Hunter gets important boosts to particular powers. The damage from Fume Threads has been significantly increased, and the bonus damage from returning Chakrams for Supply Everlasting has been doubled from 40% to 80%. These changes should increase the viability of formerly less sought-after Demon Hunter builds, therefore providing gamers with more choices for fighting. The Wizard class also gains from an improvement to Lissana's Sorrow whereby critical hits while empowered can now freeze foes in an area. To keep equilibrium, this crowd-control impact is limited to once every 1. 5 seconds, therefore offering a strong weapon for area denial and control without being excessive.
Significant Quality-of-Life Improvements
Additionally, Blizzard added several much-sought qualities of life upgrades that greatly improve the daily gaming experience. The Market's Gem filtering system has been upgraded to include always visible target gem filtering. This greatly simplifies player planning of builds and obtaining of the exact jewels required, therefore lowering friction in the gearing process. The buff panel has been enhanced as well; players can now pin the buff panel to stop its continuous reordering of effects. This apparently small modification significantly increases fighting readability, therefore enabling players to more readily follow active buffs and debuffs without visual interruption. Moreover, the skipping of the chase scenario has alleviated the irritation experienced during several Flesh Harvest quest replays. With Update 5. 0. 0, the conversion of Fabled Wisps is also simplified as Inferno 7-9 Fabled Wisps will be automatically transformed into Universal Fabled Wisps. This modification helps gamers get ready for greater Inferno levels by simplifying crafting advancement and lowering inventory mess.