Blizzard Quote [source]
The media section of our Diablo III website includes your submitted comics and fan art, in addition to Blizzard screenshots, wallpapers, artwork, videos, audio clips, and much more. When you submit a piece of original Diablo fan art to us, there’s a chance that we’ll highlight it here!
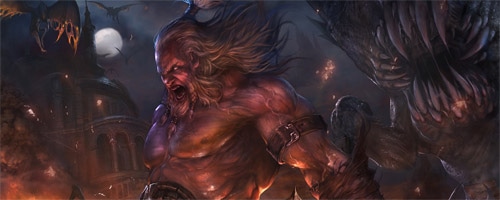
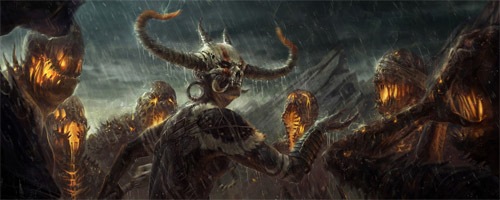
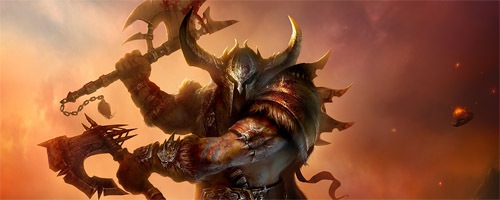
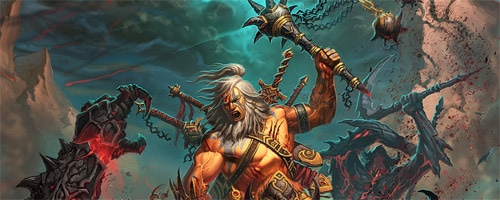
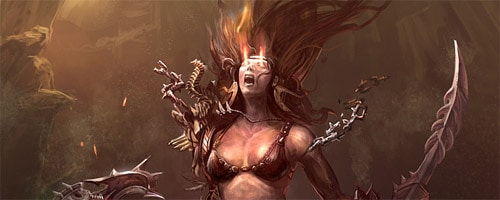
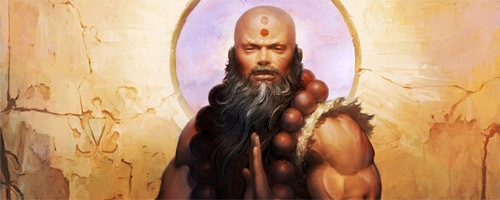
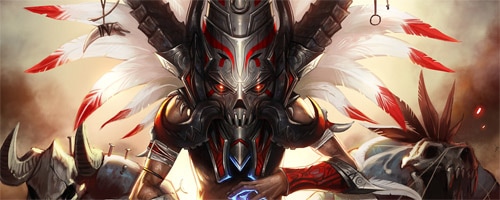
We recently added ten winning illustrations from last year's Portrait of a Champion art contest to the Diablo Fan Art Section. You can check out these impressive pieces below.
Winners:
by Yang Mansik (Yam)
"Rain Dance" by Dylan Pierpont
"Victorious" Dmitriy Prozorov (Tamplier)
Runners Up:

"Wiz n Chant" by Isuardi Therianto (ijur)
"Barbarian" by Turovec Konstantin (KAaSTuroveC)
by Sehyun Kim (PRU)
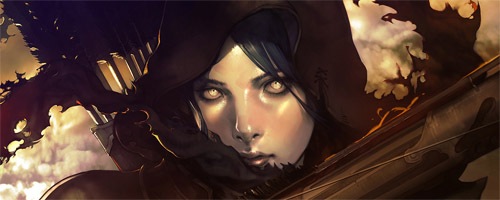
"Demon Hunter" by Sung-a Park (Kyrie)
"Shadow Power" by Jimmy Xu
by JiHun Lee
by Kim Tae Kyeong (Sia)
Interested in sharing your own original work with the Diablo community? Read our Terms and Conditions of Fan Art Submissions to Blizzard Entertainment, and then submit your piece of fan art here.
Keen on contests? Considering entering the Blizzard Comic Contest by creating a fun original comic based on the Warcraft, Diablo, or StarCraft universe and submit it to us for a chance at some fabulous prizes we give away each month!
We look forward to seeing the results of your creativity!
Blizzard Quote [source]
Hey all, update on this.
1.0.8 will now have XP shrines multiplicative, and MF/GF from Fortune shrines will exceed the 300% cap.
Blizzard Quote [source]
As an aside, we realize XP shrines aren't useful to players who are P100. I want to acknowledge the issue but you won't see any changes to address this in 1.0.8. We also realize that the MF/GF 25% from Fortune Shrines is small relative to the 300% you already have when you are P100. Again, something we could look to improve in the future, but not in 1.0.8. For 1.0.8 we're only going with the change to exceed the cap.Blizzard Quote [source]
In the latest PTR patch notes for build 16033, we noted that "certain areas in Act I and Act II have received further adjustments to Monster Density." We've seen some players ask what zones this change applies to, so here's a bit more information.Zones that are bolded received a straight-up buff to their density.
Zones that are italicized were slightly nerfed.
All other zones had monster spawns adjusted to make them feel more "clumpy."
Act I:
- The Lyceum
- Cave of the Moon Clan Level 1
- Weeping Hollow
- Cathedral Level 1
- Cathedral Level 2
- Leoric’s Hunting Grounds
- Whimsyshire
Act II:
- Realm of Shadow
- Dahlgur Oasis
- Vile Cavern
- The Storm Halls
- The Unknown Depths
- The Eastern Channel
- The Western Channel
Thank you to everyone who's posted about the density changes so far; your feedback is incredibly appreciated. We're still fine tuning monster density across all Acts, so please be sure to keep sharing your thoughts and experiences from the PTR. :)
Blizzard Quote [source]
Updates to patch notes can be found in red. Last updated April 15 at 5:30 p.m. PDT.
Below you'll find the preliminary PTR patch notes for 1.0.8. Please note that this isn't the final version of the 1.0.8 notes and that some changes may not be documented or described in full detail.
To provide feedback on these changes, please visit the PTR Feedback forum. To report any issues you experience while playing, please visit the the PTR Bug Report forum. Additional information about the PTR can be found in the PTR FAQ.

PTR PATCH 1.0.8 – v.1.0.8.15858
These notes will be updated through the course of the testing process. Please be aware some changes may not go live until a new PTR build is released.
Table of Contents
- PTR
- General
- Achievements
- Auction House
- Battle.net
- Bosses
- Classes
- Crafting
- Monsters
- Quests
- User Inferface
- Bug Fixes
PTR SPECIFIC CHANGES
- Certain areas in Act I and Act II have received further adjustments to Monster Density
GENERAL
- Players can now identify all items in their inventory by speaking to Deckard Cain or by using the Book of Cain that can be found near the shared stash in all Acts
- The cooldown incurred by changing skills outside of town on Inferno difficulty has been reduced to 30 seconds (down from 60 seconds)
- There is now an option in Video Settings to lock the cursor to the window when in fullscreen windowed mode, if Diablo III is the active window
- Multiplayer Co-Op
- Players now receive a 10% bonus to Magic Find, Gold Find, and Experience per additional player in a multiplayer game, up to a maximum of 30% in a four-player game
- The Magic Find and Gold Find bonuses can exceed their respective 300% caps
- The Experience bonus can stack with other bonuses from items and Monster Power (the bonuses will stack multiplicatively)
- A notification is now sent to all players in a multiplayer game whenever a party member engages an Elite monster or Treasure Goblin in combat, and their location will be shown on the mini-map
- In addition to this, an icon will also appear over player banners in town to indicate if they're in combat with a monster, Elite monster, or Treasure Goblin
- Players now receive a 10% bonus to Magic Find, Gold Find, and Experience per additional player in a multiplayer game, up to a maximum of 30% in a four-player game
ACHIEVEMENTS
- Bug Fixes
- Fixed a bug that prevented monsters killed by a follower or pet, before being attacked by a player, from counting toward achievement criteria
AUCTION HOUSE
- User Interface
- Tooltips in the Auction House will now show an item comparison for a player's currently selected character
BATTLE.NET
- Matchmaking
- Players will now be able to search for games that were started on any quest once they have reached level cap
- Matchmaking "Tags" have been added
- In addition to selecting your Difficulty, Monster Power, and Quest, players will also be able to choose from the following tags when searching for Public Games: No Tag, Questing, Brawling, and Key Warden
- Social
- Players can now add a note about a friend by right-clicking the name in their Friends List
- Players can now enter a message that will be broadcast to their friends
- Players can now create multi-user conversations
- There are multiple ways to start a conversation or invite other players to an existing conversation:
- To start a conversation, open Public Chat Options, then select Invite Friends > Start Conversation or use the "Start a Conversation" option in the Social window by right-clicking on a friend's name
- To invite or add friends to an existing conversation, open Public Chat Options, then select Invite Friends or use the "Invite to a Conversation" option in the Social window by right clicking a friend's name and selecting the desired conversation
- Similar to public channels, private conversations can support up to 99 players
- There are multiple ways to start a conversation or invite other players to an existing conversation:
- A new section has been added to the friends list called "Players Near You"
- Any player who is on your local network will be displayed here (even if they're not currently your friend)
- If needed, this feature can be disabled from the Social Options of the Game menu
- Players may now be marked as a "Party Guide"
- The Party Guide is assigned to the first person who joins a Public Game
- If multiple characters join a Public Game at the same time, the game will choose the hero with the highest level or Paragon level to be Party Guide
- When a Party Guide leaves the Public Game, a new one will be chosen automatically
- Alternatively, the Party Guide can right click on a party member's portrait and pass them the Party Guide title
- The Party Guide will have a unique icon that will appear on the mini-map
- Names in your "Recent Players" list will now expire if they become older than a month
- Blocked players will no longer appear in your "Recent Players" list
BOSSES
- Bug Fixes
- Skeleton King
- A bug causing The Skeleton King and The King of the Dead to not play an animation when performing their Whirlwind attack should now occur less frequently
- Skeleton King
CLASSES
- Demon Hunter
-
- Active Skills
- Rapid Fire
- Base weapon damage increased from 276% to 438%
- Hatred cost while channeling has been reduced from to 6 (down from 10)
- Skill Rune - Bombardment
- Weapon damage increased from 345% to 414%
- Explosion radius increased to 8 yards (up from 4)
- Skill Rune - Fire Support
- Weapon damage of Homing Rockets increased from 35% to 145%
- Skill Rune - Withering Fire
- Now reduces the initial Hatred cost to 10 (up from 5)
- Rapid Fire
- Active Skills
- Wizard
- Active Skills
- Arcane Torrent
- Base weapon damage increased from 210% to 285%
- Skill Rune - Arcane Mines
- Weapon damage increased from 180% to 340%
- Skill Rune - Cascade
- Weapon damage of bonus missiles increased from 210% to 285%
- Archon
- The duration of Archon should now be extended by assists from players in multiplayer games, in addition to kills
- Disintegrate
- Base weapon damage increased from 170% to 220%
- Skill Rune - Entropy
- Weapon damage increased from 196% to 253%
- Skill Rune - Intensify
- Maximum damage increased from 221% to 286% weapon damage
- Teleport
- Players may now Teleport to any location within range, as long as a path is available
- Bug Fixes
- Fixed a bug causing Teleport – Safe Passage to only reduce damage from physical attacks
- Arcane Torrent
- Witch Doctor
- Active Skills
- Firebats
- Now has a larger initial cost but a much lower continual cost while channeling
- Firebats
- Active Skills
- Active Skills
CRAFTING
- General
- Players can now craft multiple items and gems at a time within the same tier, so long as they possess the necessary materials
- Players can now craft items using materials located in the shared stash
- Blacksmith
- Salvaged item information will no longer be displayed in the chat log
- Bug Fixes
- Fixed a bug preventing players from salvaging an item by dragging it onto the Blacksmith's anvil icon
MONSTERS
- General
- Players should now encounter more monsters in Acts I, II, and IV in Inferno difficulty when playing at Monster Power 1 or greater
- In multiplayer games, the increase in monster hit points per additional player has been reduced to 50% (down from 70%)
- Tormented Stingers and Stygian Crawlers have had their experience reduced by 75%
- Damage dealt by Tormented Stingers has been reduced by 75%
- Experience granted by Shadow Vermin has been reduced by 50%
- The chance for Shadow Vermin to drop loot has been reduced by 50%
- Keywardens
- Nekarat the Keywarden now has a chance to drop a random Key (of Destruction, Hate, or Terror) in addition to the Infernal Machine plans
- All Keywardens will now only appear in Inferno difficulty
QUESTS
- General
- Experience earned by completing a quest is now granted to players that have reached the level cap
USER INTERFACE
- General
- A maximum of eight buffs and debuffs will now be displayed on the UI
- The maximum number of debuffs that will be displayed is three
- A maximum of eight buffs and debuffs will now be displayed on the UI
- Bug Fixes
- Fixed a bug preventing damage numbers from being displayed if a monster was affected by a spell such as Hex
BUG FIXES
- The sound that plays whenever a Barbarian's Overpower ability comes off cooldown is no longer similar to a Legendary item dropping
- Male barbarians no longer run faster than the other heroes while feared.
alyu314, cloximb and theoryzero are this weeks winners.
Contest is now over.
Another week and again we have 3 prizes of 20 million gold each to be given away.
Rules & How to Enter:
- The contest is for North American Diablo 3 servers only.
- To enter leave a single comment on this post. Multiple comments will be deleted.
- If you enter with multiple accounts I will know and disqualify your entries.
- At 9:00PM PST (today) I will stop collecting entries and any post after that point will not be eligible to win. The winners will be announced shortly after.
- You do not need to be online at the time of the drawing.
- Winners will be contacted directly by me and have his or her name edited into this post.
- If you have any other questions or concerns please send me a message directly.