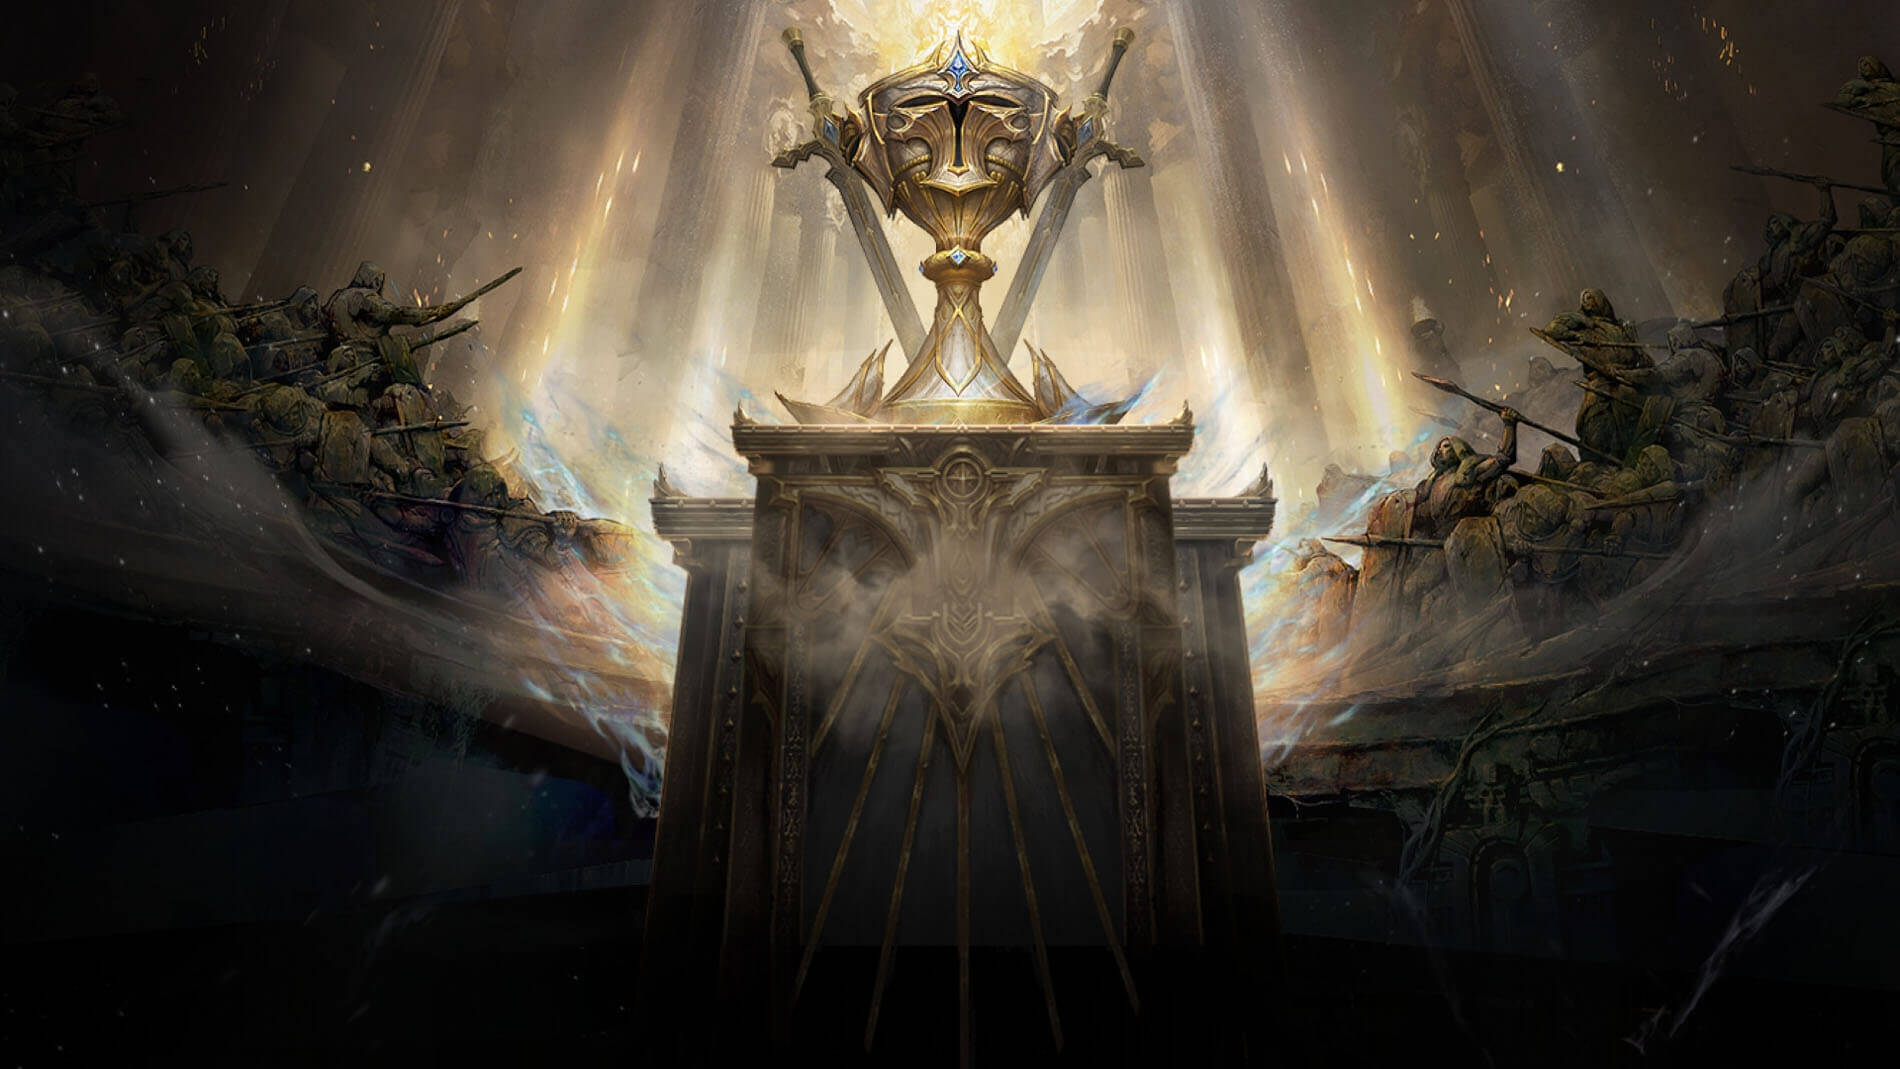
Preparing for the 2026 Diablo Immortal Roadmap
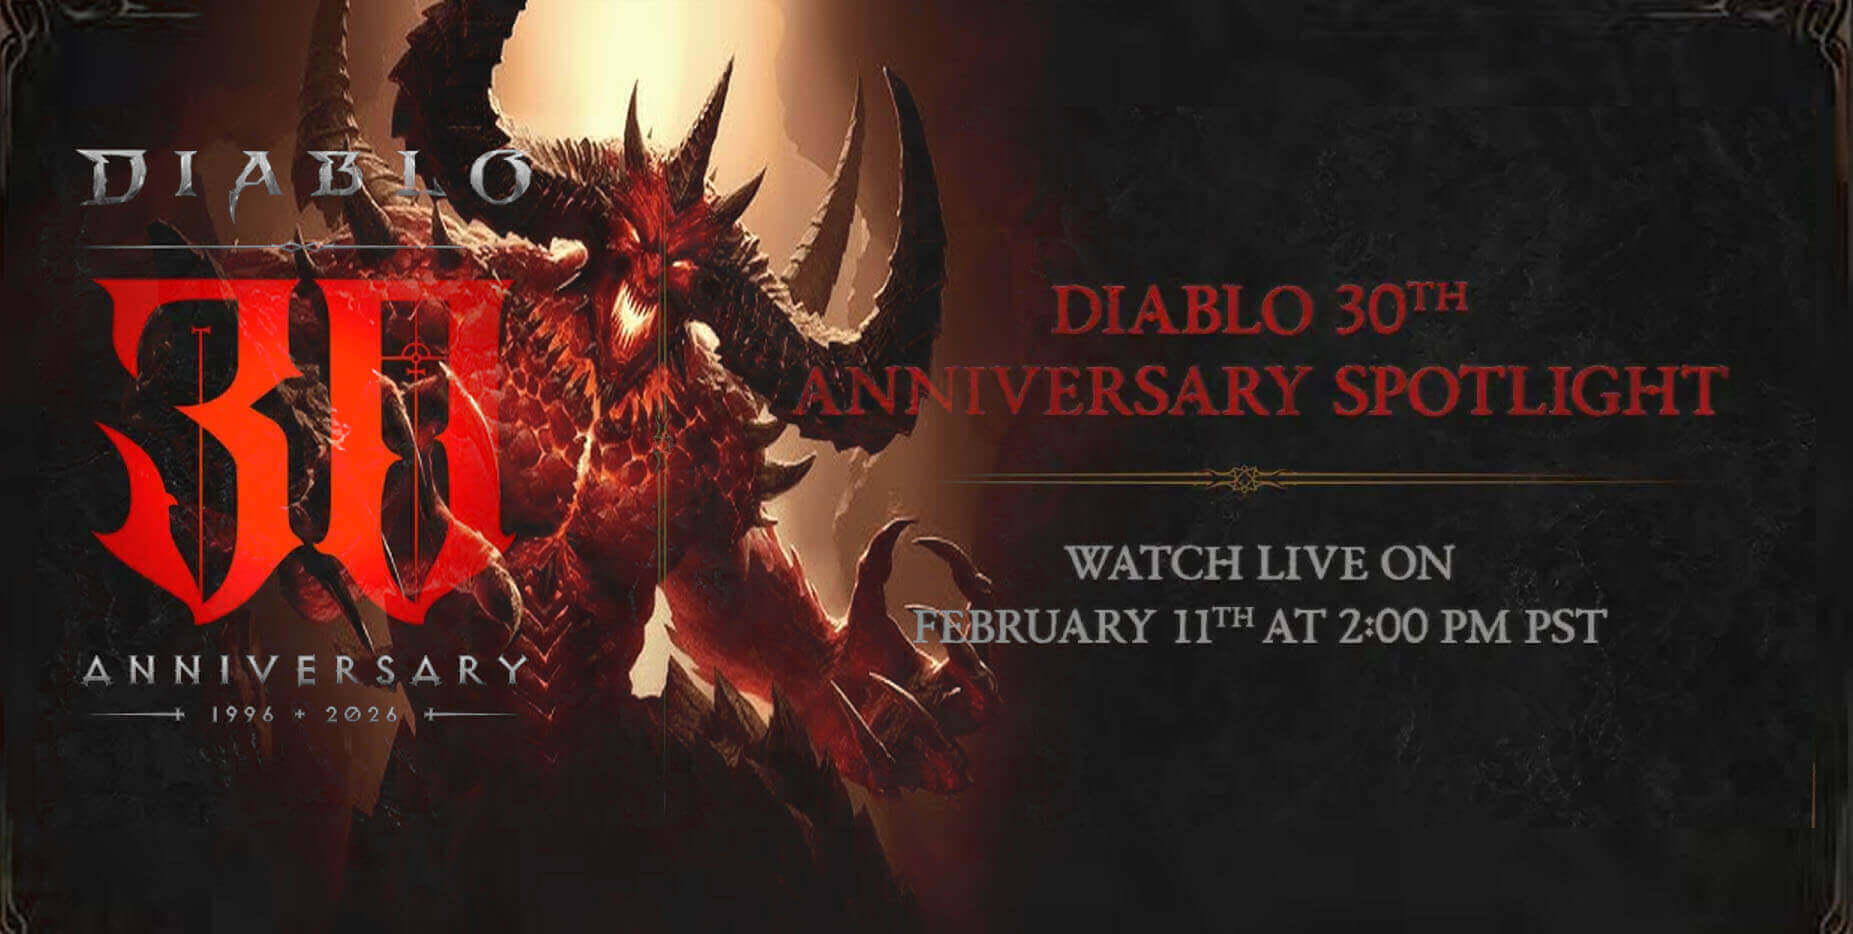
For the continuing story of Diablo Immortal especially, the forthcoming Diablo 30th Anniversary Spotlight on February 11th points to a turning point as seismic announcements shape the Diablo world's terrain constantly. This presentation will provide a thorough view of the franchise's path, with particular revelations set for Diablo Immortal's 2026 development path. The previews indicate that players are getting ready for a year marked by story deepening, geographical extension, the debut of a fresh character archetype, and the reappearance of a noteworthy enemy. Grasping the ramifications of these revealed aspects is essential for valuing the developing character of this very large multiplayer online role-playing game inside the larger setting of Sanctuary's mythology
The Strategic Unveiling of the 2026 Roadmap

To keep players interested in the mobile and PC world, Blizzard Entertainment's plan for Diablo Immortal depends on constant content delivery. The promise of a full 2026 Game Roadmap during the Anniversary Spotlight indicates a dedication to long-term planning that covers main elements of the player experience: narrative, surroundings, class diversity, and high-stakes conflict. The roadmap will outline a year of "growing threats, increasing knowledge, and unexplored areas. " This continuous stream of changes keeps stagnation—a typical issue for live-service games—from happening for a game that regularly includes players into its developing story. The announcement of a new chapter in the continuing narrative confirms that Immortal is actively helping to shape the ever-evolving canon of the Diablo universe, addressing the "consequences" of prior acts in Sanctuary, and is not only filling time between major releases.
The Arrival of a New Class and Frontier
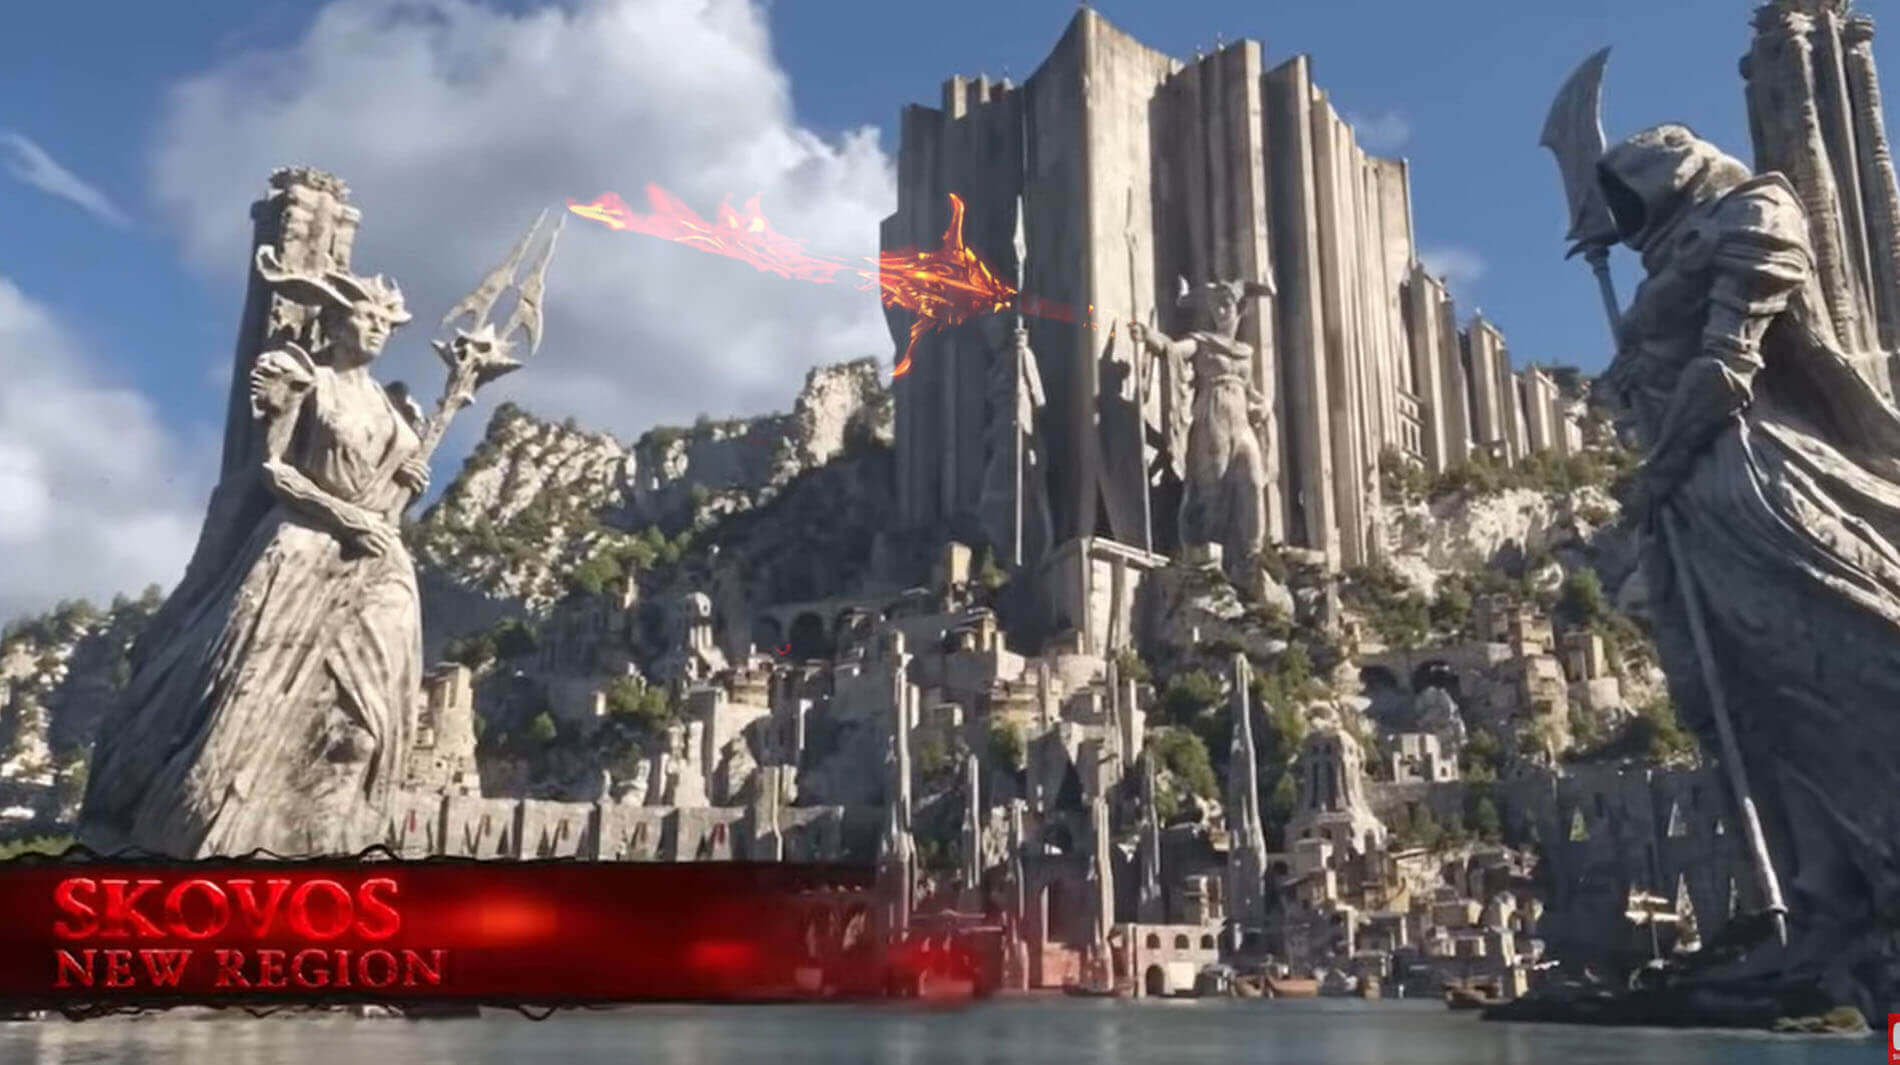
The birth of a new Class is one of the most obvious expected developments. Described somewhat as a "shunned and dangerous warrior," this introduction is the main impetus behind game development and character design. New courses provide veterans with new methods to engage material and draw in new players curious about that particular fighting style, therefore changing the meta. Usually, the arrival of a fresh class in a big ARPG revitalizes the endgame experience. Moreover, the development team intends to reveal a "New Region to explore. " This geographical growth is essential since fresh regions always provide new questlines, distinctive settings that mirror the storyline themes, and better-tier rewards possibilities. The game's set tone matches exactly the way this region is defined as a "harsh frontier where corruption festers," pointing to settings ready for conflict and discovery where "forgotten horrors claw their way back. "
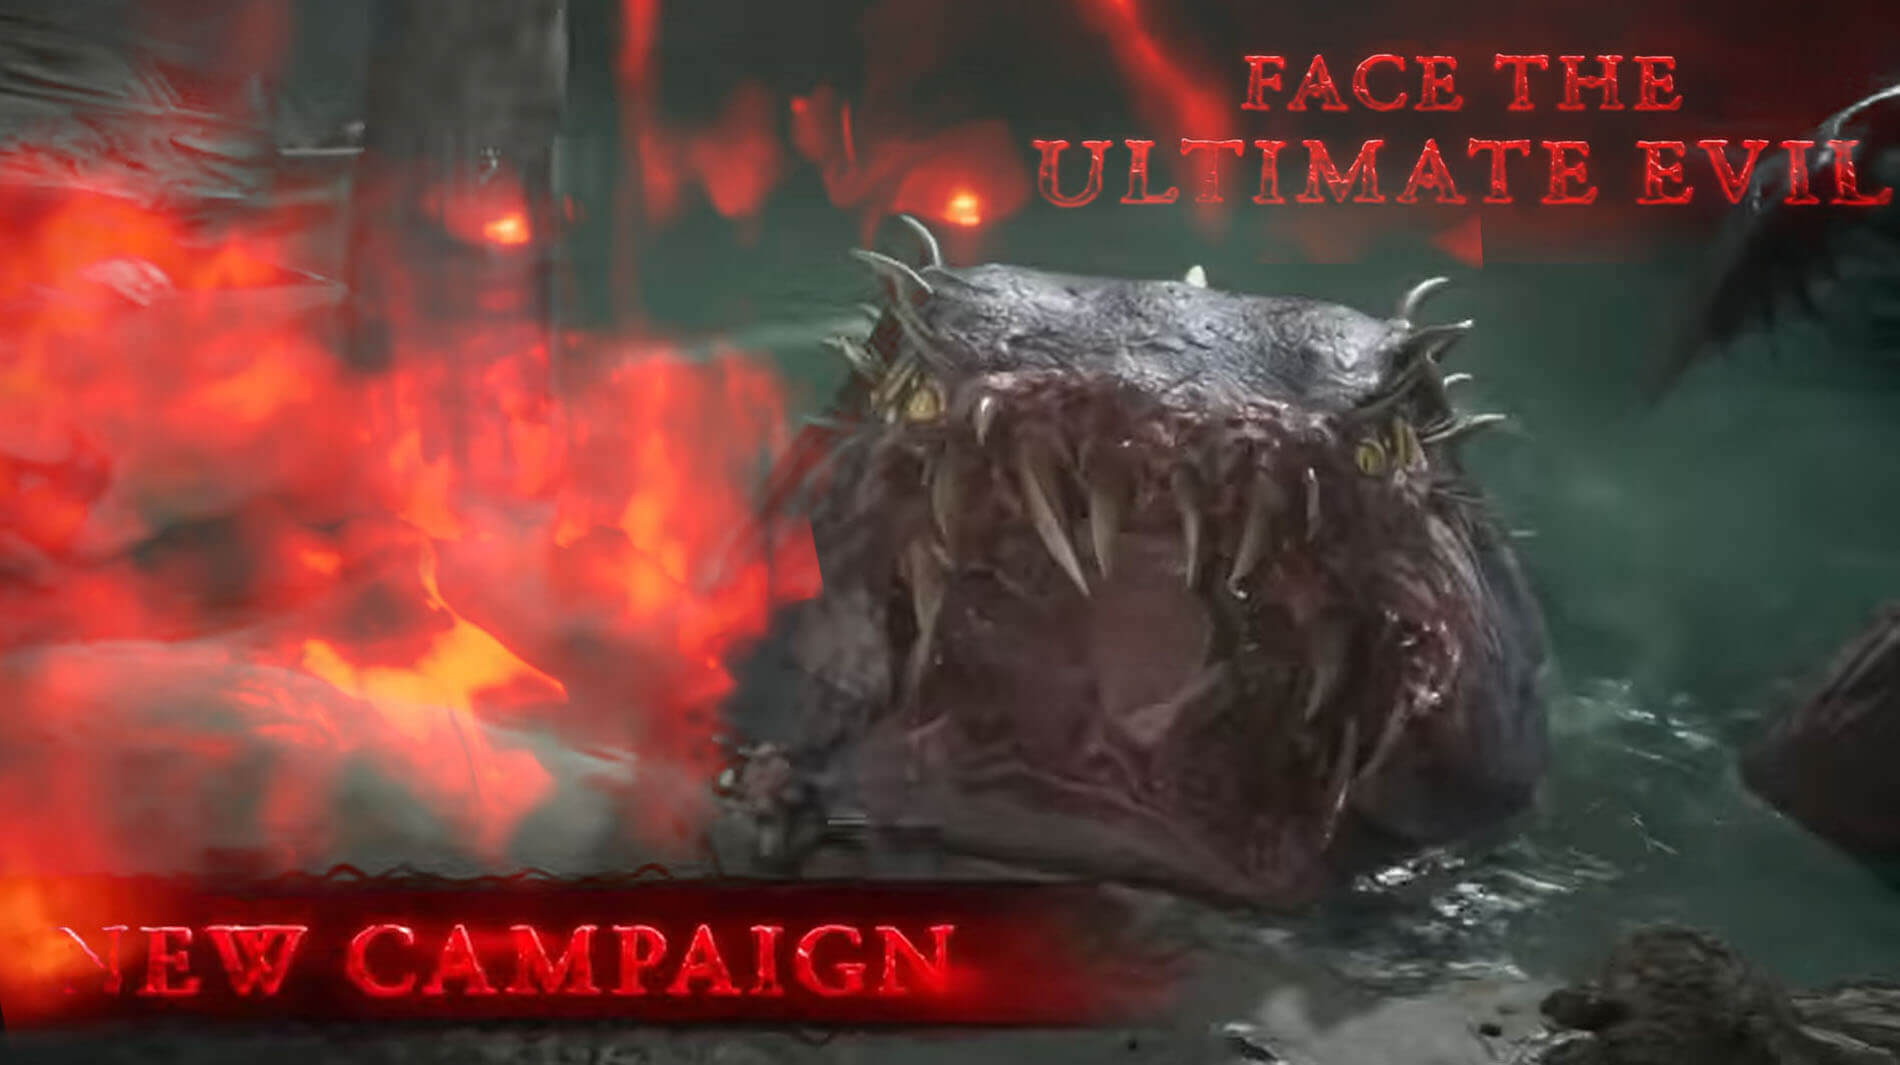
The Return of a Malevolent Force
The stated return of an "infamous villain whose shadow once scarred Sanctuary" is maybe the most lore-significant hint. Returning a great foe raises the stakes for all players in the framework of Diablo lore as it goes beyond episodic disputes to tackle fundamental sins. For the year 2026, this malevolent force will most likely be the main plot twist and will lead to big seasonal events or expansion arcs focused on overcoming this reintroduced threat. This approach makes the drama weight right away because it uses the fact that people know the famous villains from the series. The story arc will be successful to the degree the villain's comeback is smoothly incorporated into the current Diablo Immortal timetable, providing a gratifying conflict that seems deserved rather than random.
Incentivizing Engagement and Community Interaction
Beyond the fundamental material shows, the creators are using quick rewards to guarantee great viewership and quick post-reveal interaction. Offering ten Legendary Crests, Legendary Gear, and Gold for a limited time directly recognizes the player base's commitment and transforms viewing time into in-game advancement. Moreover, the quick follow-up developer chat on the Diablo Immortal Discord shows a commitment to openness and straight community input. Having a live chat right after the main broadcast helps to clear things up right away and makes the most committed players feel like they belong, which strengthens the game's community aspect as it gets ready for its next big phase.
The Value of Community Loyalty
In the setting of live service games, player loyalty is a major time, effort, and sometimes monetary investment. For games like Diablo Immortal, which require constant involvement to explore seasonal content and advance character development, the loyal define the main demographic that fuels continuous conversation, offers important input, and supports the in-game economy. Developers sometimes honor this commitment with particular actions meant to strengthen the connection between the creators and the community. A physical gesture of thankfulness, for example, is the promise of special, limited-time promotional codes with valuable in-game items like Legendary Crests, Legendary Gear, and a lot of Gold. These presents are symbolic gestures of appreciation for the players who dare to face the ongoing difficulties of Sanctuary; they are not merely financial; they acknowledge their continued presence during times of both calm and high activity.
Fostering Engagement Through Revelation
The continuous interest of the believers mostly depends on expectation and the promise of fresh stories and problems. Modern gaming communication is frequently organized around precisely choreographed reveals meant to keep enthusiasm up between big content releases. For this relationship, direct communication channels like interactive forums like Discord and specialized YouTube broadcasts become absolutely necessary. Developers' announcement of specialized "Spotlight" shows indicates that major, selected information on the game's future is on the way. This proactive communication guarantees the community that the developers are working on the year ahead and that their commitment is appreciated, therefore handling every possible "rising terror" or "infernal gift" awaiting players. Such events drive players to tune in at once to share the news, therefore reinforcing social bonds and converting passive consumption into active expectation.
Interactive Development and Feedback Loops
Beyond just reading official news passively, the current gaming scene depends heavily on direct contact. The focus given on developers interacting with players live on sites like Discord right after significant announcements shows a dedication to openness and communication. This direct access turns the connection from a basic developer-to-consumer approach into a working partnership. Developers who have real-time conversations about future features welcome constructive criticism and quick clarification, which helps to make the player community feel like they are an important part of the refinement process. This cooperative attitude is absolutely necessary; it guarantees that the most committed segment of the game's audience stays in line with its expectations and wishes as the game develops and includes updates spanning all linked titles inside a franchise. Therefore, the planned broadcast is more than just a data dump; it's an invitation to help design the shared universe's future.
Diablo Immortal's Evolving Landscape
Maintaining player involvement and durability depends greatly on the ongoing development of large multiplayer online role-playing games. Regular major content releases from Blizzard Entertainment's Diablo Immortal, a mobile and PC hybrid, highlight this dedication. Often celebrated by its thematic title, one such change reflects not only the inclusion of fresh cosmetic goods but also a major realignment of the competitive and cooperative environment inside Sanctuary. These big changes, especially the ones that have to do with structured PvP and getting gear, help to balance the power dynamics and make new challenges for both experienced players and new adventurers. The developers' plan to keep the game dynamic following times of strong cross-server competition and meta changes is highlighted by the most recent large content update, which includes a fresh Battleground mode, upgraded gear, and reestablished competitive structures.
The Novelty of Core of Chaos Convoy
The new Battle Pass at the centre of this seasonal update is thematically centred on the barren, icy reaches of the World's Crown. This path of progression is the main way that players are rewarded for playing well consistently throughout the season. Unlike completely random drops, the Battle Pass promises practical resources and sure cosmetic improvements when certain milestones are achieved. Keeping player enthusiasm throughout weekly play sessions depends on having clear, attainable objectives provided by this organized strategy. The Battle Pass offers new, themed objectives that could need certain loadouts or interaction with newly introduced features, which guarantees that even well-known characters have fresh advancement goals and supplements current endgame loops for elite players.
Synergy Between Events and Player Choice
The inclusion of creative gameplay elements meant to defy accepted conventions has been a main feature of recent expansions. A good illustration of this approach of design is the limited-time Chaos Convoy Battleground mode. Unlike typical, static PvP settings, Chaos Convoy uses random power progression as its main feature. This system compels players to discard their pre-conceived perfect builds and instead interact in real-time adaptation. Gifts of Corvus are at the heart of this style as they are strong, match-changing fighting modifiers. Offered intermittently throughout the game, these gifts bring uncertainty and chance.
The design favours tactical flexibility above strict preparation. Players first choose a Gift; they can reroll once, which determines the course of their character's temporary form. Importantly, new Gifts show up every 90 seconds, forcing gamers to include these surprising buffs—ranging from more damage-over-time effects to spectral friends and lowered cooldowns—into their current gameplay. Over one hundred possible Gifts guarantees that the experience stays unexpected and fresh throughout several playthroughs as the amount of realistic build options explodes. This design tests a player's basic knowledge of their class mechanisms as opposed to their proficiency with a particular, ideally optimized gear set.
Balancing Competition and Reward
Beyond the brief thrill of seasonal modes, large changes also meet the long-term objectives of committed gamers by means of improved gear and formalised contests. Strong new Legendary gear will influence the general power creep and build diversity accessible in structured PvP as well as PvE. For players who have perfected the current endgame, getting these fresh goods provides real, long-lasting incentives to improve.
Additionally, the comeback of competitive PvP events points to a renewed focus on high-stakes, organized conflict. Formal tournaments offer reputable venues for the finest players to show their worth after times when players have improved their abilities throughout cross-server Battleground matchmaking. This loop of content keeps people interested because there are always new things to learn, new ways to play, and old tournaments to participate in. Often related to particular dates following server maintenance, the coordination of these rollouts produces obvious excitement in the community centred on rapid involvement with the new Battleground format and then preparations for competitive ladders.
The Multifaceted Impact of Corvus Gifts
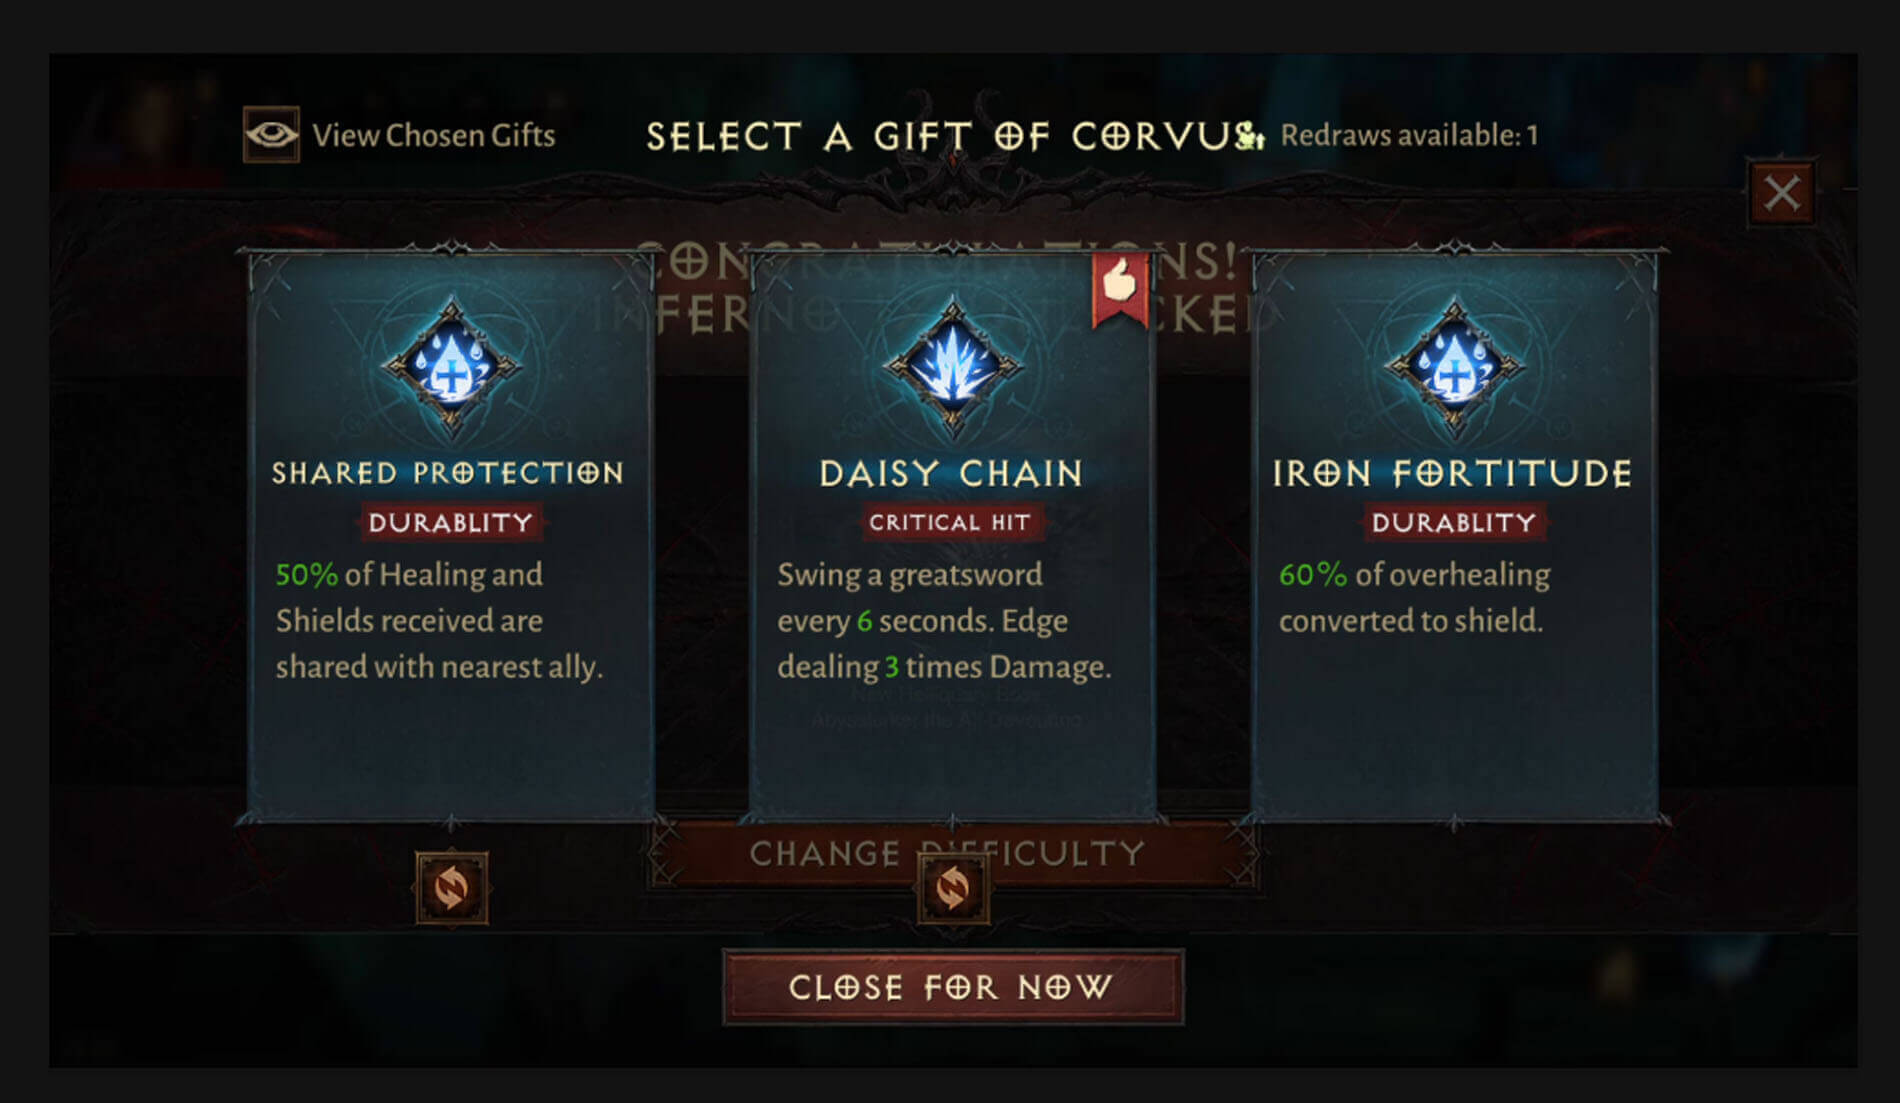
Within the Chaos Convoy environment, the gifts of Corvus are the main sources of variation. Their impact reaches almost every facet of player performance. Think about how damage over time effects get better; this one thing can make a build go from being weak to being really important for a good strategy. It can also make a build go from being bad to being good. Improved movement speed also significantly changes tactical positioning, which allows players to control engagement ranges or get out of bad spots far more readily than they could in regular modes.
Introducing spectral weapons that fight with the player greatly boosts individual firepower, essentially serving as temporary, AI-controlled allies. This addition to fight presence significantly changes encounter pacing and requires players to control not just their own actions but also the positioning and threat profile of their spectral allies. Reducing ability cooldowns also squeezes the decision-making window, therefore encouraging a more aggressive and skill-based style of play in which resources are swiftly and regularly managed. Stacking these modifiers produces exponential power increase, which guarantees that no two combat situations feel the same.
Building Limitless Combinations
With over one hundred different Gifts to choose from, the number of ways to build things in the Chaos Convoy mode is very high. This means that there are almost no limits to how you can put things together.
This unpredictability pushes players away from proven meta builds that would otherwise rule regular gaming. A player who would usually depend on strong armor and close-range attacks could find themselves forced to go for a very mobile, ranged damage profile thanks to lucky drops of spectral weapon Gifts and speed boosts. Players have to examine their present Gift loadout, spot developing synergies, and change their tactical approach halfway through a game to benefit from these rewards for creativity and demand fast thinking. In competitive or difficult gaming settings, this continual change promotes great flexibility, a very important ability. The system is basically turning strategic improvisation into a game.
Ensuring Balance Through Selective Restriction
Although the Gifts of Corvus have a lot of power, the developers have taken important steps to make sure the event stays competitive and fair. A purposeful act of system isolation is the clear disabling of Paragon Skills, Specializations, Warband Remnants, and particular Boss Skill affixes. To guarantee that success is driven only by the decisions taken about the random Gifts and the instant tactical execution during that particular run, Chaos Convoy deliberately puts these standard, ongoing progression systems on hold. If these constant power systems remained active, pre-existing character traits would dominate the unpredictability of the Gifts and negate the main design objective of the event, which is to assess player ability under fresh, randomized circumstances. This selective disabling guarantees that players start on a more equal, albeit somewhat erratic changed playing surface. Furthermore, the incentive system awarding participation twice Battleground incentives motivate broad involvement with this special, balanced temporary mode.
Integration with the Sanctuary Ecosystem
Any significant change in a game like Diablo Immortal depends not just on the calibre of the new feature but also on how well it fits with the current world of Sanctuary. PvE players, who might avoid fierce PvP, still have worthwhile material to overcome thanks to the new dungeon foes and hard tasks that reward them with advancement pertinent to the new power ceiling set by the update. The celebratory seasonal events that go along with these patches help to ground the technical changes within the continuing plot of the game, therefore providing a shared group experience that briefly draws attention away from just competitive climbing to participation and celebration. By taking this all-encompassing approach, we can make sure the upgrade addresses the many reasons why players play.
Centred on the Chaos Convoy and the reconfirmation of competitive play, the main content update highlights a committed attempt by the creators to revive Diablo Immortal's endgame. The upgrade effectively challenges accepted meta techniques by injecting ephemeral, extremely erratic gameplay via randomizing power modifiers. For committed players, the return of competitive frameworks and the addition of fresh Legendary gear offer long-term objectives at the same time. This deliberate method of content delivery, combining novelty with proven progression paths, guarantees that the moon's ballad appeals throughout Sanctuary, keeping the experience interesting and guaranteeing that players always draw their blades against fresh obstacles.
New Legendary Equipment’s
Shifting Paradigms in Barbarian Gameplay

The beginning set of Legendary items described for the Barbarian class clearly shows this change in perspective. Barbarian builds have always either concentrated on pure raw damage or ongoing area control. The new technology, however, is mostly about defensive scaling and how different skills can work together. For example, the main hand item Carnage Call directly connects the utility skill Demoralize to offensive output by having it do damage based on maximum Life. This points to a possible road for Life-stacking constructions that can be both offensive and defensive. The Thrashabout off-hand also significantly changes Hammer of the Ancients, linking its damage to maximum Life while providing momentary immunity to crowd control throughout a crucial attack series. This pairing targets a frequent flaw in Barbarians: susceptibility during drawn-out animation sequences. A clear, self-sustaining damage reduction loop develops when the Yoke of Legacy chest piece—which offers damage reduction following the Hammer of the Ancients—is used with it. This turns the regular heavy-hitter into a more durable front-liner able to take a beating while dealing out damage matching their own bulk.
New Tactical Dimensions Through Utility Integration
Beyond pure strength improvements, the new legendries underline strategic integration. Reliable crowd management is added to a movement talent with the Ram Cords trousers, which make Leap inflict Fear. In challenging content with a high enemy density and a lot of lethal attachments, the capacity to control enemy placement and stop harmful casting is quite helpful. This prepares the scene for a controlled encounter by allowing for creative arrangements whereby a Barbarian can start a fight with a disruptive Leap, then follow up right away with the damage reduction from the Chest piece. By increasing maximum Life and using Cowardice, which enhances damage suffered by foes under knockback influence, the Shockscowl helm extends this tactical aspect even further and works flawlessly with the Leap and Hammer of the Ancients powers. Rather than depending on basic cooldown cycling, this collection of things promotes a playstyle that combines movement, crowd management, and damage boosting into a coherent, responsive sequence.
The Broader Implications for Build Customization
These very specialized legendries help to keep player interest high by stopping build stagnation, so fulfilling an important role. In games that last a long time, once a build is found to be the best, innovation usually stops until the next expansion. The developers encourage experimentation by adding tools that enable unusual scaling measures, like greatest Life determining main damage output. Players are challenged to investigate relationships between offense, mobility, and defence in hitherto less than ideal or unattainable ways. The Hurtling Frame shoulders, which gives Fortified status and raises core stats when you Leap, makes mobility even more important as a way to defend and attack than as a way to get around. This focus on multi-layered effects guarantees that players aiming to maximize their performance in Inferno XI must interact closely with the itemization system, therefore promoting a meta game rich with many different viable builds instead of a single dominant setup.
Enhancing Core Damage Mechanics of the Blood Knight

The starting damage of the Blood Knight is being much increased by synergistic legendary effects, especially those affecting the Umbral Lance skill. Increasing consequent damage taken by adversaries hit inside a small window, the Stirred Depths main-hand tool directly pushes constant use of this talent. This moves the emphasis away from infrequent strong hits and toward a regular beat of strikes needed to keep a damage multiplier going. Adding to this, the False Container casually adds a fresh lance application trigger mechanism: automatic firing dependent on the player losing or gaining health. This guarantees that the Blood Knight keeps constant pressure even during times of self-healing or rapid incoming damage, hence turning a resource management decision into a dynamic response to fight events. Such integration calls for more mechanical knowledge of the healing efficiency and defensive cooldowns of the class.
The Transformation
Perhaps the most game-changing aspects of the new mythological set are those that include the Blood Knight's unique gimmick, the Abomination transformation. The creators have obviously meant to either fix earlier flaws or enhance the dream world connected with this transient condition. The Shaded Teeth chest piece makes the Blood Rush (Abomination) variant more useful because it makes it harder for people to target during the dash. This is very important because it gives it a way to defend itself from attacks. It also makes the variant knockback and bleed application better. This is vital for negotiating close encounters.
Moreover, the Crushed Pity pants offer the changed state a totally different offensive weapon. Along with immunity to control loss, the Abomination's extra slam ability guarantees consistent positioning and sustained main attack damage amplification via marks. This implies a build route in which the changed state turns into a long-lasting powerhouse instead of a short burst window. By eliminating the need for Anger consumption and substituting a ramping Damage and Life Drain effect instead, the Tameless Revelry shoulders address a major transformation cost. This adjustment significantly affects the financial cost of the transformation, which enables more frequent use and rewards those who can keep the form as the damage and drain keep mounting.
Defensive and Resource Optimization
Beyond simple aggression, the new equipment covers survival and crucial quality of life concerns. Reducing damage received from Bleeding foes, the Hearty Glutton helm offers focused defence for the Abomination form. In settings where several monster kinds inflict ongoing damage effects, this focused mitigation guarantees the transformation's continued viability against particular threats and assures its sustained power. Removing the Anger cost from the shoulders directly affects resource management by freeing up energy that could have been used for transformation, therefore powering other important skills or just extending the uptime on the empowered state. These items together promote a playstyle that strongly encourages frequent transformation usage and great weaving between the normal and monster forms.
Synergies of Shock and Critical Damage of the Crusader

The Crusader becomes a great chain-lightning expert as several fresh items specifically address the interaction between shock effects and critical damage amplification. The Cruel Attraction's primary hand weapon adds a constant, automatic source of electrical attack by awarding Sacred Fire Critical Hits with bonus holy lightning damage. This goes really well with the Pained Sentiment off-hand, which makes foes hit with a Critical Hit take more damage from Condemn. Condemn, now changed by the Shock Doctrine chest piece, turns into the center. The Shock Doctrine turns Condemn into an electric field that follows the player and keeps shocking them to make energy. This feedback loop is quite important: Condemn provides Shock, which exposes adversaries to more critical damage from Pained Sentiment and produces resources for more lightning strikes. This complex mix points to a build whereby slow, heavy single strikes are less important than movement and regular application of Condemn.
Mobility and Crowd Control Enhancements
Through potent mythical effects linked to movement abilities, the redesign also greatly enhances the sometimes-criticized mobility weaknesses of the Crusader. The Storm Saddle pants transform Draw and Quarter into a mounted charge with the Storm Steed, offering a direct improvement that gives speed and immunity to slows. This essentially resolves kiting problems frequently seen in high-level meetings. Moreover, this improved mobility helps to bolster attacking ability. The Azure Sacristan helm transforms Fist of the Heavens into a charged, forward-dashing strike that shocks enemies, an impact especially enhanced when the Crusader is already mounted and phantom steeds join the attack. This combination highlights a design concept whereby crowd control and direct multipliers for damage depend on mobility; not only survival ability. A mounted Crusader using Fist of the Heavens is extremely effective at breaking up groups since he has amazing power and works well with phantom strikes.
Targeted Critical Hit Optimization
The tools in the kit include particular optimization features meant to guarantee that these electrically charged strikes always hit with full force. The Jolt of Conviction shoulders straight raise Fist of the Heavens' Critical Hit Chance especially against Shocked foes. This shoulder piece provides a trustworthy window for huge Fist of the Heavens bursts following a Condemn deployment as the Shock Doctrine chest piece guarantees Condemn is always applying Shock. This layered approach to damage guarantees that the build is not dependent on simple luck for great output; rather, the player deliberately controls status effects (Shock) to unlock more critical potential. The Cruel Attraction weapon also relies on critical hits to trigger its secondary lightning damage, tying the entire system back to the fundamental statistic of critical chance, whether through gear optimization or skill interaction.
Joint Enhancements to Core Skills of the Demon Hunter

The newly added Legendary items aim squarely at honing the Demon Hunter's utility and main damage-dealing abilities. The interaction between Quickthorn (Main Hand) and Capricious Ambush (Shoulders) specifically targets Rain of Vengeance. Quickthorn's extra to Movement Speed for this power enables improved positioning, a crucial element in an action RPG, while Capricious Ambush turns the ability into a tool for area denial that automatically stuns foes whenever other abilities connect. Rain of Vengeance is transformed from a simple damage cooldown into a strong crowd control and area saturation device with this mix.
The adjustments to the Sentry skill also show a push for automated engagement and more dependable critical strikes. Relentless Hunt changes the Sentry from a fixed turret into a dynamic, responsive buddy that fires and launches explosive missiles automatically when the Demon Hunter approaches nearby. Malicious Contrivance raises Sentry Critical Hit Chance upon use. This combination implies a plan whereby the player gains from proactive skill usage that instantly boosts their automated damage sources, therefore reducing downtime between key rotations.
Transformative Impact on Vengeance
Perhaps the most significant changes are observed in the gear influencing the Vengeance ultimate ability, particularly via Protracted Wrath (Pants) and Cloak of Knives (Chest). By changing the Demon Hunter into an "avatar of vengeance," Cloak of Knives gives a big defensive and offensive boost. It also gives immunity to knockback and crowd control and adds new active skills. This turns Vengeance from just a simple damage amplifier into a real engagement state, so the player can safely reposition or make high-risk moves.
Extended Vengeance duration based on effective critical hits from other abilities helps to supplement this. Played properly, Vengeance can be maintained for far longer lengths if a Demon Hunter takes vital damage, therefore producing a near-permanent uptime on the enhanced avatar state. This synergy promotes a high critical hit chance build strategy; the more consistently the Demon Hunter scores crits, the longer they stay in their strongest form. This pushes the class away from burst timing and toward sustained, high-octane output based on continuous mechanical performance.
Strategic Implications and Build Diversity
Taken together, these six items drive the Demon Hunter archetype toward a very mobile, aggressively sustained damage dealer who uses automatic turrets with strong personal cooldowns. While the increased Sentries offer continual damage that drives the Vengeance extension from Protracted Wrath, the movement speed bonus from Quickthorn helps the continuous repositioning required to activate the automated stunning from Capricious Ambush. This setup encourages players who can easily switch between placing Sentries, keeping Vengeance uptime, and using Rain of Vengeance intelligently for control. The new legendries, while concentrating primarily on current abilities, do not particularly impose a particular build; rather, they offer strong tools that reinforce current styles, including those emphasizing great critical damage or those stressing utility via Sentry placement.
Enhancing Summoning Power and Crowd Control of the Druid’s

A sizable part of the fresh equipment tackles the Druid's dependency on summoned allies head on. The Main Hand object, Bristlebough, changes the way Surging Stone can be used. It now has strong crowd control, which lets it pull foes in and stun them while also giving nearby summons a crazy Attack Speed boost. It doesn't just do damage. The Druid may start fights under control and then profit from more summon output thanks to this strong tactical anchor point on the battlefield. Woundfinder (Shoulders) makes this synergy even better by adding a damage vulnerability debuff to enemies hit by Surging Stone. This directly helps both the Druid and their summons, which is stronger.
By eating Primal Power to produce secondary, lesser Sling Sages, the off-the-cuff item Teeth of the Fen helps the Oak Sage directly. This mechanic turns a single focused effect into a spreading danger for foes by raising the sustained pressure and area denial given by this particular summon. Trapdacks (Pants), which brings a dependable immobilization system related to the Oak Sage's attacks, complements this summon skill. This adds a layer of control that rewards Oak Sage's focus fire and guarantees that high-value targets stay locked down for key events, even if limited by a cooldown on the same target.
Area Denial and Sustained Utility
Apart from straightforward combat boost, a few legendries emphasize creating permanent spheres of influence, which is essential for regulating the stream of high-level events. Through Circle of Life, Rising Union (Chest) offers a strong zone for damage-over-time healing and recovery. What sets this product apart is its scaling: the more friends you have in a given area, the more effective the item is. This item is a really good support tool in group content that rewards good formation play.
Savage Abundance (Helm) also combines the Circle of Life into the Druid's damage rotation by boosting adjacent summons for three seconds after the area is live. When combined with Budding Union, the Druid sets up a place where their summons has more power to hurt enemies and heal friends. Within that area, their summons has more lethaliy. This mix motives a particular playstyle whereby optimum damage uptime and team survival depend moslty on proper Circle of Life positioning.
Constructing Advanced Build Archetypes
Taken together, these six things point to a meta shift toward very synergistic summoning builds that give battlefield positioning and continuous involvement front seat over burst damage. A Druid using this set could weave Surging Stone for an initial lockdown (Bristlebough and Woundfinder), then use their Oak Sage network for ongoing control (Teeth of the Fen and Trapdacks), and finally anchor their position with a powerful Circle of Life that buffs their minions (Budding Union and Savage Abundance). Thoughtful ability sequencing is rewarded by this complex network of consequences. For example, starting an encounter by dropping Circle of Life and then immediately using an empowered Surging Stone pull makes an ideal zone where summons is crazy, foes are kept under control, and the damage output is as high as it can be during the vulnerability window.
Defensive and Mobility Skills of the Monk

The Monk's defensive ability gets a significant boost from the famous Shield of Zen-related items. The main hand item, Elusive Verdict, turns Shield of Zen from a strictly defensive bonus into a powerful weapon for aggressive positioning. It directly compensates players for keeping their mobility up by giving immunity to loss of control and knockback as well as extra damage reduction scaling with Dash skills. This inspires an aggressive rather than a passive defensive attitude. The helm piece, Cunning Grin, adds to this by boosting Skill damage while Shield of Zen is active, therefore producing a virtuous cycle whereby proactive defense directly converts into offensive capability. Effective melee gaming revolves around this design concept of interacting with foes while safe.
Transforming Flying Kick into a Primary Damage Engine
The most important thematic adjustments this gear set brings in are reconfiguring Flying Kick from a utility or gap-closer tool into a main damage component. Using Flying Kick immediately raises Critical Hit Chance for a limited time via Snap Judgment. This inspires players to include the kick into their main rotation mostly to get ready for follow-up high-damage strikes. Moreover, Undue Censure, the shoulder piece, inflicts further wind damage by adding a secondary, activated mystic kick upon contact. This stacking effect implies a wish to turn Flying Kick into a multi-hit app. The pants, Coalwalker, add more offensive power by using a fiery assault that applies a Burn effect and, most importantly, gives you a short time to use the ability again if it hits. If the player is tactically correct, this offers possible for ongoing involvement using just one basic skill.
Reimagining Flying Dragon and Resource Management
Vaiyu's Mandate, the chest piece, directly changes the Flying Dragon skill, therefore honing the interaction between mobility and damage output. This object adds a fresh level of positioning and resource control. Flying Dragon now uses Dash skills by making Energy when it hits an enemy with a Dash. Then it uses that Energy to do a targeted jump that ends with a big, knockback-inducing wind burst. Flying Dragon goes from being a basic attack to being a strategic repositioning tool that also helps with Energy regeneration and crowd control. This design makes the Monk player have to actively manage their Energy economy by linking Dash usage into Flying Dragon deployment, which gives them better control of the battlefield than earlier versions did.
Necromancer’s New Power Interactions for the Core Abilities

The Necromancer's newly added legendary equipment mostly mixes once unconnected skill sets. For example, the Frostgloom main-hand weapon directly combines crowd management into the Command Skeletons skill, so multiple attacks stun foes. This gives the summoned minions another level of defensive usefulness and setup ability, which means that players who keep playing the game are rewarded for doing so instead of being rewarded for doing a lot of damage in a short amount of time. The Gravemaster helmet also changes the dynamic between summoner and their creations. Tying the attacks of skeletal puppets to the player's Primary Attack while making them untargetable turns the main skill into a powerful force multiplier for pet damage, requiring a fundamental change in how players handle their basic offensive actions.
Rethinking Primary Attack Dependency
One interesting trend in this set of equipment is the increased focus on the Necromancer's Primary Attack, which has always been seen as a weaker source of income. Through Primary Attacks, the Misbeholden off-hand adds Encroaching Fear stacks; when Bone Spirits activate these stacks, they erupt for area damage and Fear effects. This produces a strong synergy in which a strong utility skill depends on simple attacks as basic setup tools. The Death After chest piece, which raises bonus Primary Attack Speed after utilizing Bone Spirits, further reinforces this dependency and creates a cyclical link between the main and a significant cooldown ability. The Sanguine Jewel shoulder piece supports this concept by boosting Primary Attack Speed when Borrowed Time is active, ensuring that the class has multiple avenues to maintain a high rate of basic attacks, potentially making them viable even outside dedicated summon builds.
Transformative Mobility and Defence
Beyond unpleasant synergies, the Grimwaltz trousers provide a significant modification to the Wraith Form ability. Turning the Necromancer into a spectral avatar with faster movement speed and swapping the Primary Attack for piercing spectral bolts gives a great short-term repositioning and damage tool. This essentially provides the group with a blast of great mobility and a different attack pattern that is helpful for getting through tough situations or quickly covering gaps. This implies that even as the class is being pushed toward Primary Attack builds, there is still a clear way for players who value agility and tactical placement to move away from just standing around and casting spells.
Integrated Movement and Attack Design for the Tempest
The main power of this new Legendary set is that it combines movement skills, especially Dash variations like Rolling Surf and Crosswinds, right into the core loop for dealing damage. For example, the Hullslasher Main Hand component turns the Primary Attack into a damaging dash that also shatters armour. This instantly maximizes the Primary Attack's usefulness by transforming a daily activity into a tactical repositioning and debuffing tool. Likewise, the Hailblade Off-Hand connects Dash skills to producing reserve wind blades released upon the following Primary Attack, hence offering both area damage and a self-healing mechanism depending on the target's bleeding state. This generates a fast feedback loop: attack to maximize damage and heal after utilizing Dash. The synergy extends to other slots, solidifying these new rotational dependencies. Using Flowing Strike empowerment, the New Dawn Chest piece lets Dash skills unleash a damaging wave that knocks opponents back, therefore offering essential crowd control in addition to movement. Managing interactions depends on this, particularly in high-density scenarios common in Sanctuary. Moreover, the Sense and Lethality Helm item specifically links Rolling Surf to three seconds of causing the Bleeding condition, therefore directly enhancing the Crosswinds Off-Hand's healing capability. This shows a well linked system whereby gathering several elements of the set considerably enhances particular chains of activity.
Status Effect Management and Combat Flow
Including Bleeding as a crucial status effect among numerous goods emphasizes a tactical turn toward burst engagement paired with DoT (damage over time) mechanics, which sustains damage over time. Bloodscent Pants clearly pay off aggressive already Bleeding opponents, implying that effective build optimization will need combining abilities that use this state early in the process. The restriction that one enemy cannot be dealt more than once per second of damage stops players from just spamming the empowered attack on a single target for infinite gains, hence requiring more general involvement or exact timing. This degree of control guarantees that the power rise stays skill-based as opposed to strictly quantitative.
The Memories Adrift Shoulders item enhances another layer of utility by raising Primary Attack Speed following Flowing Strike. This not only rewards the use of the Dash skill but also temporarily accelerates the frequency of the now empowered Primary Attacks granted by the Hullslasher. When these components are put together, the intended combat flow seems to be based on a quick sequence: Start with a Dash skill to apply Bleed and get ready for the attack sequence, then use a powerful Primary Attack. The speed boost that results from this can be used to do more damage right away, and if the initial conditions were met, the secondary healing effect could be helpful. This is very different from older, more stationary damage theories.
Shock-Focused Lightning Damage Amplification of the Wizard

The extreme amplification of lightning damage by conditional bonuses is a main theme rising from this equipment collection. The main-hand weapon, the Planar Hook, changes Arcane Torrent into a close-range lightning burst that favors Shocked enemies. This obviously complements the off-hand Lunar Spindle, so enhancing the damage done by foes suffering from Shock from Lightning Nova. Adding lightning orbs from Lightning Nova, applying both Shock and a lightning mark, the Spark Shower chest piece finishes this main offensive loop by making enemies who are marked take more damage when they are hit by Shock. To keep overlapping Shock and Mark debuffs for optimum sustained output, this trio of items motivates a very aggressive, tightly packed fighting style wherein the Wizard must continuously weave Lightning Nova and Arcane Torrent. Unlike earlier builds that could have emphasized pure elemental damage, this configuration values clever positioning and deft use of status effects.
Revisiting Mobility and Critical Hit Optimization
The second main area of improvement is the Wizard's main defensive and repositioning tool, Teleport. Teleport is now strongly linked with damage output thanks to the Legguards of Returning and the Veilwood Helm. The Legguards of Returning turns Teleport into a three-stage move with not only repositioning but also a second-use area damage impact that gives the movement skill itself some attack value. More importantly, the Veilwood Helm lets you stack Empowered Transit while using Teleport. Non-Teleport abilities subsequently use these stacks to increase Critical Hit Damage. This mechanism pushes a basic decision-making process: should the Wizard utilize Teleport just for fleeing or to start a damage phase? Consuming the stacks with a skill like Arcane Torrent, which is already enhanced by the Bellwether Pauldrons' close-range critical chance bonus, suggests a build predicated on burst windows rather than constant attrition. By increasing Arcane Torrent's critical hit probability when foes are nearby, the Bellwether Pauldrons further strengthen this close-quarters focus, therefore enabling more consistent successful critical strikes following an attack sequence starting with Empowered Transit stacks.
The Tactical Shift Towards Melee Range Engagement
Taken altogether, these legendary call for the Wizard to undergo a major tactical change. Traditionally regarded as a glass cannon running from great distance, this new arrangement calls for near-to-mid-range engagement to completely fire its damage multipliers. The Arcane Torrent improvements (Planar Hook and Bellwether Pauldrons) only work well if the Wizard is close to the target. Effective use of the three-stage Teleport (Legguards of Returning) to enter the ideal engagement zone, apply Shock and Marks via Lightning Nova (Lunar Spindle and Spark Shower), and then deliver high critical damage strikes driven by empowered stacks acquired from mobility depends on success. This has a higher skill ceiling because a build made for kiting will be much more effective than one where the Teleport sequence is messed up or the Shock/Mark synergy isn't kept up. The Wizard is transformed by this gear kit into a volatile, very mobile skirmisher with great burst damage if the player learns the subtleties of proximity-based benefits.
Introducing the Monster Commander
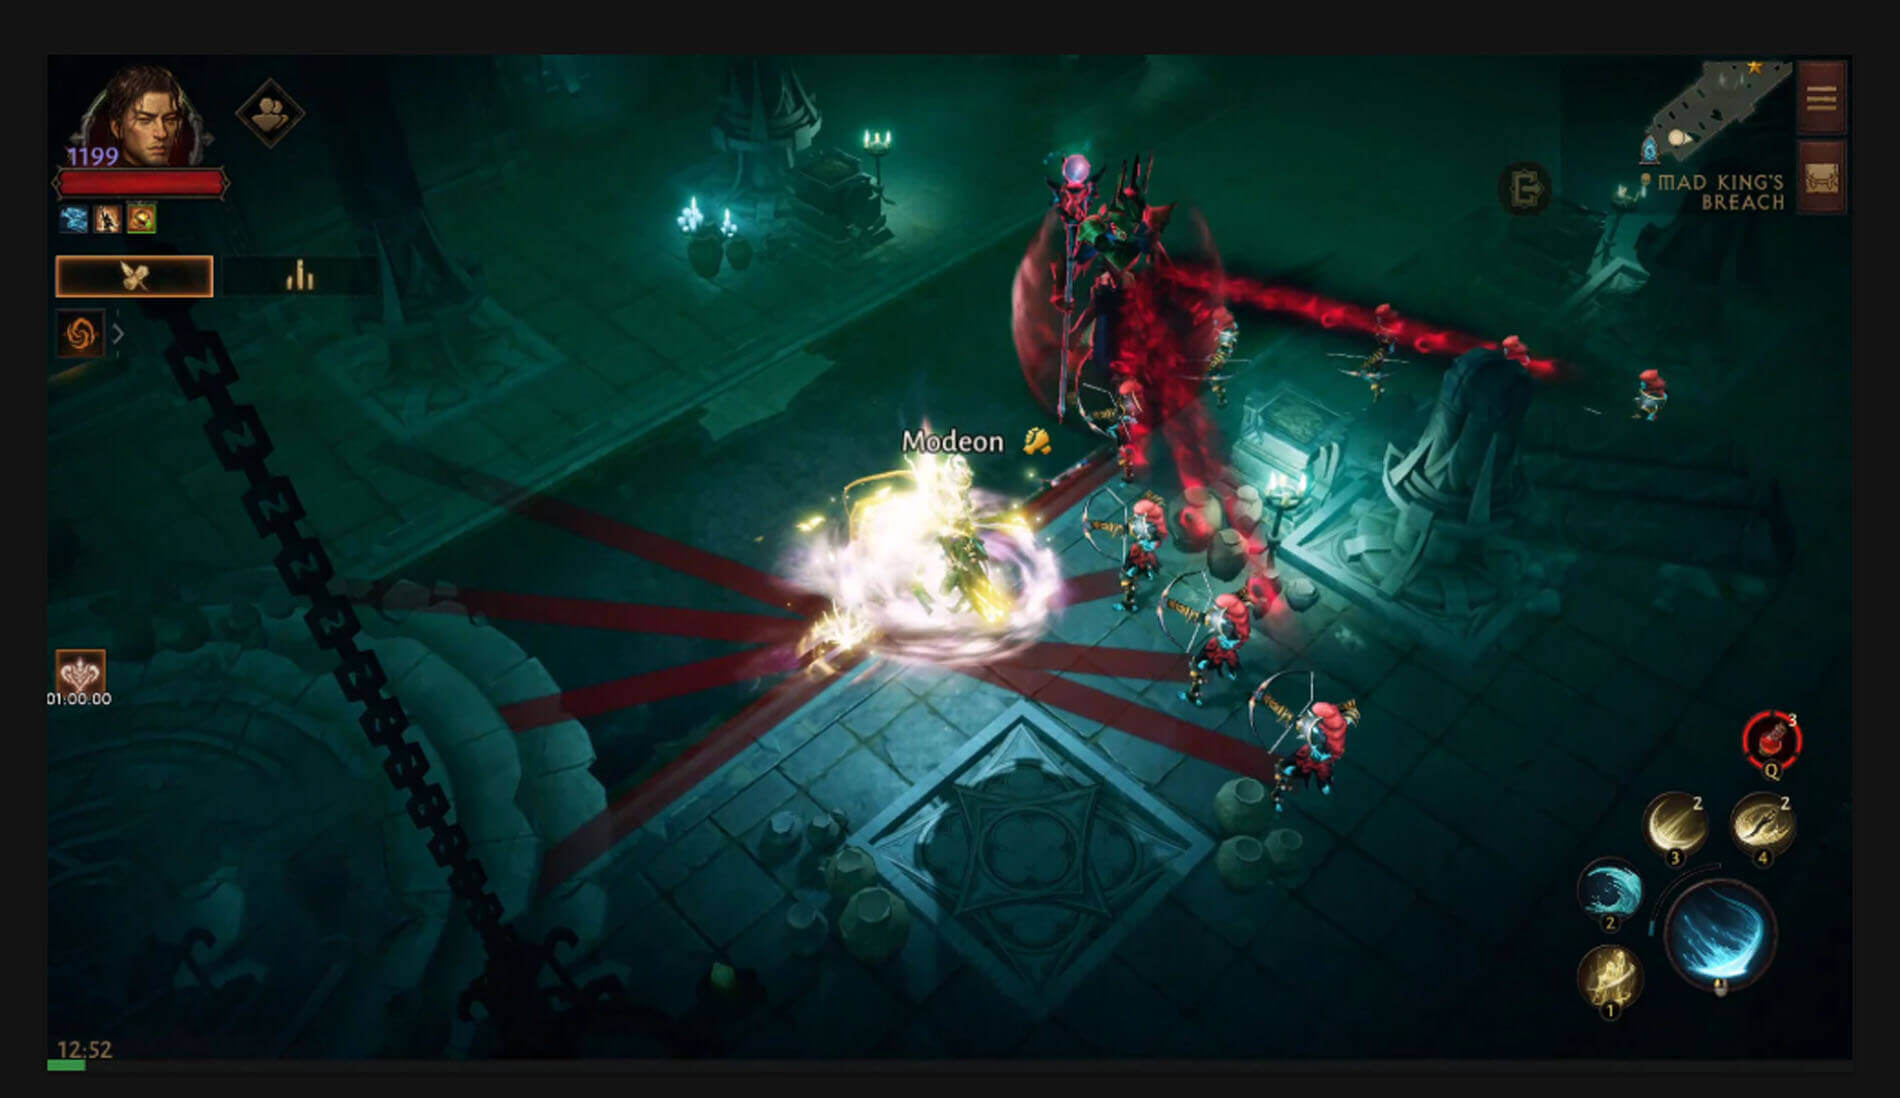
The Monster Commander transforms the dynamics of dungeon crawls at its very core. Previously, area of effect abilities and better equipment mostly helped to vanquish a bunch of foes. But the Commander adds a command structure component to the enemy troops. They drive players to interact with the placement and timing of the smaller enemies they typically overlook by gathering nearby foes into coordinated formations and timing their strikes. This design decision is a direct reaction to the demand for more strategic depth in endgame material. The player's normal habits are broken when known monsters all of a sudden act with goals, so brute force is temporarily put aside for strategic evaluation.
Two particular formations currently best illustrate this strategic need: the Shield Wall and the Ranged Volley. Before players can successfully strike the shielded core, they most likely need to identify a flaw in the defensive line, maybe by flanking or using piercing strikes. On the other hand, the Ranged Volley calls for quick movement and cover use to keep damage from being focused and intense from a distance. Every arrangement is a tiny fighting riddle meant to disrupt the habit of unthinking massacre by intentual design decisions. Good navigation of these events calls for quick adjustment of one's own abilities and posture to upset the existing coordination and sharp observation of the enemy's setup. This shift towards dynamic enemy behavior parallels design ideas found in other contemporary action RPGs aiming for longevity by means of intellectual challenge rather than mere number crunching.
Incentivizing Strategic Engagement
The way Blizzard uses the Monster Commander system is made even better by real, immediate rewards, which makes sure that players see these encounters not as annoying chores but as good chances. The promise of a Legendary item drop upon the first defeat of a Monster Commander each day is a great motivator to go out and overcome these fresh obstacles every day. Since this system links strategic success straight to player development, the time spent studying and conquering the Shield Wall or Ranged Volley is immediately lucrative. Moreover, the scaling of extra incentives according to encounter difficulty guarantees that mastering these sophisticated tactical situations remains a useful effort even after the first daily bonus is obtained. This tiered reward system supports the Commander's requested higher cognitive load.
A Step Towards a More Responsive Sanctuary
The Monster Commander fits inside a larger plan to make the world of Sanctuary feel more dangerous and responsive to player choices. This project is not a one-off; it builds on systems like Cursed Shrines and Corrupted Heroes, which add surprising or challenging aspects to regular gameplay loops. The aim is to stop the earth from being boring and therefore monotonous. The creators imply a dedication to making monsters act with more intelligence and coordination by adding an enemy type able to plan and carry out sophisticated moves. This development implies that future upgrades will keep expanding on this base, possibly adding Commanders using different monster families or even totally new, complicated formations to make sure that dungeon runs stay full of real, emerging dangers.
The Revival of Server Rivalry in Diablo Immortal's Bout of Realms
The announcement outlining the framework for the tournament, set to go from February 25th through March 15th, emphasizes a dedication to promote regular, intense PvP action. Unlike earlier cross-regional competitions, this iteration stresses strong intra-regional rivalry, with eight-person teams vying for the title of regional champions, therefore indicating a strategic change in Blizzard's approach to grow its competitive community.
The Structure of Server Based Conflict
The Bout of Realms is mostly based on server identification. The competition uses established community loyalties and rivalries by matching teams from one server against others on the same server cluster. Starting with a registration window from February 25 through March 1, the schedule is obviously separated. Teams need to settle their rosters and get their strategies ready in this first stage. After registering, the Ranked Matches phase, which lasts from March 2nd to March 6th, is the time when teams can get points and make sure they are seeded properly for the elimination rounds. Since early performance directly influences the later phases, this style calls for consistency.
March 9–15 sees the Elimination Bracket mark the tournament's peak. Although the general plan is similar to earlier Cross Server Bout of Realms events, the particular emphasis on intra-regional dominance gives it a unique flavor. Local power is celebrated as the best teams in a particular server cluster must beat their next-door rivals before moving on. Since the local player base is very personal about bragging rights, this concentrated intensity can sometimes produce more natural enthusiasm than would otherwise result from only cross-regional conflicts. From major, infrequent events to continuous, more regular testing grounds for a bigger number of would-be champions, the developers have said they want to create a continuous, more frequent competitive cycle.
Strategic Implications and Community Development
Mature esports development depends critically on the frequency advised by the developers. Skill development depends on consistent competitions that offer needed pace. Teams have clear, short-term goals to strive for, which inspires constant meta-analysis, class optimization, and team coordination activities. Repeated exposure to demanding situations hastens learning curves for a game like Diablo Immortal, where PvP effectiveness mostly depends on gear synergy and class composition. Knowing they will have another chance soon helps teams to see little setbacks less terrible and more educational.
This server-centred strategy enhances community links even if via competition. Often observing via streams or in game chat, the whole community becomes emotionally involved in the result when Server A's elite team meets Server B's best. This regional play produces better involvement levels than a broader cross-regional tournament might. The emphasis is on showing the combined strength and commitment of a single server community rather than only on personal ability. This approach effectively develops the foundation for competitive gaming: enthusiastic, identity-driven support groups.
Looking Beyond the Current Cycle
The announcement also suggests that future changes are coming, since after this Bout of Realms, a new kind of competition dependent on community needs will be launched. Long-term player retention in live service games depends on this reactivity. The popular team-based server dispute is confirmed by the ongoing competition, but the will to bring something fresh reveals an understanding that the competitive landscape has to change. Whether this new approach emphasizes 1v1 combat, many objective modalities, or maybe a different team size, the simple idea of innovation motivates the most committed players to be curious and involved.
Still, the current system offers a good baseline. It lets experienced participants hone current methods while it gives younger, committed teams a clear route to rise the ranks in their own server environment. Blizzard guarantees continuity by effectively returning this known, difficult framework, therefore laying the foundation for later growth of their PvP choices.
Tong-Shi’s Renewal Returns
Through its seasonal events, Diablo Immortal, Blizzard Entertainment's mobile and PC action RPG, effectively uses such techniques. Of these, Tong-Shi's Renewal stands out as a noteworthy occasion meant not only for personal development but also firmly grounded in community giving and involvement. From February 4 through February 26 server time, this renewal combines daily chores, resource gathering, and the sharing of festive gifts to give players a clear path to get useful in-game goods while also building social links in Sanctuary. The core components of Tong-Shi's Renewal are investigated in this essay with a focus on the task completion system, the importance of the special currency, and the prominence of giving as the main event of the festival.
Daily Engagement and Task Structure
Daily player activity—arranged around the accomplishment of up to five daily particular chores—forms Tong-Shi's Renewal's basis. These activities involve players in several aspects of Diablo Immortal gameplay, therefore guaranteeing total participation in several modes. Running Dungeons, confronting Elder Rifts, killing elite monsters, finishing Bounties, and effectively beating the elusive Jingun are among the required activities. The event encourages active engagement over passive collecting by demanding that players engage in these different gameplay loops. Red Bags and Tseym are two of the priceless benefits that come from finishing these jobs. Although participants might try these chores multiple times, the system sets wise limits to keep equilibrium: during the course of the event, players are only permitted to earn 30 Red Bags and 100 Tseym per week. This weekly limit promotes consistent involvement across the three-week period as opposed to binge playing, hence guaranteeing a consistent stream of resources for the devoted player base.
The Currency of Celebration: Red Bags and Tseym
Red Bags and Tseym, the two main currencies produced from daily activities, have different but complementary functions in the event framework. Once earned, Tseym helps to fill personal reward pools, which means that when you contribute you can get random things like Gold, Scrap, Dust, or even a Random Legendary Item. This system offers task completion with some luck and quick financial reward. The Red Bags are the most socially focused aspect of the event, though. Red Bags are made specifically as gifts for friends or clan members to celebrate with. The mechanism encourages prosocial conduct; players earn rewards not only upon opening a Red Bag but also upon sending one. Sending Red Bags in numbers opens up tiered rewards, which include Normal Gems of your choice to Rare Crests. This gives you real benefits for the act of giving itself. Additionally, a free daily Red Bag claim via the login rewards tab gets around the weekly limits and encourages daily check-ins without penalizing players who might miss a day of task completion, particularly given that a quest system is there to make up for any missed login incentives.
Promoting Social Interdependence
Tong-Shi's Renewal becomes a group social activity from a simple resource grind thanks to the explicit encouragement to send and receive Red Bags. Maintaining strong community structures in the cutthroat MMO scene depends on systems that positively encourage gifting. The event encourages player interaction by tying useful progression tools like Crests needed for high-level gameplay to the act of sharing. A player who has a lot of work done can help a friend or Clan member who isn't as active. This makes sure that the game's economy and social structure reflect the renewal spirit, which is usually associated with good fortune and community well-being. Including Familiar usage to finish bounties for the renewal activities even simplifies the procedure even further so that players may use current resources to help with their civic responsibilities within the event framework.
Season 48 Battle Pass, Events & Rewards Guide
Major narrative arcs usually signal a time of ambiguity, but in the realm of Sanctuary, the aftermath of vanquishing strong opponents like Albrecht and facing the Fleshwarped is only a lead-in to the next phase of battle. The most recent game update, which comes after big wins and the purchase of strong Ancient Legendary gear, shows a clear change of direction meant to strengthen player advancement and increase involvement inside the game world. From seasoned pros to returning casual players, this new chapter emphasized by the arrival of Season 48 and integrates a full Battle Pass, timely limited-time events, and rewards systems meant to appeal to a wide range of players. This upgrade stresses organized development and purposeful involvement over just luck, therefore producing a unified experience in which storyline drive directly drives game incentives.
The Core of Season 48 Progression

The new Battle Pass at the centre of this seasonal update is thematically centred on the barren, icy reaches of the World's Crown. This path of progression is the main way that players are rewarded for playing well consistently throughout the season. Unlike completely random drops, the Battle Pass promises practical resources and sure cosmetic improvements when certain milestones are achieved. Keeping player enthusiasm throughout weekly play sessions depends on having clear, attainable objectives provided by this organized strategy. The Battle Pass offers new, themed objectives that could need certain loadouts or interaction with newly introduced features, which guarantees that even well-known characters have fresh advancement goals and supplements current endgame loops for elite players.
Synergy Between Events and Player Choice
The success of any material update mostly hinges on the way its different components work together. In this case, the Battle Pass framework is deftly entwined with limited-time events. These occurrences, which usually centre on particular fighting difficulties or resource collecting priorities, provide prizes that speed up Battle Pass advancement or directly aid character optimization outside the primary seasonal path. An event, for instance, emphasizing on overcoming frost-based opponents directly advances the World's Crown motif and also grants extra experience or crafting supplies enabling players to unlock more tiers of the Battle Pass more quickly. This strategic overlap guarantees that players participating in concentrated farming or events always believe their time is being well spent, therefore reducing the feeling of useless effort that may haunt poorly integrated systems.
Accessibility and Momentum in Gameplay

This upgrade stresses the need of keeping progression available, which is a key feature. Although devoted gamers still own the top levels of prizes and the most difficult material, the baseline seasonal experience aims to be interesting for individuals with little time. Systems enabling fast access into relevant play help new players or those returning after a break. Participation is emphasized over depending just on the luck of random drops in order to guarantee prizes. This motivates momentum; once a player spends a little bit of time, the Battle Pass's visible progress and achievable event objectives present a compelling reason to keep playing, so strengthening character builds through consistent gathering of required components rather than being frustrated with close calls on rare things.
Strengthening the Narrative Through Gameplay
The publication of material effectively links the following Sanctuary future direction with the previous tale ending. The gameplay loop becomes relevant when the Battle Pass and events are framed with regard to the effects of recent earth-shattering events. Players are not just working for stats; they are interacting with the direct consequences of the past story, therefore reinforcing their roles as active players in the world's recovery or ongoing fall. Thanks to actual in-game incentives, this thematic reinforcement raises the seasonal cycle from a basic reset to a needed continuation of the larger plot so guaranteeing that the player's time commitment has narrative relevance.
Season 48 offers a mature perspective on the delivery of live-service content. Blizzard has built an interesting environment for ongoing involvement by combining a well-defined Battle Pass, thematically relevant limited-time events, and progression pathways that celebrate player choice and time investment. The update effectively expands on earlier narrative successes by providing clear, attainable aims suited for several playstyles, therefore guaranteeing that the trip across the freezing fringes of the World's Crown is both fulfilling and meaningful. Narrative, structure, and reward are strategically aligned to provide a solid basis for the continuous expansion of Sanctuary.
The Legacy and Perseverance of the Boreal Nomads

A major temporal event in the operational cycle of the game, the release of Season 48 and its accompanying Boreal Nomads Battle Pass points a change in thematic emphasis and incentives. This pass, which is available from January 14 to February 11, takes players on a figurative journey to the cold, historically rich northern regions known as the World's Crown. The theme goes much beyond just beautiful; it strongly bases the events of the season in the mythology of previous inhabitants’ exiles and tough survivors who relied on continuous work against tremendous challenges. The way the Boreal Nomads Battle Pass captures these themes of tenacity and consistent involvement into its structural layout will be discussed in this article together with the progression philosophy, the kinds of rewards it offers, and the value proposition it presents to both free and premium users.
The Philosophy Behind the Boreal Nomads Battle Pass
Emphasizing consistent activity over quick completion, the fundamental design theory behind the Boreal Nomads Battle Pass is Season 48 is expressly meant to reward persistence, unlike passes that may incentivize short, sharp bursts of gameplay. This reflects the historical hardship of the northern clans, who risked death in the harsh environment if they stopped working. Spanning about a month, the pass's length offers a realistic window for players to include seasonal difficulties into their usual gameplay loop. Daily chores, continuous challenges, and participation in related activities help one accumulate Battle Points for progression. This dependence on constancy guarantees that the trip across the 40 ranks of the pass feels earned, therefore strengthening a feeling of success linked to long-term commitment instead of short-lived bursts. Linking reward satisfaction straight to regular participation helps this strategy promote long-term player retention.
The Boreal Nomads Battle Pass's 40 tiers provide a thoughtfully chosen collection of unlockable goods meant to help players right away and over the long run. The benefits are carefully distributed between instant utility and fundamental character power improvement. Crestes, which are required parts for interacting with Elder Rifts, the main way to get the prized Legendary Gems, are among the most important of these. Late-game build optimization depends on legendary gems, which also affect player resonance and open up strong combat capabilities. Including Hilts also gives some financial freedom. This adaptable money lets players buy unique goods, charms, and extra resources from in-game stores, which helps them to fine-tune their character loadouts. Beyond these main elements, the pass offers extra progression resources required for basic gameplay loops like gear upgrading and reforging, therefore ensuring that even apparently insignificant rank accomplishments directly affect general character development.
Differentiating Player Value Trucks

Modern seasonal content design must strike a compromise between access and premium incentives; the Boreal Nomads structure clearly upholds this. Upholding the idea that active participation is always worthwhile, both the free and paid levels provide significant returns. By just taking part in the regular tasks required to gain Battle Points, free track participants are assured to get valuable information. This guarantees a minimum degree of incentives buildup, therefore reducing exclusion-related emotions. On the other hand, those who own a premium Battle Pass have access to a larger range of rewards and sometimes progress more quickly through the tiers. This tiered system successfully rewards the financial commitment of premium members while also confirming the time investment of all committed players. Whether a player buys the premium track or not, the system guarantees that regular activity produces clear and useful results immediately relevant to their path through the World's Crown.
For Season 48, the Boreal Nomads Battle Pass effectively integrates its visual source of northern endurance into its practical design. The pass promotes ongoing player engagement by giving methodical effort over rapid consumption top priority across its 40 ranks. The reward system, which includes Crests, Hilts, and Legendary Gems, directly helps meaningful character growth, which is good for both short-term needs and long-term power scaling. Offering significant incentives at all levels of involvement, the dual track system strengthens its allure even more. Season 48 finally bears witness to the idea that consistent, tenacious work produces actual benefits, much as survival in the World's Crown does.
Seasonal Focus and Gameplay Themes

Resilience, control, and endurance—the same qualities required of life in a harsh, frozen environment—define the thematic base of the Boreal Nomads season. The gameplay mechanisms developers choose to highlight are directly influenced by this underlying theme. Practically speaking, players succeed when they give survival during long battles more importance than doing quick bursts of damage. These demands creating characters or loadouts able to keep effectiveness throughout drawn-out battles. Moreover, the tough environment points to a demand for becoming proficient in crowd control. Freezing and slowing foes become more than just strategic benefits; they become thematic needs reflecting the effort to control an environment that clearly aims to hinder development.
Intrinsic motivation comes from the match between thematic identity and gameplay features. A player who is good at dealing damage over time or concentrates on being defensively useful will naturally feel affirmed during this time. Reducing downtime between fights—a major element of effective resource management in challenging terrain—is automatically rewarded. This loop whereby the theme determines the effective plan and the plan supports the theme produces a really immersive and gratifying seasonal experience that rewards people who adopt a systematic, long-term attitude to problems.
Progression Through Consistency
Apart from daily gameplay, the design of the connected Battle Pass shows a dedication to consistent, dependable progress rather than erratic bursts of action. Unlike time-limited, high-intensity events requiring quick, concentrated attention, the Boreal Nomads Battle Pass emphasizes regularity. Stable progression curve is fed by everyday activities, weekly goals, and continuous seasonal events. By accepting the fact of contemporary player availability, this approach enables people to participate at their own speed while still seeing real forward momentum.
This multilayered approach to advancement adequately meets a broad range of player engagement. For the committed completionist, reaching all 40 ranks is a major, real seasonal achievement that shows they have mastered the particular difficulties of the season. On the other hand, the casual player who can only spare little time is not completely excluded. Consistent, even if brief, involvement still makes meaningful rewards reachable. This is very different from game models where missing crucial days might have a big impact on how many seasonal rewards you get. This creates a more inclusive model for long-term involvement.
Why Season 48 Is Worth Your Time

Season 48 effectively combines interesting seasonal narrative with actual, power-oriented prizes. While the Boreal Nomads' story framework offers taste and background, the real advantages included into the Battle Pass structure help to confirm the appeal. The season provides required upgrading materials and performance-focused loot that immediately improve long-term character viability for players committed to honing their endgame construction. For those less interested in just maximizing things, the seasonal identity itself is enough to make involvement worthwhile. Season 48 is a great investment of player time because it finds a good balance between being really involved in the story and getting stuff done, between having a strong narrative flavour and having a lot of practical power. It rewards that adopted persistence, so mirroring the very journey of the titular Nomads and encouraging players to develop a hard, resilient attitude.
The Paradox of Ruin and Rebirth in the Shattered Wilds Event

Perfectly illustrating its dynamic, the Shattered Wilds event shows a scene marred by past battle, a clear reminder of destruction, but also framed as a rich ground for future recovery and strength. This change purposefully uses a time-limited event framework meant to encourage committed, diverse involvement rather than only provides momentary distraction. The Shattered Wilds event seeks to reset player motivation by emphasizing earned development above depending on random chance, therefore rewarding consistent effort across several gameplay aspects while also providing very sought-after rewards required for elite level advancement.
The Event as the Core Mechanism of Renewal
Running from early January to early February, the Shattered Wilds Limited-Time Event's temporal restriction creates a sense of urgency that directs player activity into concentrated engagement. Beyond just basic daily login incentives, this event serves as the primary motivator for the update by setting up a structured, multi-week advancement route. Importantly, the design approach changes the emphasis from just one, boring grinding to a thorough investigation of all the possible activities. Completing event-specific goals tucked inside rotating game styles will help players advance. This method distributes rewards more fairly since it takes into account both the more casual player who concentrates efforts during peak event weeks and the very committed player who plays daily. The focus is on tangible results instead of random fortune. A notable feature is this trend towards deterministic reward systems, which gives players a strong feeling of control over their character progression throughout the event's duration.
The physical advantages granted upon meeting Shattered Wilds goals are closely related to the constant need of endgame play. The reward pool is chosen to solve major bottlenecks in character optimization. First and most important of these are the Telluric Pearls, which are needed to make Legendary Gems better. These are the best reason to join. Including Set Items also helps to improve current strong equipment configurations, whereas Legendary Items provide freedom to experiment with different builds or required tool improvements. One-Star Legendary Gems are useful for enhancing early resonance levels or supporting secondary character configurations and help to support even basic development. This handpicked collection guarantees that investments in the event produce quick, significant results that avoid the sometimes-annoying dependency on simple random number creation drops seen in certain areas of loot acquisition. Including progression gained via skill and time into the fundamental reward loop confirms player commitment throughout the whole game experience.
The Structure of Rotational Engagement

A system of rotating highlighted activities guides the framework helping the whole event advance. This rotational element keeps player involvement dynamic throughout the course of the event. Players have to adjust their strategies each week as the emphasis changes between different in-game events instead of concentrating on one boring job for four weeks. This design decision promotes constant activity and expands the range of content players engage with, therefore guaranteeing that the investigation of the Shattered Wilds seems like a trip across many obstacles rather than a fixed challenge course. Players who stay constantly engaged across these changing weekly focuses are deliberately rewarded, hence validating the main idea of the event that consistent, flexible involvement is the secret to reaping the most valuable resources from the update. This organized flexibility reflects the actual problem of rebuilding after disaster, which calls for constant work and flexibility.
The Shattered Wilds event deftly places itself as more than just a narrative or visual improvement. It's a carefully thought-out progression system disguised as recovery from destruction. The developers have produced a strong reward system by providing a clearly defined, time-sensitive event that rewards regular, varied participation with vital endgame materials. The combination of story setting and deterministic reward mechanisms creates a situation where both ability and commitment are valuable assets, enabling players to actively rebuild their strength in a scene marked by previous failure, hence providing a real chance for significant progress inside the game's ecology.
The Strategic Return of Diverse Play Experiences in Sanctuary

Beyond just content refresh, the regular reintroduction of fan-favourite events inside continuing online worlds like Sanctuary is absolutely vital since it tactically recalibrates player engagement by recognizing the many reasons that motivate long-term participation.
Instead of following a single challenge pattern, the present returning event lineup shows a refined knowledge of player segmentation. Whether someone values pure survival testing, competitive ranking, best resource farming, or greatest transactional value, this carefully chosen selection guarantees that a relevant progression path is always available during any given login session. By appealing to the spectrum of player involvement preferences, this multifarious strategy turns regular play into a more whole and pleasant encounter.
Underlying these repeating events is a design philosophy that implies a conscious attempt to prevent genre tiredness. Early in the cycle, Survivor's Bane establishes a tone centred on tactical endurance. This event, which runs from January 7 to January 14, calls for builds that show resilience and resourcefulness rather than just raw offensive ability. Success here depends on knowing how to prioritize threats and controlling defensive cooldowns under stress. For many players, learning this defensive skill set is the first step towards having a good account overall. This makes it a great first thing to do because it quickly shows that you're getting better at the game, which helps you do better in other parts of the game.
On the other hand, Conqueror moves the emphasis strongly toward performance metrics. This event directly appeals to players driven by competence and tangible skill display and takes place between January 9 and January 12. It is a competitive proving ground where high placement depends on perfect class mechanics and quick judgments. The gratification that comes from establishing fresh personal bests or moving up leaderboards is a great internal incentive that confirms a strong commitment in game knowledge and control ability.
For a sizable portion of the player base, efficiency and consistent buildup are still quite important; Hungering Moon directly satisfies this requirement. This event gives predictable resource acquisition first importance from January 10 to January 17. Its planned rewards mechanism fits exactly with the Battle Pass system's rhythm, so players who like to optimise things and make money grow in the long run can make steady progress. This consistency provides a solid foundation for daily involvement and contrasts with the high-variance thrill of other difficulties.
High Intensity and Value Optimization
The event rotation's second half offers rising fighting intensity and chances for financial leverage. Running from January 14 to January 21, Trial of the Hordes is specifically meant for damage specialization in high-area-of-effect. For players who have put a lot of time and money into skills that help them manage crowds and clear the screen, this event is the perfect place to see if their endgame builds can stand up to a lot of pressure and make them even better. Effectively navigating Trial of the Hordes not only grants excellent rewards but also confirms particular high-tier build choices relevant to more general game advancement, such as progress in the Shattered Wilds areas.
The last event, Shady Stock, which runs from January 17 to January 24, looks at a whole different part of how players interact with each other: how to make the most of things. This occasion serves as a business possibility since it provides limited-time offers that call for great timing and resource control. Shady Stock provides important decision points for those who like the meta-game of maximizing return on investment. Effectively negotiating these changing offers can sometimes provide disproportionate advantages in terms of rare commodities or currencies, therefore rewarding hard work and timely involvement. The schedule makes sure that even those who only log in for a short time at the end of the period have a high-value activity available by ending the cycle with a focus on transactional efficiency.
Returning events' strategic placement inside Sanctuary creates a whole ecosystem of involvement. The developers make certain that no major playstyle is neglected by cycling through difficulties testing survivability, competitive ability, effective farming, overwhelming battle application, and financial sense. This careful sequencing ensures that, whatever their particular concentration, player investment produces significant, quantifiable progress. The outcome is a dynamic setting where frequent logins are always recognized, therefore promoting sustained player loyalty throughout a rather diverse demographic profile
The Enduring Legacy of Darkening of Tristram Event

Diablo series by Blizzard Entertainment is a pillar of the action role-playing genre, and its 1996 version still serves as a basic text for dungeon exploring. Introduced in Diablo 3 to commemorate the franchise's history, the yearly "Darkening of Tristram" event is a carefully designed bit of interactive nostalgia. This short-term occurrence goes beyond mere cosmetic changes; it essentially recreates the sombre, limiting experience of the first Diablo inside the framework and mechanics of its current successor. The planned comeback of this occasion, set for late December 2025 to January 2026, emphasizes a critical convergence of historical respect and current game design. Analysing the Darkening of Tristram's design, mechanism, and cultural significance helps to explain why this yearly trip to the beginnings of Sanctuary is still so important to the committed player base.
A collection of fresh Legendary Gems will enhance the new chest pieces. While the exact statistical specifics were withheld during early previews, it is expected that these gemstones will encourage totally different build pathways. In games when the endgame meta has become stale, new gem releases are the main means to drive diversity. The community impatiently awaits the following class balancing that is often required to ensure that no single class becomes universally dominant, as such changes usually cause a significant shift in battle effectiveness that might upset the dominance of current top-performing builds. Such significant changes often need further class balancing to guarantee that no one class becomes universally dominant; the community eagerly awaits this following the first gear release.
The Genesis and Purpose of Nostalgic Immersion

The Darkening of Tristram event marked the 20th anniversary of the Diablo series when it first aired in 2016. Blizzard's goal was simple: to offer a direct, real connection between the aging Diablo 3 player base and the game that kicked it all off. Though nostalgia in gaming is a strong emotional and financial motivator, if done poorly it may seem like a quick buck-in. Blizzard avoided this trap by deciding on a thorough mechanical translation above a surface imitation. Several important areas clearly show the dedication to historical accuracy, therefore changing the well-known Diablo 3 gameplay loop.
The most important of these changes is the addition of retro visual and movement limits. Players are deliberately given a pixelated visual filter that makes them look like they were from 1996. More importantly, movement is limited to eight directional inputs—a far cry from the fluid, multidirectional movement made possible by contemporary game engines. This imposed rigidity alters tactical decision-making right away; placement turns into a more planned, grid-like computation instead of a flexible dodge. Moreover, replicated is the dungeon arrangement itself. The event offers a single, descending design resembling the 16 levels of the first Tristram Cathedral, culminating in a battle with famous adversaries and monsters from the first game rather than the random, expansive maps of current Diablo.
Event Mechanics and Access Points

Key to the limited-time character of the Darkening of Tristram is the exact timing of it, which encourages players' feeling of urgency. The story trigger is Cultists showing up on December 31st, 2025, according to the operational plan given. A blue portal, the actual gateway, opens on January 3rd and gives players three days to get ready or just have fun before the main dungeon opens. The event ends for sure on January 31st, after which the portal disappears until the following year, making any work that wasn't finished inaccessible for a while. This yearly cycle helps to support the unique occasion nature of the event.
Players must first interact with Diablo 3's current system before they can enter the darkness. Players have to check into Diablo 3 and choose Adventure Mode. Act I open at The Old Ruins, a place familiar to experienced gamers. Players search and engage with the particular blue portal here. Successfully entering this portal starts the change that turns on the Retro Vision Mode and moves the player character into the stylised recreation of Old Tristram. From the town centre, players travel north to the Cathedral entry, where the actual start of the descent is indicated. The success of the occasion depends on this multi-layered strategy combining accessibility with authenticity, which uses contemporary technologies to access a retro experience.
Dungeon Progression and Classic Adversaries

Tristram's darkening matches the ongoing difficulty of the first game. Diablo 3's better skill system and faster speed help the fighting itself, but the environment makes people adapt. Diablo 3's divided acts and random tile sets differ from the single, ongoing fall across the Cathedral levels. Players encounter opponents whose abilities and tactics are precisely adapted from the first game.
Each run ends with a face-off against the venerable boss roster. This includes meetings with strong people like the Butcher, King Leoric, and finally Diablo himself. These people are shown in a way that respects their original designs but also uses modern graphics to make them look better. These meetings are not only basic reskins; rather, they usually require knowledge of the original boss mechanics but filtered through Diablo 3's improved fighting capabilities. Effectively negotiating the tight movement and the known enemy position offers a very gratifying feeling of success based on historical memory. The event challenges the player's recollection of Diablo 1's layout and threats while using their understanding of Diablo 3's power scaling.
The event hurls guests into a recently open location that mimics the notorious Cathedral dungeon across 16 different levels. This consistent depth is straight from Diablo 1, where investigation was straightforwardly vertical and unforgiving. Players must go down each level until Level 16, where they meet the main Lord of Terror. This design stresses perseverance and resourcefulness, which are key ideas from the original title. This is very different from how Diablo 3 is usually played, which is more open-ended. Blizzard's suggestion to use a fresh level 1 character for this event strengthens the genuineness by driving players to embrace the slow, deliberate gearing process akin to early 1990s dungeon crawlers instead of depending on strong current builds.
The Allure of Exclusive Rewards and Achievements

Getting special, permanent rewards is a major reason why people play in any limited-time video game event. Tristram's Darkening abounds with these motivations, presenting actual evidence of a fruitful trip back in time. The incentives are mostly decorative and collectable, so they fit right in with the celebratory mood of the event. The Red Soul Shard, which lets players access the powers of the famous "The Horadric Cube" in Diablo 3, is one of the most important things that will stay around from the game. Moreover, players can acquire special cosmetic rewards that allude to the original game upon finishing the particular event quests, including the "Portrait of Tristram" and a unique pet, the "Wirt's Leg" pet, referencing the infamous hidden cow level from Diablo 1. These things are quite valuable since they act as badges of honour, showing that the player took part in the given time frame. The addition of particular achievements connected straight to the event's completion also appeals to completionists since it offers quantifiable objectives beyond mere participation. The fact that the rewards are limited means that players who miss the January window have to wait a whole year, which maximizes engagement during the active period.
The return of legendary bosses and a unique treasure mechanism greatly enhance the difficulties in Darkening of Tristram. Players have to overcome tough obstacles like The Butcher on Level 2, the Skeleton King on Level 3, and Archbishop Lazarus, all the way up to the last fight with Diablo. These adversaries deliberately evoke nostalgia in their conduct and the incentives they provide, even while they use the graphics engine of Diablo 3. Critically, the loot that fell closely resembles Diablo 1's design. Players discover objects resembling and operating like their predecessors, such as the "Godly Plate of the Whale," instead of getting modern Legendary items. Respecting the legacy loot pool of the first game, this mechanism deftly closes the mechanical divide between the two games and guarantees that the rewards seem important in light of the event.
Nostalgic NPCs and the Black Mushroom Quest

The recreating of the Black Mushroom quest, which is closely related to the lore and the destiny of beloved non-player characters, is perhaps the most poignant part of the event. Pepin, Griswold, Farnham, and Ogden familiar faces from Diablo 1 comeback but in a horrible break from recollection: they are discovered as corpses strewn around the dungeon floors. Their death is necessary for finishing the complex quest's steps. Finding the Black Mushroom needs moving to Level 9, then Adria in town brews the Witch's Brew, and lastly Farnham's body is administered the beverage. Further encounters with the remains of the other NPCs provide essential elements such Gard's Letter and Drunkard's Debt. Using these gruesome results to create Wirt's Leg as a mace in the Blacksmith unlocks more event-specific benefits. Using player memory of these characters, this questline is a brilliant example of environmental narrative that adds emotional depth to an otherwise simple dungeon run.
Black Mushroom Quest Steps
- Reach Dungeon Level 9 and find the Black Mushroom
- Return to town and speak with Adria
- Click Adria’s cauldron to obtain the Witch’s Brew
- Deliver the brew to Farnham’s corpse
- Collect:
Drunkard’s Debt from Ogden’s corpse
Gard’s Letter from Pepin’s corpse
Healer’s Prescription from Griswold’s corpse
- Visit the Blacksmith and craft the recipe.
- Create Wirt’s Leg as a mace, unlocking additional rewards.
Cosmetic Rewards and Event Completion

The main reason why people want to play this game is because there are so many different cosmetic rewards that you can get for doing well in the game. Players that methodically negotiate the obstacles of the event reveal rewards that show their commitment in a physical form. For instance, finishing particular dungeon levels provides crucial visual indicators like Ogden's Sign and Banners. A more noteworthy accomplishment is obtaining Ogden's Brew, which is awarded particularly upon overcoming every boss faced along the timeline of the event. Moreover, getting animals, special friends that follow the player, usually calls for exact, maybe unusual, gameplay actions. For instance, earning the Butcher Pet with a level one character requires meticulous preparation to prevent inadvertent character advancement.
Unlocking Unique Artifacts and Transmogrifications
Apart from the basic beauty, the occasion gives access to legendary objects connected to Diablo's past. The notorious Wirt's Leg is a gateway item that players must recover to get a map pointing to the hidden Cow Level. This questline ends in the finding of Wirt's stash, which, while it doesn't give legendary power, has unique transmogrification tools. As a weapon appearance, the Butcher's Cleaver and Wirt's Leg give gamers the chance to graphically relate to these legendary characters. The player base has different levels of participation because the hidden goals are very specific, while the path to finish the banner is more direct.
The Pursuit of Exclusive Portraits

Exclusive player portraits, maybe the most challenging set of incentives, act as highly visible completion indicators. Thoroughness is demonstrated by the Demon Portrait, which calls for players to kill every single unique monster concealed among the twelve Tristram dungeon levels, including particular rare spawns found at the Unholy Altar. From Rotfeast the Hungry on Level 2 to Sir Gorash on Level 16, the comprehensive list of required kills calls for a lot of mapping and regular dungeon runs. This tests the player's ability to stay focused and keep a close eye on all the encounters they have completed. The route to the Angel Portrait is also quite demanding. This calls for a larger dedication spanning the whole Diablo 3 campaign, which includes searching Temporal Priests across all five acts, gathering seven Cultist's Pages, and finally achieving "I Sense a Soul in Search of Answers. " These portrait criteria basically demand a thorough interaction with the open world of the base game as well as the event material.
Cultural Resonance and Thematic Success
The Darkening of Tristram is successful not only for its gameplay but also for its thematic resonance. The gathering catches the first Diablo's overarching fear and claustrophobia. While today's action RPGs sometimes focus on speed and large-scale damage, the first game was known for its slow, deliberate horror and the terrifying experience of being lost in a dark, inescapable maze. Blizzard makes current players, who are used to amazing visual quality, face the simplicity and horror of the genre's roots by using the retro filter and movement constraints.
This purposeful cutting down of sensory input sharpens the attention paid to sound design and environment. Deep emotional reactions in seasoned fans are brought on by the music cues and sound effects, which are frequently straight samples or high-fidelity recreations of the original game. The event lets gamers see how far the technology has come while also respecting the simple design ideas that made the genre what it is. It's like an interactive museum exhibit. This is an educational activity presented as amusement showing that limitations can encourage creative depth. It gives fresh players a clear, low-risk introduction to grasping the Diablo world's history, therefore grounding the present storyline in its historical setting.
The Darkening of Tristram is not only a once-a-year holiday; it's a great example of how to use digital archaeology and fan service with real artistic commitment. Blizzard produces a distinctive gameplay experience that is both familiar and foreign by deftly fusing Diablo 1's mechanical and artistic constraints into Diablo 3's strong framework. The rigorous yearly window chosen by the scheduled operational dates running from December 31st, 2025, to January 31st, 2026, effectively creates urgency and exclusivity. The trip through the retro-filtered Cathedral, which ends in classic boss fights and gives players unique cosmetic items, makes sure that this trip down memory lane stays a key part of the Diablo 3 experience. It serves as a stark reminder that occasionally the strongest link to a contemporary work is discovered by purposely going back into its gloomy, pixelated past.
The Sundered Goliath is the height of Albrecht's logistical nightmare. Made from the grafted bodies of hundreds of followers, it is a mix of many lives devoted to one, enormous form. Though at first thought to be a failed experiment because of its bulk, Albrecht used this failure to create a mobile command and deployment platform. This hulking chamber it carries acts as a troop carrier, transporting battalions of Shardborne straight into the battle, and trampling enemies. This creature is the ultimate example of military hubris: the belief that sheer, concentrated biomass can beat tactical skill, so turning the troops themselves into the main infrastructure of war.
Prepare for The End of Madness

The December update's main theme is the resolution of the conflict started by Albrecht's ambition within the Sharval Wilds. The invasion of Shardborne legions sets up a high-stakes fight, which moves the story toward a decisive battle for control over the region. This narrative urgency directly translates into the gameplay design, as players get ready for what is described as the final battle for the people of Sharval. In live service games, it is very important to resolve big story points to make sure that player's investment from the past few months is validated. By bringing the Epoch of Madness to a crescendo, the developers provide a sense of accomplishment and closure, while also setting the stage for future storylines. New challenges, which are naturally linked to defeating these newfound horrors, make sure that the narrative momentum directly fuels player activity.
Mechanical Improvements: Gears and Jewels Beyond the plot, the mechanics of any major update are its substance, and The First and Last King promises clear boosts to player power and customization. Since these goods usually represent the height of character optimization, the inclusion of fresh Ancient Legendary gear is absolutely essential as they provide special features that redefine class builds. For example, if earlier updates added modest build synergies, the new Ancient Legendries should offer more pronounced, game changing effects. Similarly, the addition of new Legendary Gems provides another layer of depth to character progression. Legendary Gems are key elements in the Diablo series since they provide significant stat boosts and active/passive powers that can greatly affect combat effectiveness. A well-designed new Legendary Gem can offer a unique utility or damage profile that current top builds lack, therefore encouraging players to interact with the new open world challenges and dungeons to get them.
New Approaches to Participation:This update especially highlights fresh obstacles inside dungeons and the open world. To serve various player preferences, developers mix the material. Open world challenges sometimes emphasize dynamic events, world bosses, or particular areas that promote great scale teamwork or solo discovery. Dungeons, on the other hand, provide curated, repeatable instances with certain mechanics to test team coordination and build execution. The developers keep both formats current by refreshing them. The reference of Brumaltine's celebration points to a temporal event, probably with unique cosmetic prizes, limited time experience boosts, or temporary gameplay modifiers. Such seasonal events encourage daily log-ins and active play by fostering community participation and providing time-sensitive rewards.
Geographical Growth and Game Variety
Adding two new subzones inside the already existing Sharval Wilds greatly extends the playable area. This growth goes beyond basic zone additions since it provides unique gameplay experiences connected to particular sites.
Entsteig Bailey
The Entsteig Bailey, which is shown as Sharval's capital's outer courtyard under attack, stresses defensive battle situations. The addition of special foes like the Living Siege Engine suggests that mechanics that give priority to crowd control and objective defense will change the game dynamic away from typical exploration or boss hunting. This kind of wave-based objective is great for testing player builds under continuous pressure.
Aughild's Barrow Tombs

In contrast, the Barrow Tombs of Aughild taps into classic dark fantasy aesthetics within ancient burial chambers. This environment signals a return to core dungeon crawling, featuring new boss encounters and high-density monster zones. Such areas are explicitly optimized for farming, suggesting they will provide rich opportunities for players seeking rare gear upgrades or currency accumulation necessary for character progression heading into the next year’s content. When these zones unlock, the Sharval Wilds will transition from an ongoing area into a fully realized, completed region, offering a sense of tangible achievement in world completion.
Importance for Player Involvement
Especially for lore fans, the December 17 update is considered a must play event. However, its more general consequences for all gamers are significant. The update offers a satisfying feeling of closure by finishing a plot thread. Simultaneously, the inclusion of several environmental challenges and better farming sites guarantees that players post story completion have immediate, practical objectives. This equilibrium between narrative happiness and ongoing gameplay loops is the cornerstone of effective live service upkeep. The update makes sure the main game loop—progress, explore, conquer—is refreshed with high-quality content that validates the community's time investment.
The Arrival of Old Legendary Chest Pieces

The most significant addition revealed for the December patch was a new gear tier created just for chest slot items: Ancient Legendary Gear. This gear type changes the crafting and acquisition loop for top-tier equipment. These items have three set Magic Affixes, and a fourth, class-specific Magic Affix that the player chooses directly during the item creation process. This gives players a level of meaningful control over character optimization that is often missing in Diablo Immortal's current randomized crafting systems. By letting players lock in a desirable class perk along with reliable base stats, the developers provided a direct pathway to fine-tuning builds, which encouraged immediate engagement with the new systems.
The Start of Customization: Old Legendary Chests The emergence of five new Ancient Legendary Chest pieces forms the core of the December update. These things are supposed to be incredibly powerful, and they go beyond the usual random drops to give a more organized power spike. One of the main things about these new chests is that they have a fixed set of three Magic Affixes, which makes them who they are, and a fourth one that is random and related to the class. This mix makes sure that while the overall power level is high, there is still some variety, which encourages people to explore the five different pieces.
Boon of the Blacksmith: Perhaps the most important aspect improving the worth of these fresh chests is the unheard-of gift the Blacksmith gives. For the first time, players who create this particular chest pieces have the power to write the fourth, class-specific Affix of their choice. This ability greatly lowers the need for pure luck in getting perfect gear. In past versions of endgame loot, getting an item with the right base stats was only the first step; then, players would spend months enchanting and reforging to make the random affixes match a build they wanted. The direct inscription option on these chests lets dedicated players instantly include these potent pieces into ideal builds, therefore rewarding focused effort rather than just RNG endurance. This feature shows a deliberate move towards player agency in obtaining high tier equipment.
Rebalancing Ancient Artifact Acquisition: The upgrade addresses the saturation and possible inflation of current Ancient Legendary and Ancient Artifact drops in certain difficulty levels as well as the introduction of new apex gear. The clear signal to refocus player attention is the choice to disable the drop and crafting of Ancient Legendary equipment for Inferno 7 through 9. These difficulties, which served their purpose in establishing early high-end power, are now being deprioritized in the loot table concerning Ancient Legendaries. This has two main effects: first, it stops the infinite accumulation of somewhat repetitive gear, and second, it focuses the highest quality drops onto the newly introduced mechanisms or even higher, yet unmentioned, levels of difficulty.
Improving Older Artefacts: The modification also has a system to turn unused power sources into useful materials for improving existing Ancient Legendary equipment. Low difficulty Ancient Artifacts, which probably come from the now-de-emphasized Inferno tiers, can now be traded for Ancient Scraps at the Weapon Smith. These scraps are specifically for enchanting existing Ancient Legendary gear. This conversion process turns items that were once useless into a valuable currency for making current gear better. This makes sure that time spent farming these lower tiers is not a complete waste. It creates a clear and logical exchange rate between old power and the potential for making things better, which helps to keep the gear in good condition.
Legendary Gems and Meta Evolution
A collection of fresh Legendary Gems will enhance the new chest pieces. While the exact statistical specifics were withheld during early previews, it is expected that these gemstones will encourage totally different build pathways. In games when the endgame meta has become stale, new gem releases are the main means to drive diversity. The community impatiently awaits the following class balancing that is often required to ensure that no single class becomes universally dominant, as such changes usually cause a significant shift in battle effectiveness that might upset the dominance of current top-performing builds. Such significant changes often need further class balancing to guarantee that no one class becomes universally dominant; the community eagerly awaits this following the first gear release.

Fated Trail's transformative potential is immense: The most possibly game-changing addition is the Five Star Gem, Fated Trail. Its mechanics center on sustained area control and damage amplification by the Rampant Growth effect. The ability to summon brambles that deal damage based on maximum Life suggests a strong synergy with survivability focused builds, turning defensive traits into offensive output. Furthermore, the secondary effects of armor shattering and enemy immobilization add useful crowd control and damage stacking capabilities. Armor shattering, especially if it stacks up to six times, implies a significant spike in sustained damage against tougher adversaries, such as raid bosses or elite enemies. This gem mechanic rewards consistent engagement rather than burst damage, potentially shifting preferred builds toward sustained output classes like Barbarians or Necromancers who can reliably maintain the damage application needed for stacking. The periodic nature of gaining Rampant Growth ensures that the power spike remains manageable and strategic, preventing perpetual uptime.

Rampart Torch:The other two gems offer more focused advantages, meeting certain tactical requirements. Rampart Torch, a Two Star Gem, addresses the basic need for damage reduction. A dependable defensive shield is quite helpful in Diablo Immortal's high-stakes settings, where enemy damage's unexpected spikes may cause quick character death. By lowering both direct and constant damage based on a percentage of base damage, this gem provides a baseline survivability boost available to all classes. Its long cooldown of twenty seconds restricts its utility during sustained, intense combat phases, but it acts as a vital safety net against starting aggression or environmental threats.
Conversely Flaystone: a One Star Gem, aims certain combat scenarios with shielded foes. Its dual benefit of more damage and more Critical Hit Chance against this enemy type makes it an obvious pick for players often facing content where shields are common, like some dungeon encounters or PvP situations where protective buffs are prevalent. While lower star gems usually yield less significant outcomes than their five-star equivalents, Flaystone offers a direct, tactical advantage against particular defensive layering used by opponents, so even lower-tier optimization slots can meaningfully help to overcome particular challenges.
Effect on Character Specialization and Progression
The introduction of these gems calls for a revaluation of present character optimization paths. Fated Trail will likely become a high-priority acquisition for players aiming for top-tier PvE performance due to its complex scaling and crowd control features, maybe creating new "best in slot" criteria where raw damage is secondary to utility and sustained pressure. The requirement for a Five Star Gem means this power increase will be gated behind significant resource investment, therefore amplifying the difference between engaged long-term players and newer participants. Rampart Torch and Flaystone offer more accessible, incremental improvements. Together, these additions ensure that character progression remains dynamic, requiring players to adapt their gem loadouts based on the content they intend to prioritize, be it general farming, high-end raiding, or competitive PvP.
Class Balance and Seasonal Engagement
The December updates gave systemic refinement via class balance changes top priority rather than merely increasing power ceilings. Reports showed that several classes would get tuning adjustments meant to reduce excessively high burst damage, especially in player versus player interactions. Furthermore, quality-of-life improvements like smoother animation timings for some skills and power rebalancing for current legendary items were planned for application. These changes aim to smooth out the general gameplay experience instead of just boost power ceilings. Along with these technical modifications, the return of the Brumaltine Seasonal Event offers a more casual venue for participation and meaningful seasonal progression for those with limited playtime. This 14-day event includes everyday tasks, cosmetic rewards, and the unique feature of craftable "Brumaltine Cards" for social giving.
Shifting Timeframes and Skill Challenges
The update timeline included a conscious phase-out of earlier content and the addition of new tasks. The end of the Creation's Domain preview event on December 21 marks a return to baseline experience rates and the end of particular login incentives. Following this, the late-month events turn toward pure fighting and mechanical skill testing. The Trial of the Hordes, an infinite combat arena, directly suits high Area of Effect damage builds and group farming effectiveness. Conversely, the Fractured Plane, starting on December 31, is the ultimate test of individual mechanical ability, forcing players to start with no gear and depend entirely on randomized, temporary power acquisition. This contrast in event design caters to both committed farming groups and players looking for individual, high-skill validation before the new year.
The December patch for Diablo Immortal showed a careful, multi-pronged approach to game revival. By including Ancient Legendary Chest Pieces that let players have real control over which affixes they could use, adding Legendary Gems that could change the current meta, and making sure that all the classes were balanced, Blizzard showed that they were really invested in the game's long-term survival. Combining these high-power changes with easy, casual seasonal events makes sure that the update appeals to all the players, from the hardcore optimizers to the casual holiday log-ins. The resulting ecosystem promises a more diverse and dynamically balanced Sanctuary moving into the next months.
Prepare to challenge Albrecht’s Living Siege Engines in the Helliquary
The fourteenth major Diablo Immortal update, The First and Last King, adds a new level of these monsters through Albrecht's most recent creations: the Fleshwarped. These creatures are the pinnacle of Shardborne evolution driven by a corrupted "power of creation," and they serve as living reminders of Albrecht's hubris. By looking at the specific horrors he has made, like the Bloatmaw, Marrowmount, and Sundered Goliath, one can see the thematic weight they carry with regard to unbridled military engineering and the fall of self.
Albrecht's War Machine: The Fleshwarped

Albrecht's plan depends not only on conventional armies but also on bio-engineered shock soldiers who can make traditional defenses obsolete. The Fleshwarped are basically twisted remnants of his Shardborne followers, their original identities erased and replaced by a single, violent command. This process of forced, radical change is similar to historical cases where scientific or magical progress goes beyond ethical consideration, resulting in weapons too dangerous to control. The Shardborne, once just followers, are now living siege engines made to be good at destruction, which shows the ultimate betrayal of the self in service to a cruel will.
Miasma: The Manifestation of Bloatmaw

The Bloatmaw is a clear example of how badly Albrecht wanted to be better than everyone else on the battlefield. It was made to kill people quickly and easily, and its swollen gullet and strong legs show that it was made to move around quickly and make sure that nobody else could get into an area. The miasma it spews is more than just poison; it is a tool of assimilation that changes flesh "in the Shardborne's twisted image. " This shows that the creature was designed to do more than just kill the enemy; it was made to make sure that the Fleshwarped aesthetic was dominant on the battlefield itself. This is like biological weapons that cause a lot of damage in a short amount of time.
The Unbreakable Advance: Marrowmount

The Marrowmount is designed for breaching fortified positions, while the Bloatmaw focuses on area contamination. The story of the Entsteig platoon's inability to hold their barricades against its charge shows a complete failure of conventional defense against a new threat. The Marrowmount, which looks like a twisted stallion, acts as a living battering ram and can smash through ramparts and come right before the main attack of the Shardborne swarm. Its success in breaking the Bravehull Stronghold shows that using biological mass as a weapon is better than using static fortifications, which is a military paradigm shift that happened in a crude way.
The Walking Fortress: Broken Goliath
The Sundered Goliath is the height of Albrecht's logistical nightmare. Made from the grafted bodies of hundreds of followers, it is a mix of many lives devoted to one, enormous form. Though at first thought to be a failed experiment because of its bulk, Albrecht used this failure to create a mobile command and deployment platform. This hulking chamber it carries acts as a troop carrier, transporting battalions of Shardborne straight into the battle, and trampling enemies. This creature is the ultimate example of military hubris: the belief that sheer, concentrated biomass can beat tactical skill, so turning the troops themselves into the main infrastructure of war.
Thematic Resonance of Flesh and Hubris
Within the Diablo narrative, the creation of the Fleshwarped—Bloatmaw, Marrowmount, and Sundered Goliath—serves as a strong thematic warning. Albrecht's ambition is not satisfied by conquest alone; it demands the absolute subjugation and redefinition of life. His "power of creation" is exercised as an act of profound violation. The desire for freedom and blood that remains in the creatures is a faint, distorted echo of the individuality he destroyed, suggesting that the very act of such extreme forced evolution leaves a residual, uncontrollable hunger. This aligns with classic cautionary tales regarding forbidden knowledge or unethical biological experimentation, where the resulting horrors invariably turn against their creators or become uncontrollable instruments of chaos.
The First and Last King's arrival, which Albrecht's Fleshwarped heralded, marks a significant increase in the conflict. The Bloatmaw, Marrowmount, and Sundered Goliath are not just strong enemies; they are real examples of how scientific and military hubris can go horribly wrong. They challenge the heroes not just by being strong, but also by showing how the very fabric of life can be corrupted in a deep way. They force adventurers to face creatures made by a tyrannical will that sought perfection through total degradation.